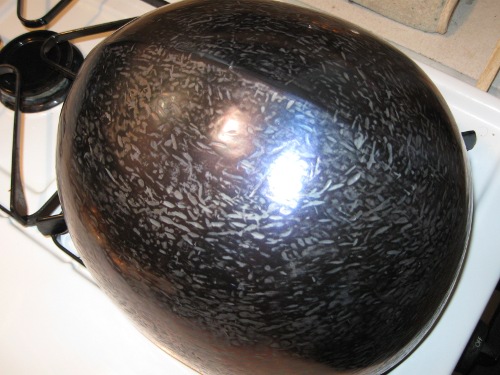
Raised from single sheet in 16 gage.
Well I did some hammering on this a while back and today I took some pictures. It is pretty much like it was before but bit smaller and with a better peak. I am keeping it "rough from the hammer" as some of my hammer marks are pretty deep and grinding them out would make the metal it too thin.
I have just taken it out of the oven after heat blueing it to a dark purple my photograph doe not do a very good job of catching the colour.
I need to build the liner and attach the maile.
I have banged metal but I have not raised a helmet top before. I am pretty happy with this one so far.
mackenzie
Attachment: 89.67 KB
Attachment: 84.89 KB
Attachment: 75.74 KB
Some of my more recent projects.
Norman style belted Gaddhjalt
The Z-loop holding the scabbard can be seen on Sancho IV:s burial sword from late 1200s, but the earliest record is from an image in Ivar the Boneless life biography (art is from 11th century, but depicing mid 8th century when he lived). Several similar attachment methods can also be seen in the Bayeux tapestry. The belt is a typical Norman fork tounge style. Feels like a western revolver holster riding yout hip when strapped on, a perfect part of your body.
[ Linked Image ]
3 pieces make the belt, Z-piece, belt with strap holes and belt with fork tounge. They're stitched together with a peculiar seam seen on the Sancho IV sword.
[ Linked Image ]
[ Linked Image ]
Scabbard is pine core, oval hollowed and lined with lambs pelt with a firm but light grip. The draw is quick but the blade won't fall out if you hold it upside down. The core is covered with calf leather stitched end to end and water shrunk and casein glue laminatinated to the core for extra durability.
[ Linked Image ]
The blade is a sharp full tanged Hanwei Tinker line Viking replacement blade fitted with my own hand made Gaddhjalt fittings.
[ Linked Image ]
Gjermundbu maille research and production
This image mostly shows the punched from plate solid rings, but also some riveted together weave. These are tinly links almost like jewelry.
[ Linked Image ]
[ Linked Image ]
Mass produced pakistani boar hunting spearhead modified to leaf shape, then mounting as parted spear for easy transport
Some simple cooled re-grinding and re-sharpening was required.
[ Linked Image ]
The shaft is ash. A thin walled welded steel tube was used for the connecting socket and a pin locks it in place. Another pin holds the spearhead in place on the shaft. Total lenght is 2. 9 meters. Even with the connecting socket and long length It still feels light and agile.
[ Linked Image ]
[ Linked Image ]
Viking axe from Skåne find
[ Linked Image ]
Here's some other stuff I did a few years ago.
Knotwork belt
A wet moulded knotwork belt, celetbrating knotwork art throughout the ages. Inspired by Aidan Meehans most excellent book "The Dragon and the Griffin".
[ Linked Image ]
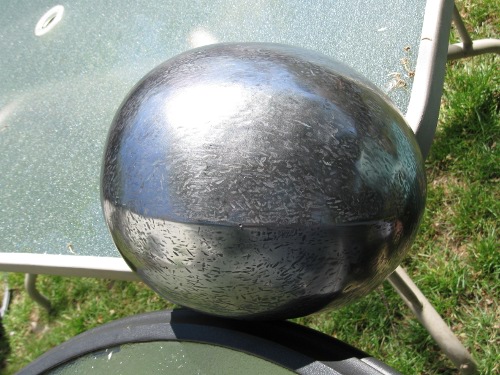
The "Mums-mums" shield boss
Cold raised work in 18 gauge steel plate.
[ Linked Image ]
My friends call it the sponge cake mould. I call it the "steel Mums-mums" (swedish cookie sized chocolate covered foam candy/pastry in the same shape). Anyway, I never finished it. Needs fine grinding and polishing.
People usually think this boss is just welded, no big deal, but then they look for telltale seams and there are none. Over the years whenever armourmaking students of mine want to take the short cut of electric or gas welding I toss this in their lap to demonstrate what can be done with raising, even cold raising from a single piece. Puts things into perspective.
Is this boss really raised? Looks dished to me, there are too few hammer marks near the edge.
Dishing and raising are fundamentally different techniques though used to achieve same results. I mastered dishing well enough to be able to make rather deep couters and poleyns without any problem, but am still unable to do any significant raising. I wonder if it is due to the lack of proper raising hammer, have to forge one someday as it is impossible to get one for a reasonable price here.
Anyway, this boss looks impressive but I think that in reality it's not as difficult project as it looks. It's not deep and these flutes require more patience than skill.
For cross peen hammers - raising hammers - take a look at places that sell auto body supply. Two of the hammers I have used are from cheap auto-body supply stores. (Canadian Tire and Princess Auto here in Canada). I expect you could even grind one out of another hammer perhaps starting with a geologists hammer to get the useful length.
Nice gaddhjalt on that H/T, Johan!
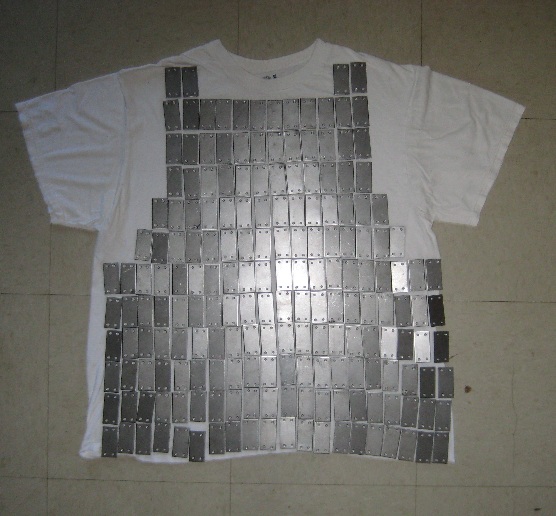
here's an idea I've been rolling around for a long time, and I've finally had the time and space to do it. About half way done with the mis en place so to speak. Here is the initial setup against an XL tee.
Attachment: 101.91 KB
Some "3eal Talent"! While I do not currently have a place to forge, quench and temper steel, it's been a treat and a pleasure to look at the work of others. Besides - have no formal training but something that I do seem to have a talent for is to take a heavy lifeless sword, grind it and even hollow grind. My first ever was a Del Tin type X viking sword that I believe was made for a reenactor, it was 5/16" thick on either side of the fuller from guard to the end of the fuller. 3 weeks of grinding on a bench sander in my spare time. I changed it from a bar of steel that was dead in the hand and very heavy, transforming it into a lively Viking sword with an incredibly sharp blade. With a gradual thickness taper down to 3/32 at the distal end. I bought it second hand from Kult of Athena and brought it back a month later to show Ryan. He was totally shocked as I told him I had never even ground a knife before.
Oh, I am NO competition for the most of you guys but it was nice to learn I seem to have a natural talent in balancing and putting life into otherwise dead bladed swords. The other Del Tin I bought for my wife was a very lively sword though I ground it to be lighter for her to wield.
I just finished transforming a Windlass one hander Migration sword into a lively near razor sharp (distal half of blade). Removed a lot of excess weight and a smooth tapering of the thickness.
I really enjoy doing this and hope someday to be able to create works of art that you all have, some of which have astounding talent! All of you should be Very Proud of yourselves!
I'd love to apprentice in a certain sword, dagger, polearm and armor shop up in that winter time frigid city of Minneapolis and. Learn from a few artisans! LOL! Gee I wonder where that might be?
Congratulations Guys, Splendid Pieces!
Bob
I made this billhook in a couple of hours at my brother's friend's dad's forge. Not much to look at, but I'm fairly pleased for my first time at the forge. I'm not sure what to do about a handle. I have some black walnut I was going to use, but now I seem to recall hearing that that didn't reach Europe until the seventeenth century. So now I'm at an impasse.
http://www.flickr.com/photos/bullets4brains/6...hotostream
http://www.flickr.com/photos/bullets4brains/6...otostream/
http://www.flickr.com/photos/bullets4brains/6...hotostream
http://www.flickr.com/photos/bullets4brains/6...otostream/
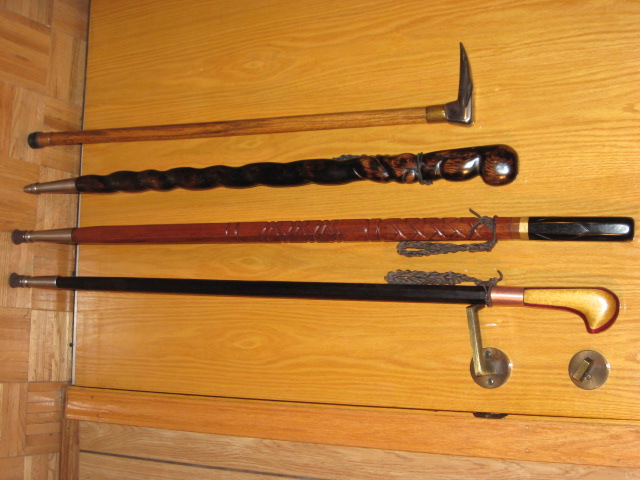
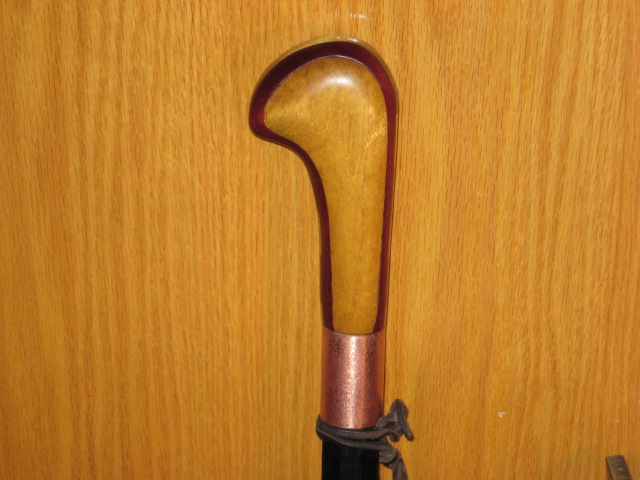
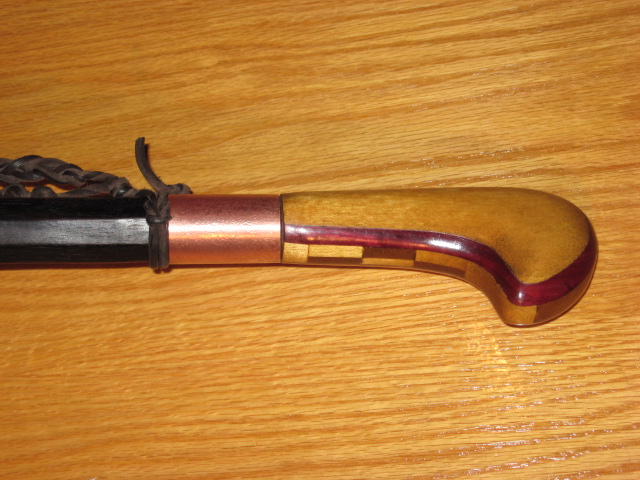
On the " Other " DIY project kind: Some of my walking sticks with more emphasis on the most recent one.
From left to right:
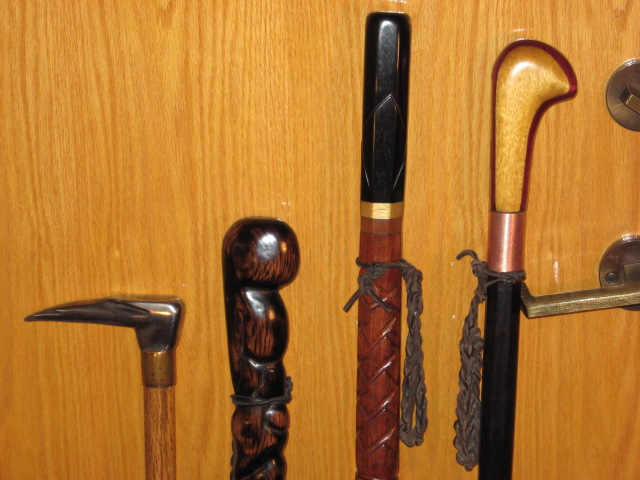
A) Prospector's pic repurposed and sculpted into an Eagle's head, made in 1975.
B) White Oak carved stick with a burned with a propane torch finish originally made in 1980 (ish ) but recently refinished to a higher polish and the addition of a steel butt.
C) Recently made Jatoba stick with an African Ebony head and Pau Amerello ( Yellowheart ) spacers.
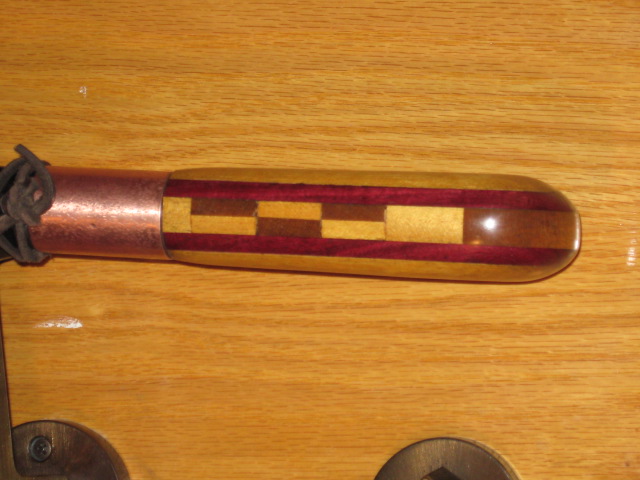
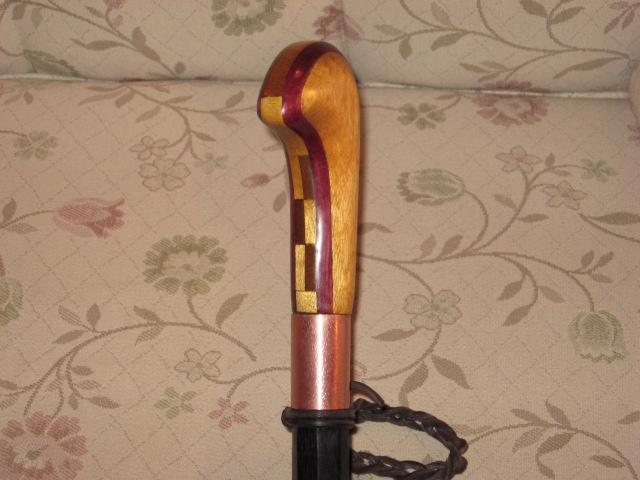
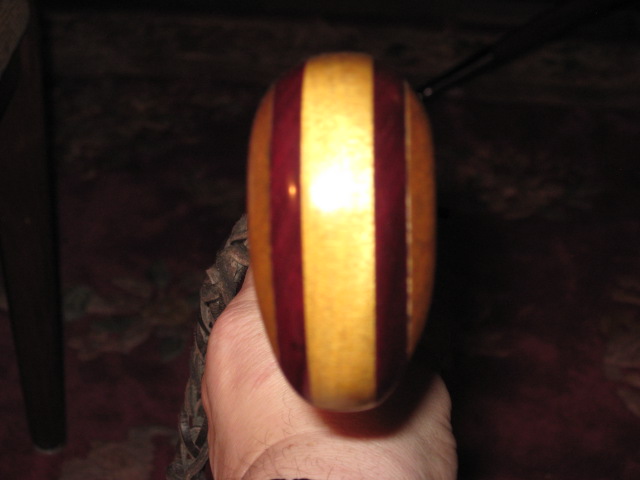
D) My most recent stick with a Macassar Ebony shaft and a laminated head made of Paul Amerello and Purpleheart.
The Pau Amerello is almost fluorescent yellow when highly polished on the side grain and darker on the end grain.
Pau Amerello pieces with the grain running lengthways and sideways in a checkerboard pattern between two slabs of Purpleheart and with two external slabs of Pau Amerello.
Copper collar joining the head to the shaft + an 8" long steel pin 1/4" in diameter.
Steel butt epoxied and pinned in place.
Attachment: 101.54 KB
Top to bottom A) B) C) D).
Attachment: 110.57 KB
Close up of stick/cane heads.
Attachment: 96.34 KB
D) Side.
Attachment: 94.09 KB
D) Back.
Attachment: 95.83 KB
D) 3/4 Profile.
Attachment: 59.04 KB
D) Top, sorry out of focus.
Attachment: 114.3 KB
D) Another 3/4 profile.
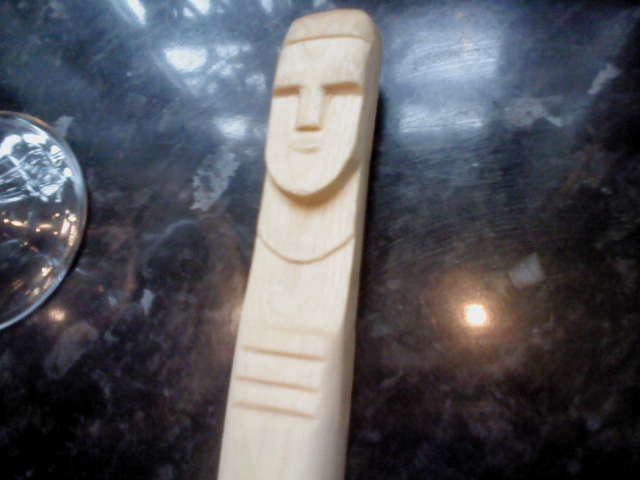
Not EXACTLY the pinnacle of human artistic achievement, but here's a cocktail muddler inspired by the sculptures from Nydam bog. No proto-germanic booze cabinet should be without!
Took an afternoon to make using a rather bad knife.
I finished it with walnut oil, but I would prefer something a little darker.
Attachment: 36.55 KB
Took an afternoon to make using a rather bad knife.
I finished it with walnut oil, but I would prefer something a little darker.
Attachment: 36.55 KB
i can't believe i never used this post to show a little bit of the work i'm proud of.
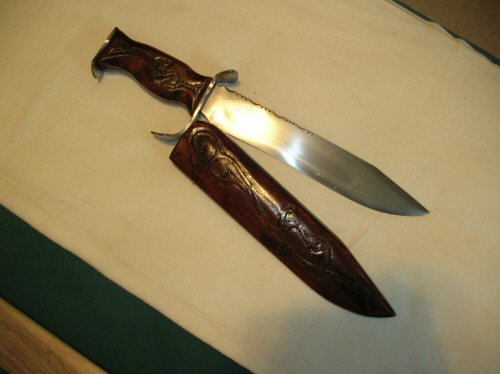
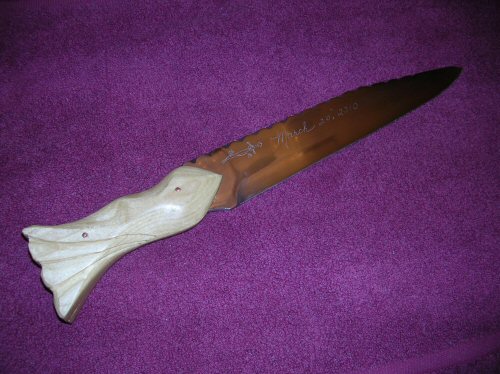
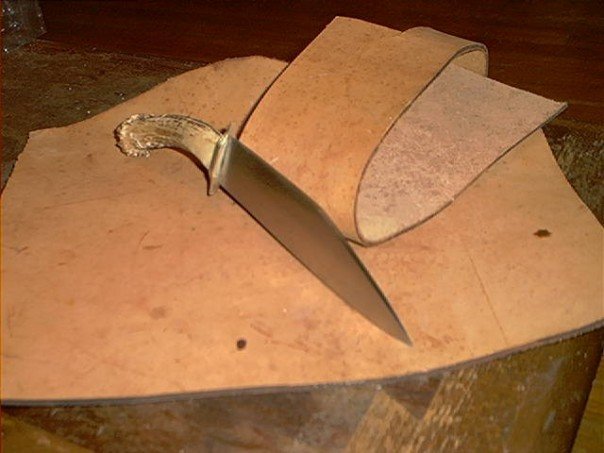
i make knives mostly for myself. i try to use historical designs with just what works out for myself so my work isn't 100% historical. i haven't been working on any knives lately most of my friend like my wood carving and trinket making more, so i'm not making as many knives as i would like.
Attachment: 83.75 KB
this is a knive project i called "the savage" i wanted it to look like a turn of the centruy american bowie knife, but it turned into this beastly thing.
Attachment: 105.97 KB
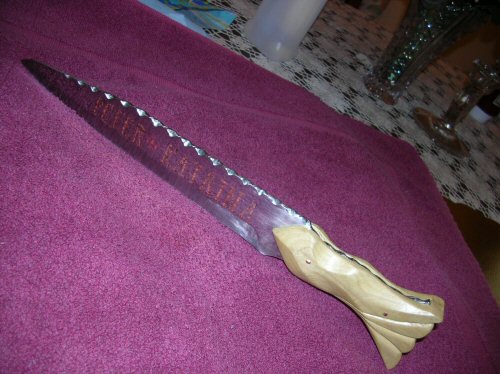
this is my favorite, it's a knife i made for a few friends of mine as a wedding gift. the blade is inlayed with brass for the names and copper. much thanks to Ben Potter who through email corrispondance helped me with the inlay process
Attachment: 105.4 KB
this is just the back side of the knife other than the engraving work it's not too special. the bride loved the idea that i sculpted the grip in the fasion of a dress. another accent which i didn't photograph too well is the ridge pattern on the spine o
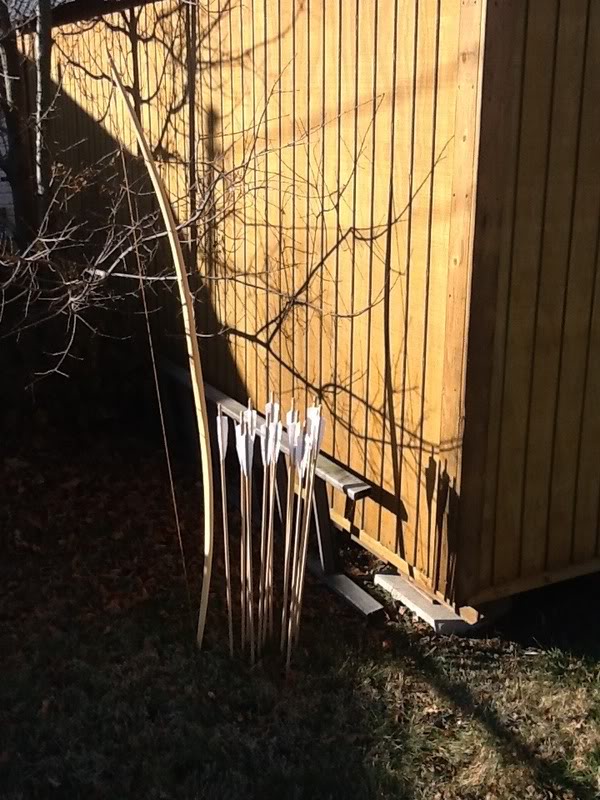
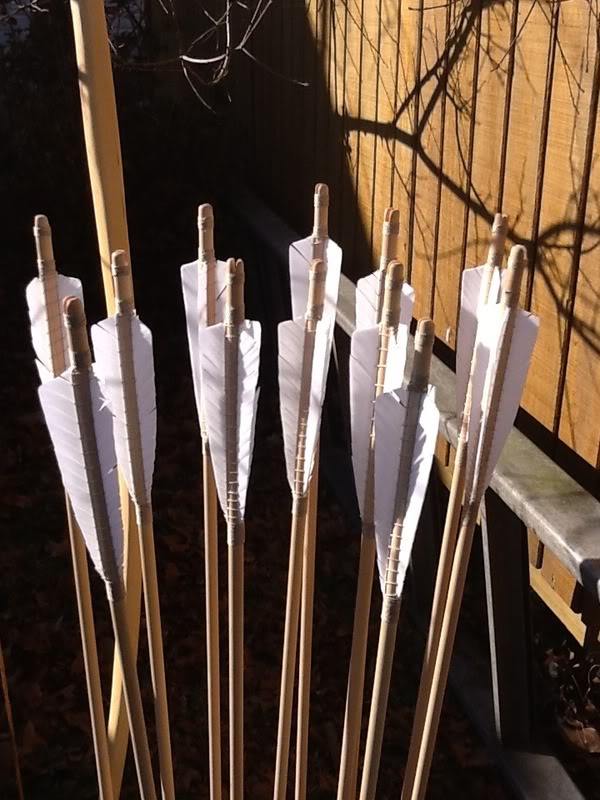
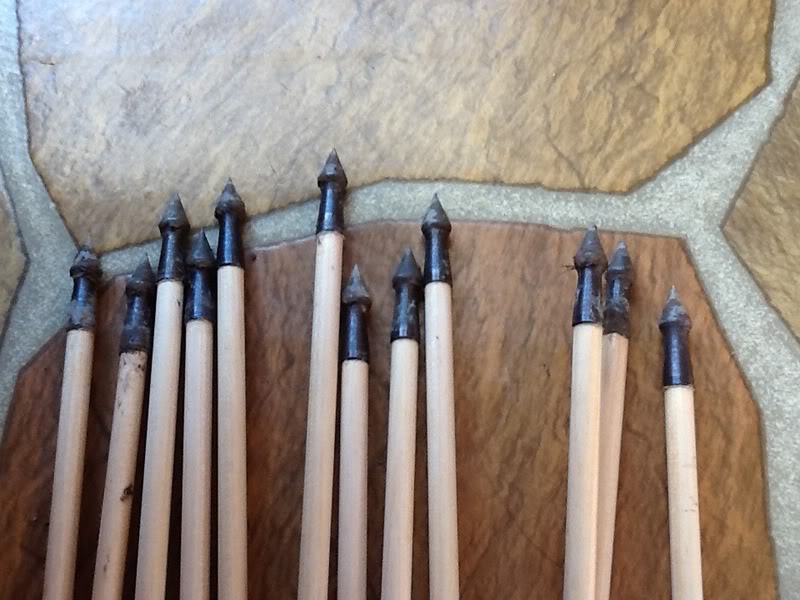
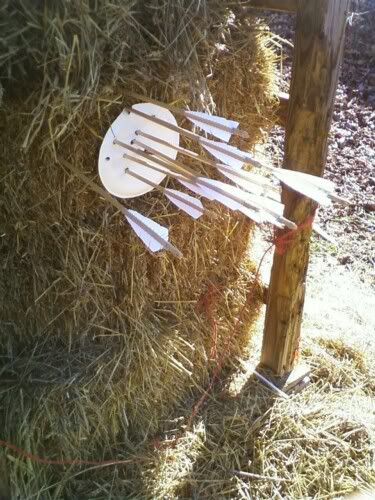
I've been making arrows lately. These are my first real attempts, and they came out looking good, and performed well.
Some great looking work being displayed here! I enjoy threads like these - it almost didn't occur to me that I have some stuff to share now and then until I read someone else mention that they were struck by the same thought. Ha. I'm currently an amateur in every sense of the word, but plan to begin professionally taking commissions for my work in June when I graduate from college, so I'll have to take advantage of posting in this thread while I still have the chance, 'eh? Here's a bit of my more recent work that I have photographs of. Cheers! :D
-Gregory
Here's a Greek spolas that I made, modified for SCA combat using aluminum plates from a stop sign riveted to the heavy suede backing. Turned out decently.
[ Linked Image ]
And other views of it:
http://farm8.staticflickr.com/7021/6655178947_01960aee3e_z.jpg
http://farm8.staticflickr.com/7028/6655181425_90ff43d521_z.jpg
http://farm8.staticflickr.com/7027/6662332647_1405619a12_z.jpg
http://farm8.staticflickr.com/7007/6662315089_eb418b4222_z.jpg
http://farm8.staticflickr.com/7008/6662318493_06d4dbac50_z.jpg
http://farm8.staticflickr.com/7165/6662330415_fcb007e389_z.jpg
http://farm8.staticflickr.com/7171/6662327609_177689a042_z.jpg
http://farm8.staticflickr.com/7019/6662324825_3c2b6116bd_z.jpg
http://farm8.staticflickr.com/7159/6662321635_cb87bf3825_z.jpg
http://farm8.staticflickr.com/7021/6662489205_324f2afd91_z.jpg
And here's a leather map that I carved to imitate Thror's Map, drawn by J.R.R. Tolkien and published in The Hobbit (1937).
Original Map:
http://www.fortunecity.com/athena/emerald/236/throrsmap.jpg
Reproduction:
http://farm8.staticflickr.com/7174/6733034493_16c2c800e5_b.jpg
http://farm8.staticflickr.com/7173/6733031367_983ff8b78f_b.jpg
http://farm8.staticflickr.com/7010/6733030671_61e3781bed_b.jpg
http://farm8.staticflickr.com/7011/6733031737_4d249e3679_b.jpg
http://farm8.staticflickr.com/7143/6733032249_9dc042d32c_b.jpg
http://farm8.staticflickr.com/7004/6733033019_3172fc5a98_b.jpg
http://farm8.staticflickr.com/7030/6733033707_91f1fc9b4d_b.jpg
And here's a nearly complete, free-hand reproduction of an illustration depicting Walter von Klingen from the Codex Manesse, a German book of poetry, c. 1300.
Original:
http://sphotos.ak.fbcdn.net/hphotos-ak-snc4/h...6610_n.jpg
Reproduction (not perfectly flat. Cell phone picture!):
http://forums.armourarchive.org/phpBB3/download/file.php?id=43649
Aleksei Sosnovski wrote: |
Is this boss really raised? Looks dished to me, there are too few hammer marks near the edge..
Dishing and raising are fundamentally different techniques though used to achieve same results. I mastered dishing well enough to be able to make rather deep couters and poleyns without any problem, but am still unable to do any significant raising. I wonder if it is due to the lack of proper raising hammer, have to forge one someday as it is impossible to get one for a reasonable price here. |
Sorry for neglecting to answer before, I lost track of this thread way back.
I use a modified medium sized slegehammer with a shallow ball shape, a wooden bowl in a large tree stump and a fluting heel or whatever they're called in english. Only the simplest tools really.
Raising is adding surface area from drawing the metal on the ouside, while dishing stretches it from the inside. You cannot effectively create proper flutings without working from the outside, drawing the metal toward the ridge, in effect raising it to some degree.
I dished the bowl, hammered lines for flutings from the inside and then raised the ridges on the outside by drawing them up with the hammer on the outside against a heel shaped anvil. This also makes the valleys as a side effect as you draw out the flute ridges, since the created added sheet surface goes both up and down. Then I dished in the bottom of the valleys to smooth them out.
Aleksei Sosnovski wrote: |
Anyway, this boss looks impressive but I think that in reality it's not as difficult project as it looks. It's not deep and these flutes require more patience than skill. |
Yes, absolutely. This is the very lesson I use it for at my classes. It's no more difficult than any other fluting work as long as you keep an eye on the twist keeping its symmetry throughout the shaping.
Last edited by Johan Gemvik on Mon 30 Jan, 2012 1:36 pm; edited 6 times in total
Here's some more recent photos of the shield boss.
All made by hand, worked cold with simple hand tools. Well, I did use power tools for the buffing.
[ Linked Image ]
[ Linked Image ]
[ Linked Image ]
[ Linked Image ]
[ Linked Image ]
[ Linked Image ]
[ Linked Image ]
All made by hand, worked cold with simple hand tools. Well, I did use power tools for the buffing.
[ Linked Image ]
[ Linked Image ]
[ Linked Image ]
[ Linked Image ]
[ Linked Image ]
[ Linked Image ]
[ Linked Image ]
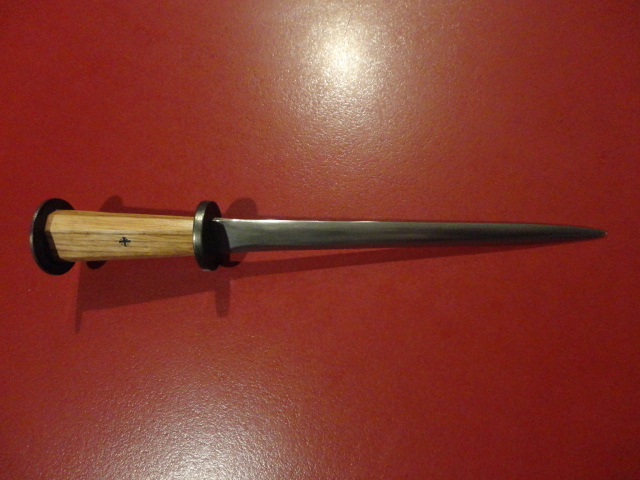
Basic Rondel Dagger made from Darkwood Armory's dagger kit. This is the first time I have tried to make a blade so it was a learning project, I couldn't put much detail to it for lack of tools so I figured it could be a munitions grade weapon or the likes. I took to it with an angle grinder for shape, then heavy to fine files followed by course to fine wet/dry sandpaper.
The blade has an oval shape to where it tapers from about the last 2 inches into the point. I did think about making the whole thing narrower in thickness though as a rondel I thought it needs that strength in the blade to punch through!
It has a fine edge though I have not yet put a sharp edge to it as I'm still learning that as well.
The rondels them selves have been blued slightly by gas flame, though this I was experimenting to see how it would be the grip is octagonal of 4 inches and is of oak, tightly fitted to the tang with very fine leather to help as spacers.
The entire piece is 14" in length with near on 9.5" blade. The octagonal grip proberly would look better on maybe a dagger with hex or star shaped rondels but it is what it is.
For someone who has not the tools or place to get the metal required Darkwood Armory's kits are good, and when I have some spare coin I'll proberly grab another couple as I enjoyed the project and could do better now that I have an idea on what to do..
cheers Jim.
Attachment: 138.6 KB
Gregory J. Liebau wrote: |
...Here's a Greek spolas that I made... |
That is mighty impressive!
I recently completed one made from carpet (it was free, and it works well enough) to take some of the sting out of HEMA sparring.
It's an amazingly modular design isn't it? One can have as many or as few pieces as one wants.
I may even make another one but with pteruges just covering the upper arm as well as the hips.
P.S. I like that you said Spolas and not Linothorax. Yay :lol:
Johan Gemvik wrote: |
Here's some more recent photos of the shield boss.
|
Johan, I think that boss is fantastic, I love the fluting. Cold worked you say? Excellent work.
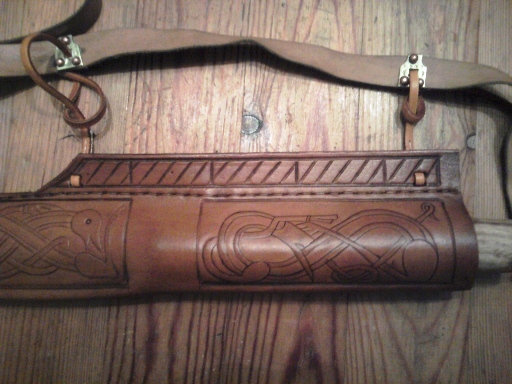
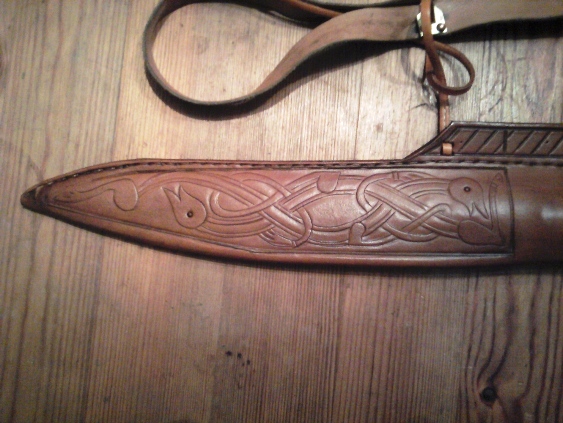
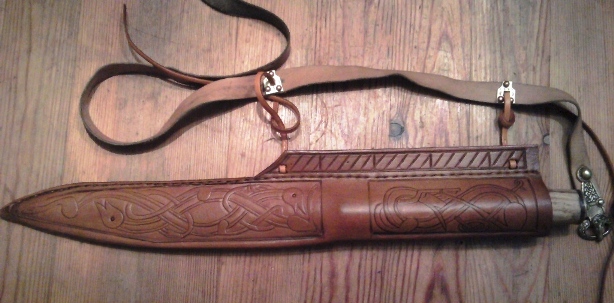
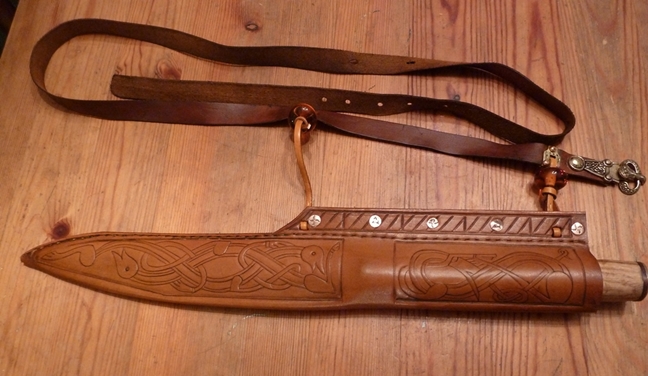
Here's something I finished last night. The seax itself is nothing special, (just my old EN45 blade ground down to a 6th century pattern and rehilted with ash, horn none and brass) but I wanted to make a sheath for it that used an archaeologically provenanceable suspension method. The remarkably well preserved 6th century Groningen sheath has two double slits in it that show that it was suspended from thongs, so I combined that with the sort of metal belt reinforcements plates with holes in that you see in some burials of the same period (these are from Dover Buckland grave 56). The width of the slots on the two different finds was pretty the same.
The decorative work is all from the Staffordshire Hoard.
Whether by accident or design, the balance point of the sheath with the seax in is bang on the lower strap.
Overall, pleased. I'm going to use a couple of beads on the thonging at the upper end to cinch it shut under the metal fitting. That way it's adjustable and the whole thing can be easily taken off the belt.
Attachment: 111.01 KB
Attachment: 133.83 KB
Attachment: 104.38 KB
And here's the same sheath with a couple of finishing touches added. A pair of amber beads provide the closure/adjustment mechanism at the top end and some embossed copper rivets on the sheath itself.
Attachment: 188.25 KB
Page 6 of 9
You cannot post new topics in this forumYou cannot reply to topics in this forum
You cannot edit your posts in this forum
You cannot delete your posts in this forum
You cannot vote in polls in this forum
You cannot attach files in this forum
You can download files in this forum
All contents © Copyright 2003-2006 myArmoury.com All rights reserved
Discussion forums powered by phpBB © The phpBB Group
Switch to the Full-featured Version of the forum
Discussion forums powered by phpBB © The phpBB Group
Switch to the Full-featured Version of the forum