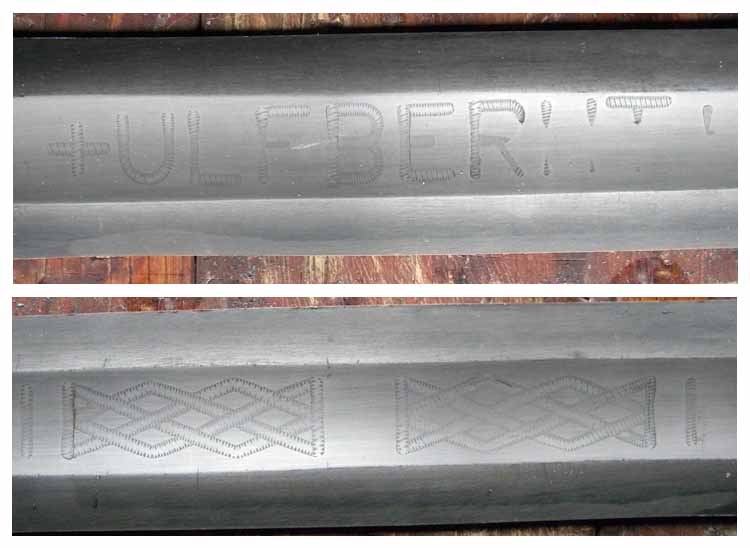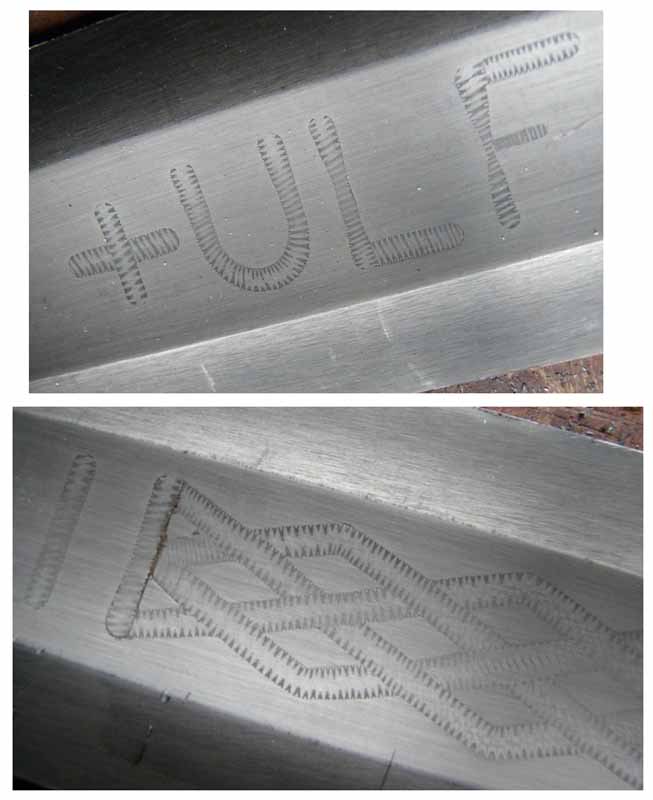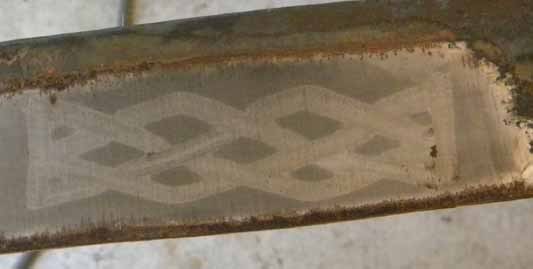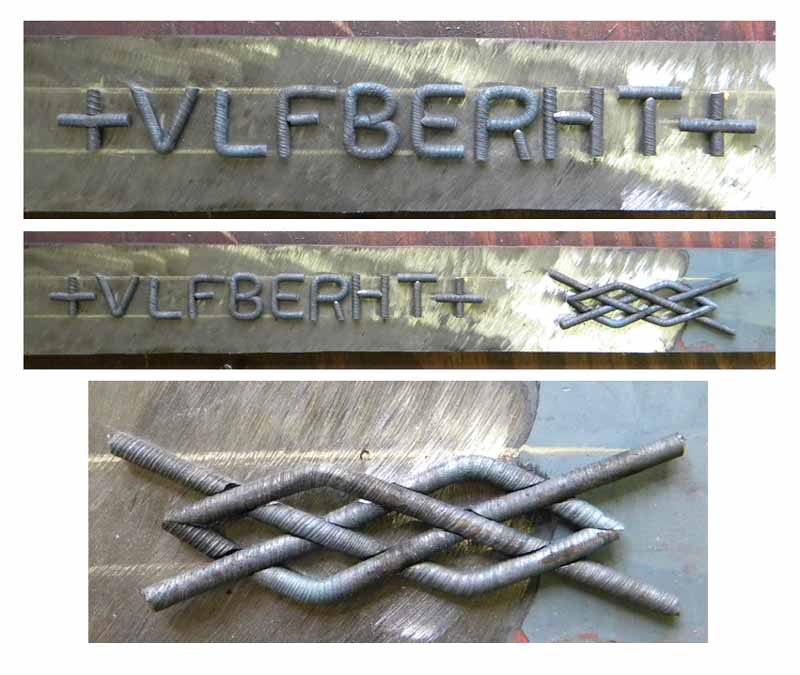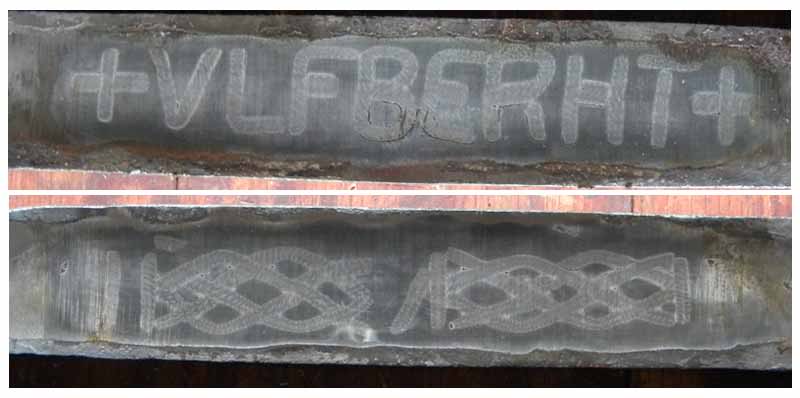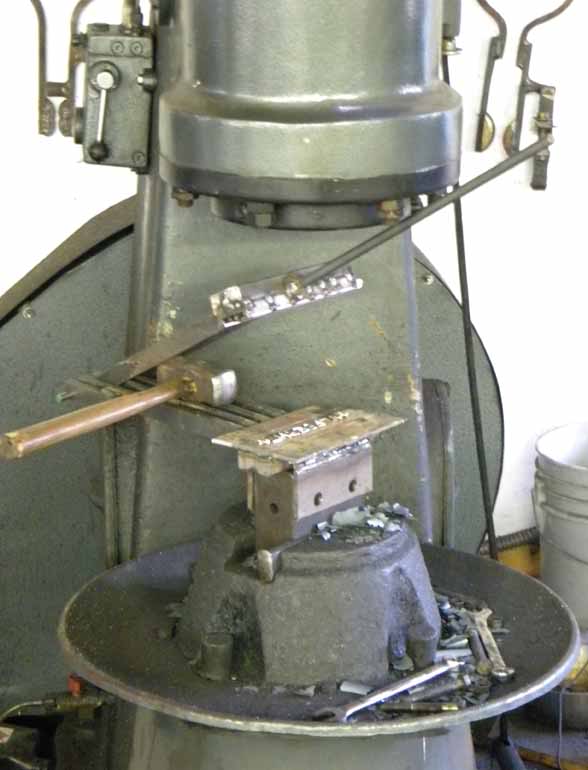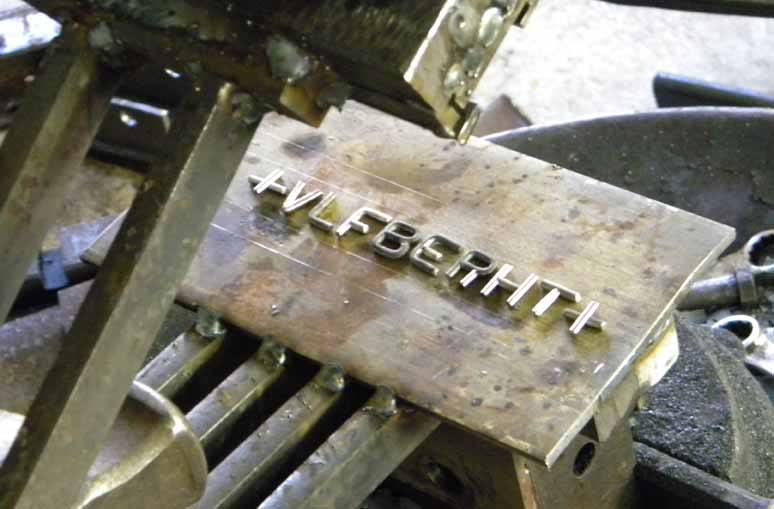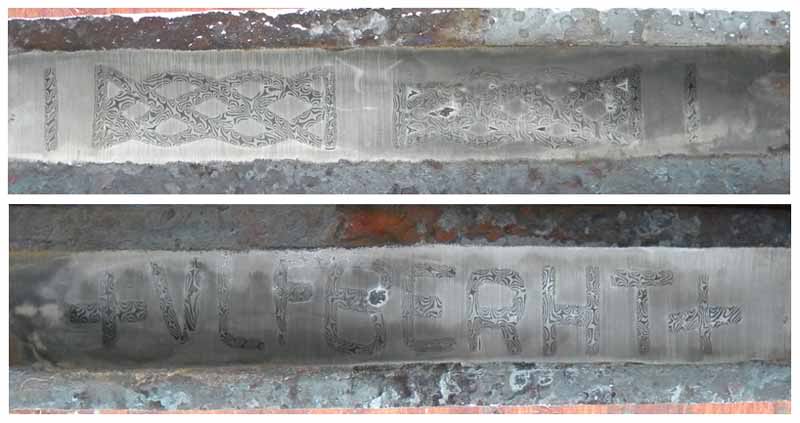
One heck of an idea for a first attempt but as one art professor once told me, "go big or go home," and I think she would laugh and say go for it, and sure enough the process started! There were several skills that I was going to have to develop in order for this piece to turn out. First off was getting pattern welded wire welded into a surface. I took a piece of scrap L6 that I had laying around and with a flex shaft machine I gouged out the lattic pattern, and cut up some pattern welded wire in the appropriate shape and pondered my next step. In the following thread, http://www.myArmoury.com/talk/viewtopic.php?t...iron+inaly there was some discussion going on about various techniques that could have been used, I decided to try sticking the wire to a hot steel bar coated in flux, with the intention of heating up the plate, then placing the cold wire on the plate and hammering them into place. I didn't use enough flux, and the pieces half stuck, half didn't. I decided to just place the wires in the grooves and heat up everything together, which ended up working fairly well.
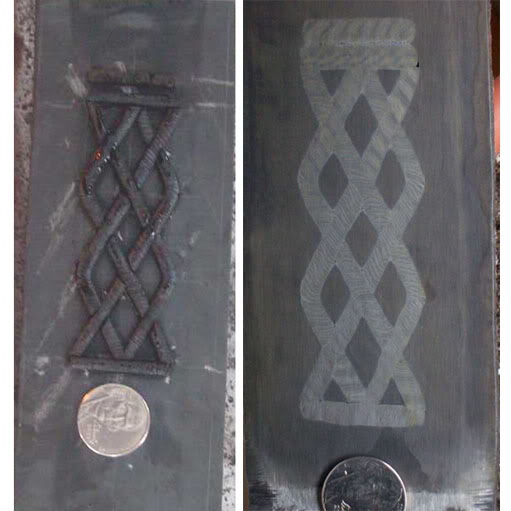
There was some modification that needed to be done, but for my first attempt, not shabby I think.
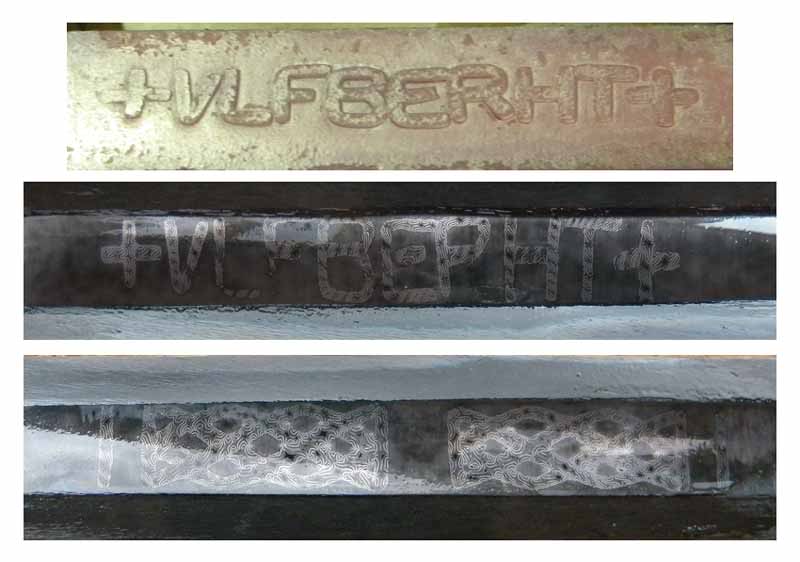
I moved on to forging a blank, and like before gouging out the lettering on one side, preparing letters, and forge welding everything together in a single heat. I annealed the bar, then gouged out the lattic pattern, prepared the wire, and welded everything together again.
At this point I'd like to apologize for not having pictures of every step. This has been a process that I've been working on for over a year and in the mean time I've changed cameras, switched computers, and dealt with a hard drive crash so some images you will have to use you imagination :)
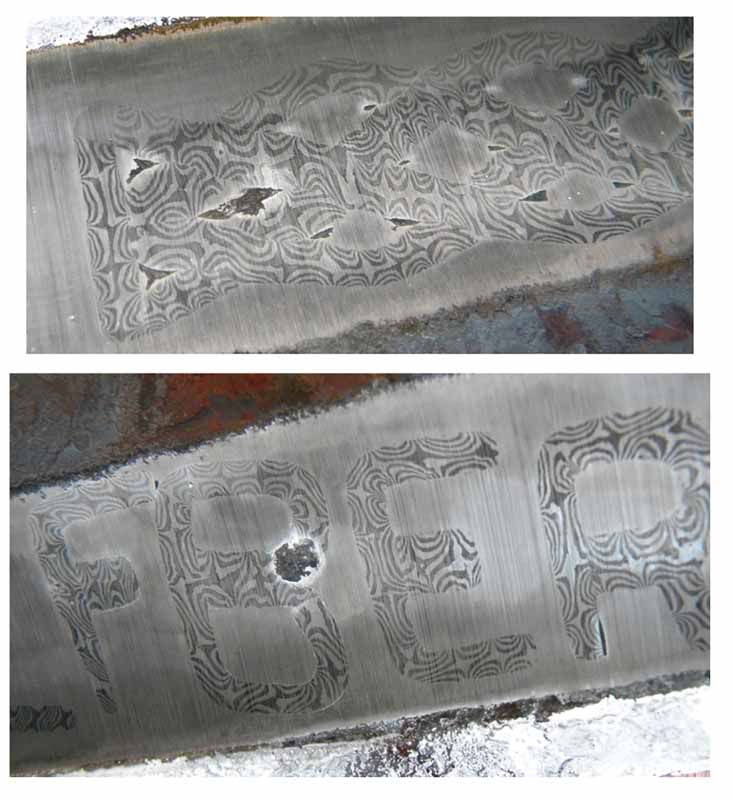
So everything was looking pretty good, and it was time for me to forge out the fuller which is a pretty daunting task when you consider the amount of time and effort that you are smashing away at. I did a decent job, but with the combination of not forging the fuller deep enough, and not accounting for the amount of distortion, and over grinding, the wire got ground through in several spots.
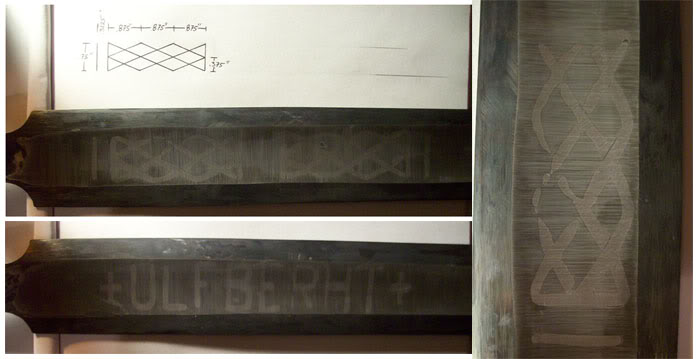
I felt like I was on the right track but I need to be able to control the depth of the grooves more consistently, and I wanted to have more control over the entire process. I knew that getting good grooves was very essential and I also knew that my skills at craving out these grooves was nowhere near where it needed to be. Plus I had a feeling that there were going to be many other bumps in the road and spending a week or so carving out grooves would add up to more waste then I would be able to afford. I did a little research and I decided to invest in a Pantograph engraving machine. With the Pantograph I was able to chisel in a pattern in one bar, and then follow that pattern by hand which moves a cutter, and making a channel. The pantograph machines work on a reducing scale so the pattern had to be larger then the actual size I wanted.
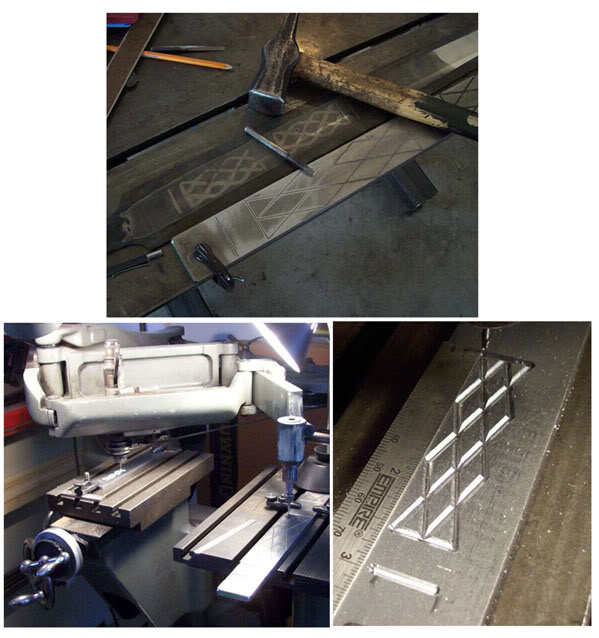
I got a good test piece, so then I moved on to my first attempt using the Pantograph. I went a little over board and order special cutter that would give me a rounded bottom, and a flared wall to ensure that all the flux got pushed out of the groove. I welded together a pattern welded billet and twisted up the thin rods to give me some wire.
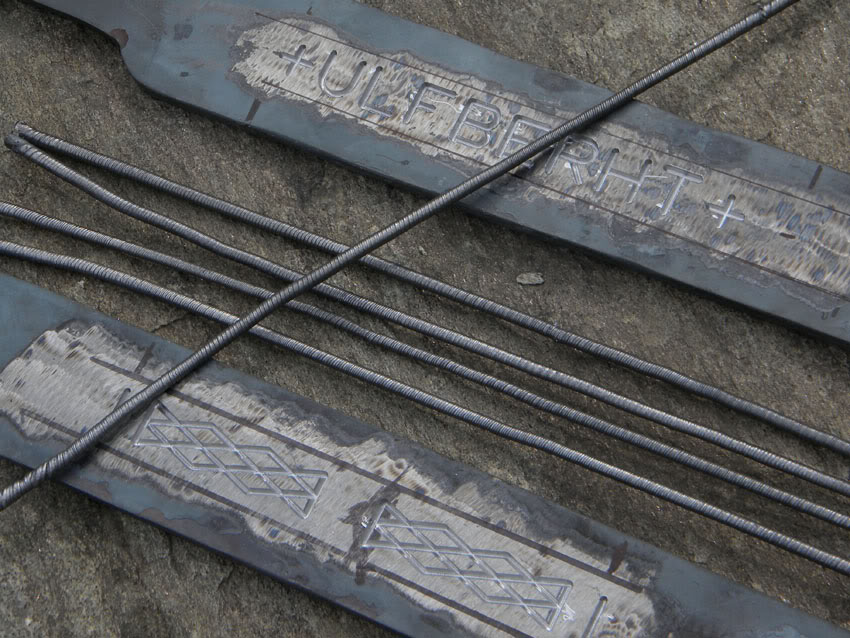
Next I had to make a special dye to profile my wire to fit the grooves. This turned out the be a royal pain, the taper was slight, but not large enough, and the wire kept sticking inside the dye.
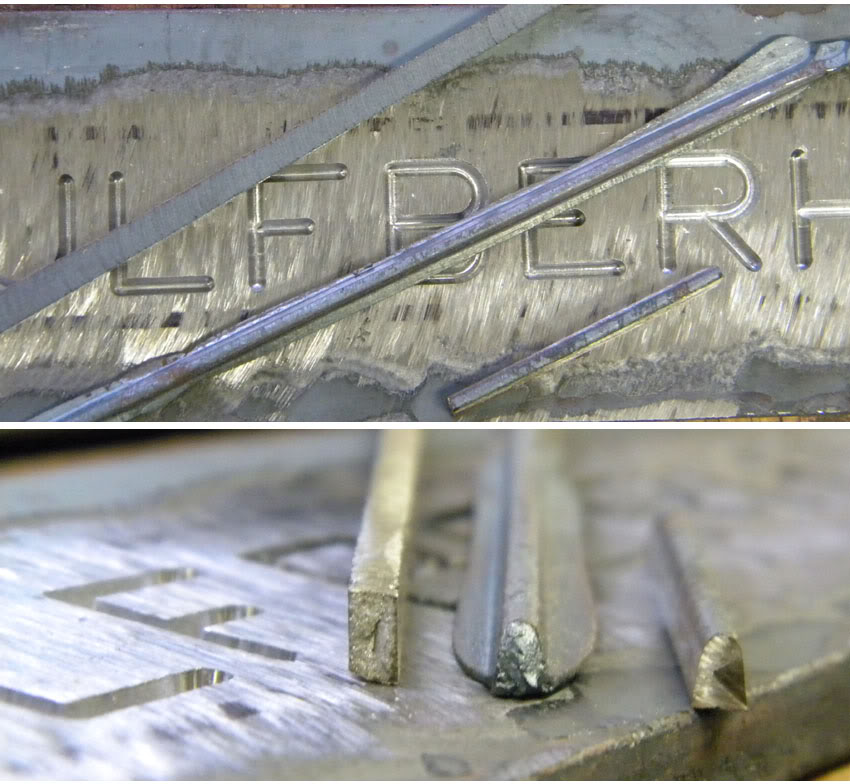
I was able to get enough wire profiled and I started setting the wire in the grooves. The one advantage of the profile that I chose was it was fairly easy to get all the mating surfaces of the wire to sit tight and snug.
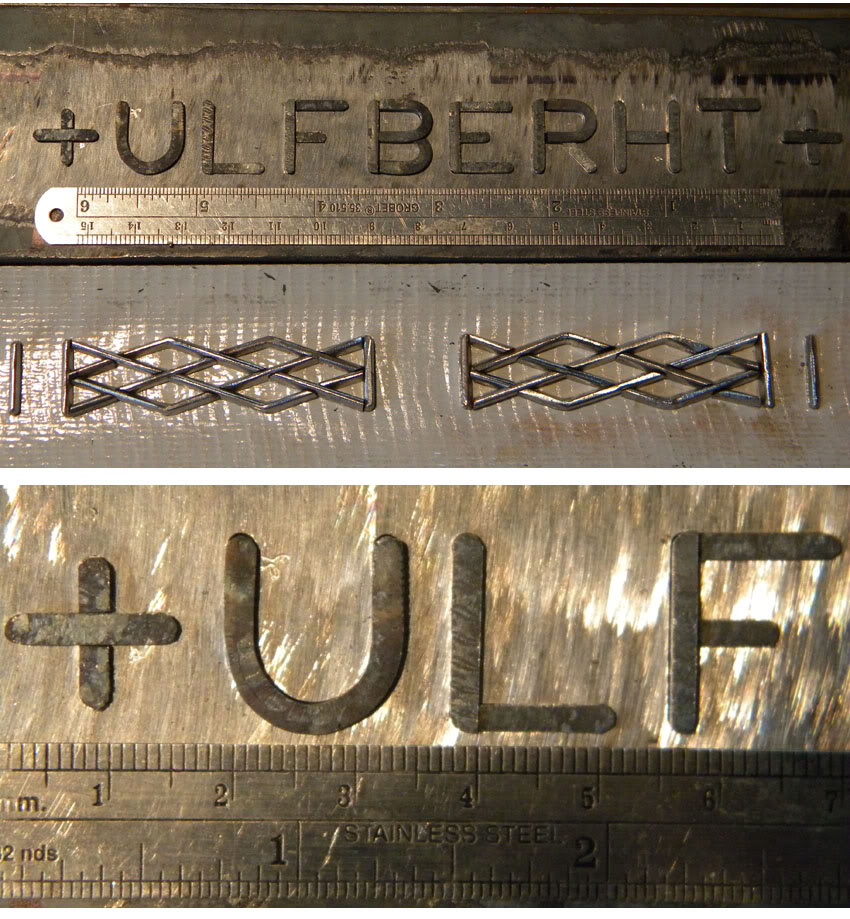
I decided I was going to do both sides at once since it seemed more reasonable, plus it was ensure that I had equal distortion on each side. I wanted to leave a little bit of the wire proud to give the wire a little extra material to push and fill the grooves. I hammered the sides of the grooved with a chisel hoping that the pressure of the pinch on the sides would be enough to keep everything in place. Slowly I brought the entire package up to heat, and right when the blank started turning red, pop pop pop went the letters. The blank was dead since scale had already formed, and the scale that forms on L6 is awesome at screwing up welds. The wire was on the bottom of the forge, so take two!
This time I came up with a clamp that would tightly hold the wire in place.
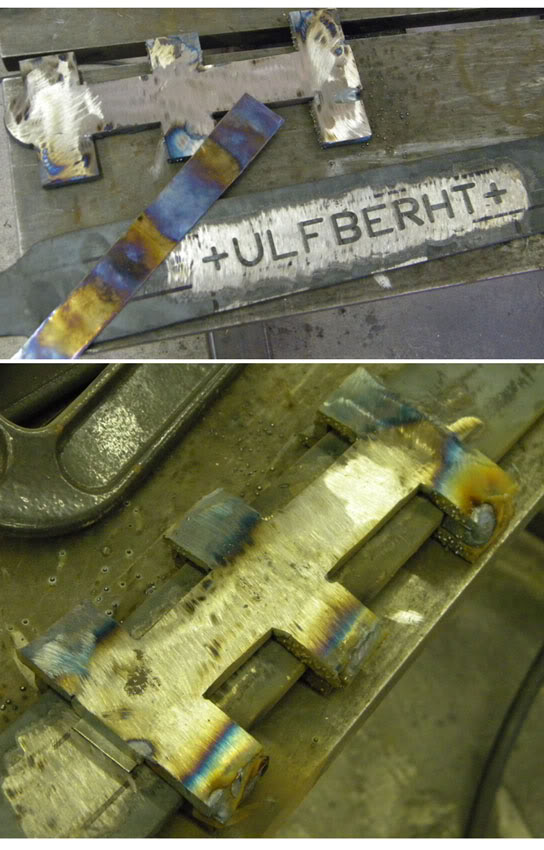
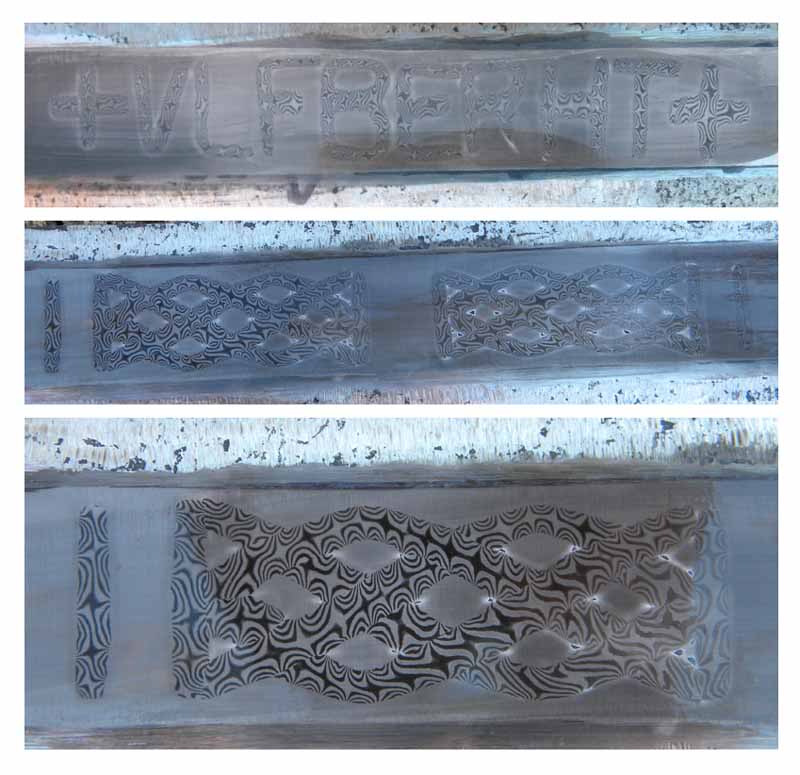
The thin sheet is oxidized nickel which I placed between the wire and the clamp so that the two wouldn't weld to each other. This turned out to work pretty well, after several welding heats I cut one edge of the clamp and peeled it of and the letters were nicely welded in place. I forged out the fuller, and gave the fuller a rough grind to find.....
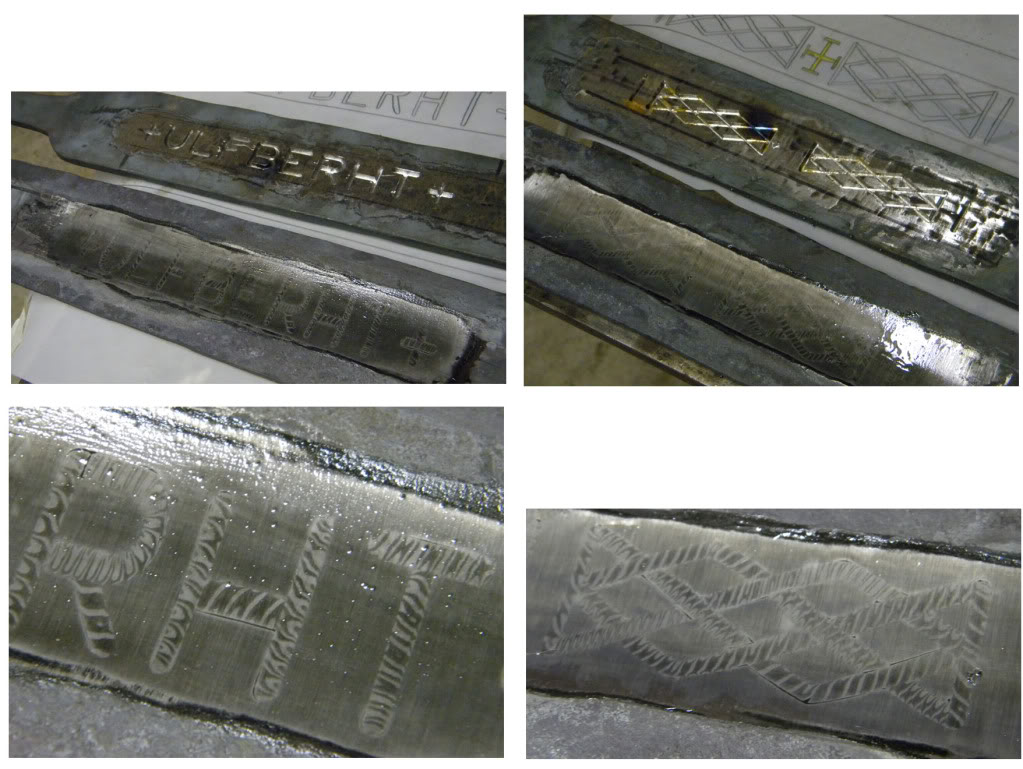
not exactly what I had hoped for.
But hey, things were getting better so let's do it again. This time I made a few small adjustments, I decided to make the channels round, and use round wire since sometimes keeping things simple is the better way to go. Plus I figured that the gaps were a result of not having the profile just right, and the clamp absorbing some of the welding blows and not giving the wire the "push" it needed, and seriously? Who wants to use a big honking clamp anyway? I figured in history metal was valuable and wasting it for that purpose might seem a touch out there. So again, I carved out the grooves, made some wire, and started setting the wire.
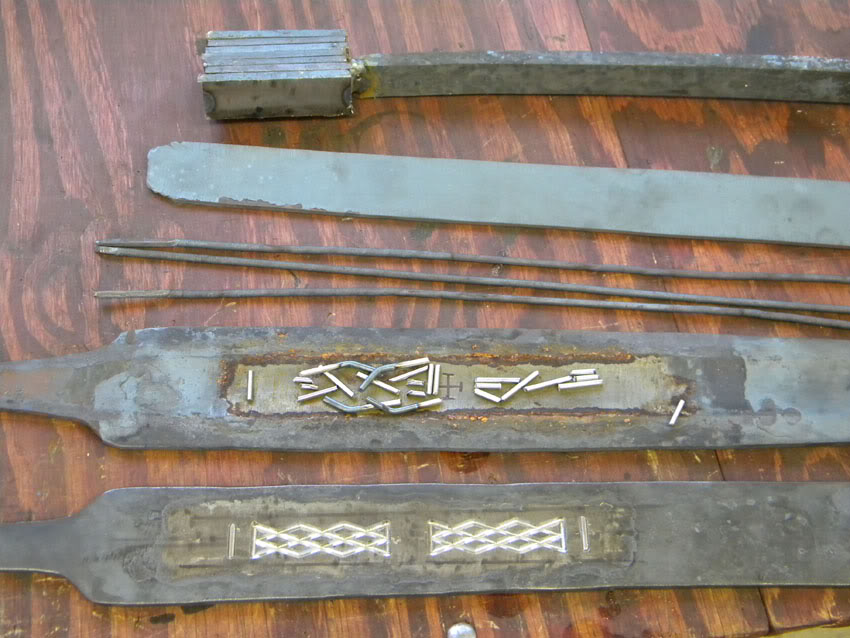
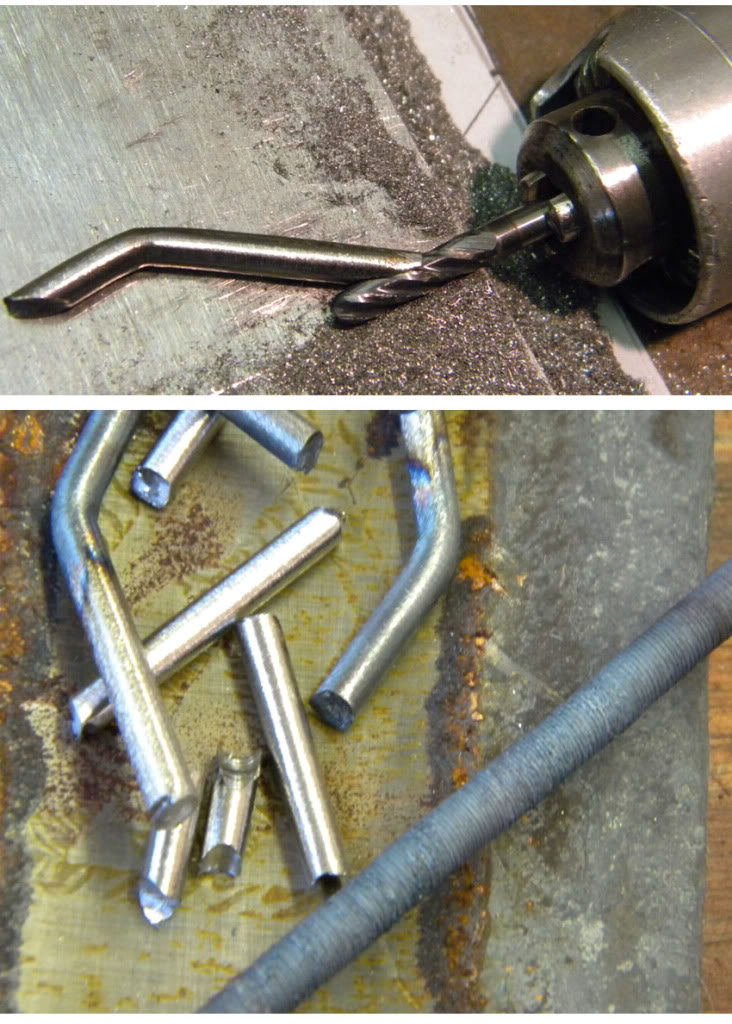
As I got started I ran into my first issue, I wanted to fit the wire together as close as possible, and just cutting the wire and grinding it straight would leave a gap on the inside of the groove. Hey, no problem, I just mounted my flex shaft on the table, and put a little piece of steel under it, and each piece was hand ground, and then profiled to fit.
The lattic side in particular was a nightmare! The piece kept moving around and with each fitting they would bump out of place and slowly but surely they started coming together. When I thought I had everything to where it should fit. I clamped a bar over the top, took it to the power hammer, and gave it a good blow to sink all those little sucks into the grooves. Yahoo! They went in. With a center punch I went around the outside to close them in place with no chance of playing great escape. "Where you going? Nowhere!"
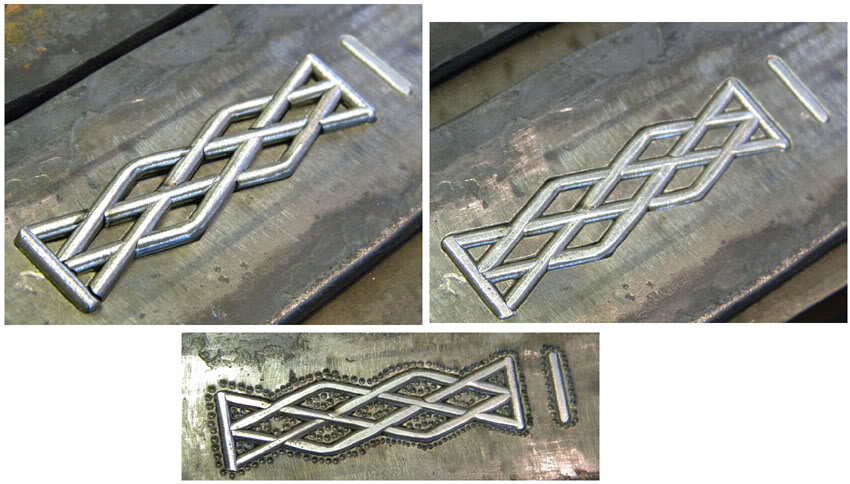
The welding went great, I thought. It turns out that I didn't leave enough of the wire exposed to get the push that I needed and I ended up with some rather awesome gaps. Well not awesome in a good way, but awesome in a big way. I'm beating myself up for not finding a picture to show, because there was one other issue that would have scraped the blade even if there were no gaps. The wire had to high of a layer count and it was twisted too tight. The resulting pattern didn't look anything like what I was going for.
However all of this did give me a chance to practice up my grinding of the blades. I found the weight of the original, and so I ground the the two pantograph engraved blades to test the weight , balance, and diameter wheel to use. I used a 10" wheel on the first blade, and a 6" on the other. The 6" proved to be too deep, cutting though the wire in some points, and leaving too high of a ridge and too much mass at the tip to balance out the blade and hit my target weight. The 10" wheel gave much better results and the thin, wide blade had the right balance and feel for what I needed. Incidentally the gaps diminished a great deal, and with the final grind the blade turned out fit for sale. http://www.myArmoury.com/talk/viewtopic.php?t=20326
I did talk with Tim and I requested that I change gears and approach the project from a different angle since there were still factors that I wanted to address and while the blade ground with the 10" was good, I wanted to do better. I felt that the wire was a touch thin for what I was hoping for, the pattern was too distorted from the re-profiling of the wire in the dye, and while I could live with those slight gaps, I was sure that I could do better.
I'll post the next leg of my quest tomorrow or the following day. These hands need to go get some dirt on them :)
