My name is JT Pälikkö and I have worked as a full-time bladesmith for almost twenty years now. I have mostly worked with all kinds of knives and puukkos, but over the years I have found myself making increasingly more swords and other historical weapons for my customers. This is the first time I participate in a discussion here in the myArmoury forum.
A few days ago I showed some pictures of a work I just recently finished to an old customer of mine. He in turn suggested that I would share some pictures and maybe some information of the process of the project here. So here goes… -hopefully this does not turn out to be too long or boring…
The project I just finished is a late “viking era” Xa-type sword I was commissioned to make couple years back. The sword itself is a quite straight forward piece, with simple hilt furniture and a hefty blade.
However, to turn the sword into something special, the customer ordered it with a pattern welded inscriptions. I told the customer that I had never actually tried forging inlays, but I was willing to try my hand with them.
Last February I finally started the manufacture of the sword. I thought it best to use easily weldable carbon steels for the whole project. The blade material used was 0,75%C carbon steel and the letters were made of twisted rods of 15N20 and 1%C carbon steel.
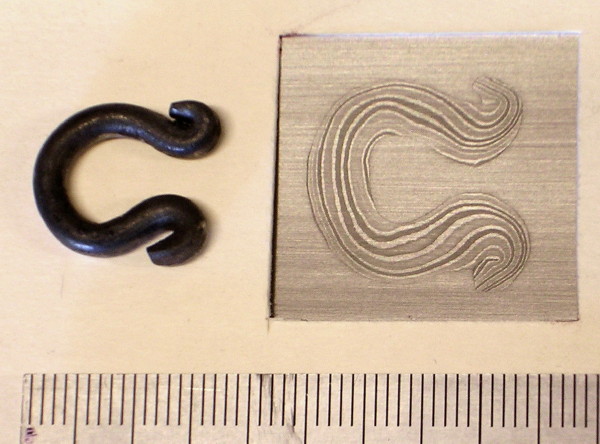
The letters were bent from 2 – 2,5 mm round rods, I tried to keep the amount of parts per letter in minimum, so for example letter M was bent from one long rod. In the actual welding process a gas forge was used. No grooves were cut for the letters, the cold letters were forged into the hot blade blank instead. To stop the letters “hopping off” while they were being seated I made a small hammer with a longish metal tube handle (just the kind Richard Furrer describes earlier on). This hammer was wielded by an apprentice (strangely similar in appearance to my wife). After a few practice welds, the process was fairly straightforward: I held the blade blank and after the initial heating I brushed of the scale, placed the letter on it with tongs, the “apprentice” would place the hammer on the letter and I would strike it with a bigger hammer. After a stroke or two I would add flux, heat the blade with the letter into welding heat and lightly forge weld the letter in place. With enough heat left in the blade next letter would be set on it and the cycle would continue.
With the aid of extra pair of hands, the whole process was surprisingly fast, it took less than an hour to weld the inscriptions and decorations on the blade.
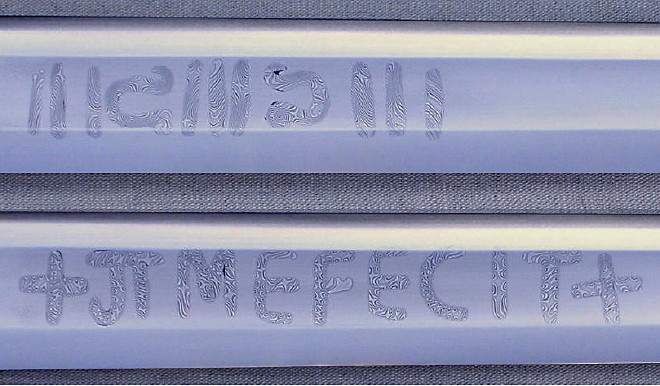
After the forge weldings, the fullers were forged in using two-sided fullering tool. I removed all scale and leftover flux from around the letters before forging the fullers to ensure that there would be as few surprises waiting as possible. Finally the bevels were forged in shape and the blade was ready for rough grinding and heat treatment. The finished blade was etched using ferricloride, which brings out the nickel in the 15N20-steel in the inscriptions nicely.
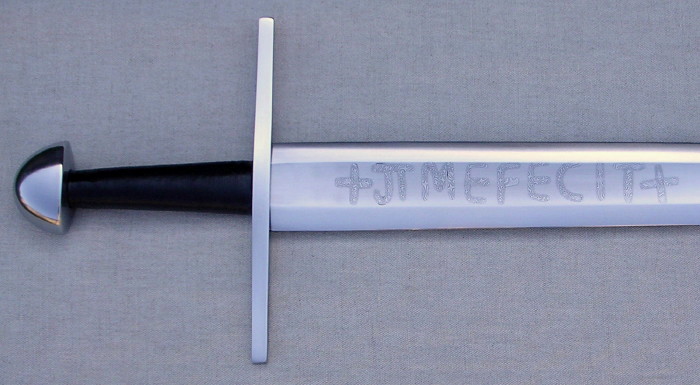
As for the actual inscription, well, it’s maybe a bit bombastic, but it is nevertheless quite true and just what the customer and I agreed upon when the order was made. The rather simple decoration on the reverse side of the blade is adopted from one “ULFBERTH” blade.
Here’s two annoyingly small pictures of the sword.
[ Download ]