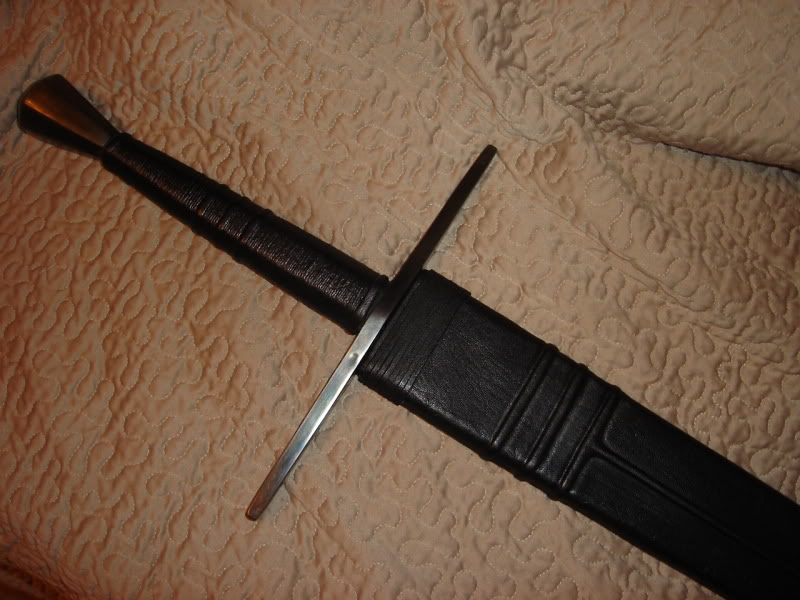
I have done cord, strip, and wire wraps before, but I decided to try doing a full leather grip wrap on the Del Tin I got the other day because the stock grip was shot. I've been reading about it for a bit in the forums, but decided to take the plunge and at least practice a little before I sent off some swords for customization after the holidays. I went to Hobby Lobby and got everything I needed around noon.
I also picked up some poplar for a scabbard project, but that will be a different post. Right now, the core is drying in my dad's garage.
I pulled off the old grip and risers. There was alot of glue/dye residue on the grip core, so I gave it a quick smoothing with a sanding block. I figured that I would be trying this a few times, so I left some residue in place and did not reshape the core from its stock hexagonal appearance.
I then cut risers from leather latigo and glued them in place with Elmers. Tacking them at the beginning with a tad of Superglue is good to hold them in place so you can pull it tight as you glue them down with Elmers.
I started my internal cord wrap using thick waxed leather stitching thread. I tacked it down with a drop of Superglue and started spinning...
Spinning...I went over the risers on the seam side. If I was doing this for a keeper, I would end and restart at each riser to avoid doing this.
Done...there were some small spaces here and there, but nothing that would be noticed with the finished product.
I then wet a piece of 2oz crafting leather the approximate size of the grip...
Now, I don't show the next part because my hands were too sticky, but I did the leather just like in the Albion video for the most part. I wet the back with Elmer's white glue, and began molding it around the grip, pressing in the details and getting excess air and glue out. A few times, I had to sort of twist the hole grip to make the seam even. The whole process took around 10 minutes - a little longer than I imagined.
I then wrapped the grip tightly with 550 cord for 4 hours and went to work on my scabbard core some. Then while leaving my core to dry, I came back to the grip and unwrapped it. I used a doe foot to define the risers a little better and push the extra leather into the space between the top and bottom risers.
Here is the seam...
It turned out better than I thought it would on my first attempt. There are several things that I plan on doing different the next time. One is to use taller risers to give them more definition. Two is to do the final drying wrap with a finer material than 550 cord (which I what I happened to have). Three is that when I do this for sure, I will strip and reshape the core - not because I think it will be a problem, but just to do it the proper way.
Other than that, I am pretty happy with my new skill. I'd like to thank all those posting on this topic for the good information in giving guidelines!
EDIT: While I was thinking about it, I went back, slightly damped the leather (which was not 100% dry anyway), and rebound the whole grip with the fine cord I used under the leather. Hopefully, in the morning, I will have a little more detail - then I can call this one done - for now anyway!
outstanding work......WISH i had that skill!!!! I'd make my own scabbard if i did!! it looks good and solid.
Nice work. :cool:
Oh, I used fine nylon cord as it is very strong and one can pull it very tightly without it breaking.
To keep the lines from fading away I usually put a bit of diluted Elmer's glue over the leather and before I wind on the nylon cord.
The nylon cord is easy to pull off the surface as the Elmer's glue doesn't have much of a hold on the nylon.
Now, this makes the leather harder and glossier than normal and some people may prefer keeping the leather surface more natural. Note the amount of diluted glue is small and it is absorbed by the leather and shouldn't look like a skin of glue over the leather.
Oh, I used WELDBOND glue that is similar to Elmer's white wood glue but becomes water proof when dry ( I think !? ).
A little coat of linseed oil ( Wipe on/wipe off ) and some renaissance wax a few day later when the grip has had a chance to dry completely to finish.
With this the grooves in the leather seem more durable as the first grip I did not doing this became very smooth after I wetted the surface to clean it i.e. all the nice grooves where washed out.
This optional way to do it gives the grip a harder and less porous surface that is semi-gloss in appearance.
Congrats!
You figured this out right away it seems :)
Very nice work, very clean. It would be great if you could manage a couple of pics without using the flash though (as I am curious about the fine details!).
"There are several things that I plan on doing different the next time. One is to use taller risers to give them more definition. Two is to do the final drying wrap with a finer material than 550 cord (which I what I happened to have). Three is that when I do this for sure, I will strip and reshape the core - not because I think it will be a problem, but just to do it the proper way."
I don't have much more to add to this since you anticipated all I wanted to say :)
Just one thing: I would have probably allowed the leather to slightly overlap the pommel and the guard (It think you may have but can't be sure with the pics). For the rest, It's all a matter of taste but I agree that more defined raisers would look good on such a massive grip (maybe also try different size raisers especially smaller ones close to the pommel since it is surprisingly small compared to the grip itself). I also agree that the original design of this grip is quiet bulky (plus you did use a cord wrap underneath the leather, which may have added to the size of it). It would definitely deserve some reshaping (looking at the picture the pommel looks almost thinner than some parts of the actual grip). A waisted grip might work on this one, the handle getting thinner as it closes to the pommel (I can't figure out the sword type on the pics though as historical accuracy might be an issue).
I don't think that you have to undertake a second attempt to try the final wrapping of the all thing with finer cord, as I'm pretty sure that wetting the grip and wrapping it again tightly with finer cord will do the job (I would leave it to rest overnight).
Anyway keep up the good work and best of luck with your scabbard (looking at this, I'm sure you'll do fine). By the way I assume that's for the same sword?
Cheers,
J
ps: The Albion vid was a great help for me as well before attempting a re wrap for a towton sword, a few very informative seconds that convinced me I had to have a go at it too :)
Hi JE,
That's a nice piece of work, a lot nicer than my first attempt at a wrap like that.
When it comes to the risers etc I can't say much about your technique, but if you want better definition on your next attempt I'd look to better materials rather than different technique.
Near as I can tell from your photos you've used chrome-tanned leather. It'd difficult to tell on the thin stuff, but the thick stuff is grey in the middle of the cut edges, which is a dead giveaway and unless the calfskin was specifically sold as vegetable tanned it was probably chrome tanned.
The thing with chrome tanned leather is it doesn't wet-form much at all. If you use vegetable tanned leather you'll get far better definition out of both your risers and your cord wrap than from chrome tan. I'd try that before using taller risers, but it might pay to try it out on a section of broom handle or somesuch test core because it does handle quite differently to chrome tanned. Mainly it stretches a lot when wet and stays stretched when it dries. That's what gives it good definition when you cord wrap it but it can mean it can be hard to get the seam sitting the way you want.
Having stared with a leatherworker's eye at the grip on my knight, the other thing that really raises the tone of the whole piece of work is how the edges are finished. The ends have been skived and folded under so there's no raw edge showing and the long edges of the grip leather have been skived down to nothing so there's no lump at the overlap and those little details take it from just being another leather grip wrap to being a really nice piece of work.
It's late here so I won't get into a description of skiving leather, but it does take a sarp, [i]sharp[\i], knife. If you don't already know how it's done and you want some idea let me know and I'll write something up when it's not late at night.
I look forward to seeing what your next attempts look like.
JE Sarge wrote: |
It turned out better than I thought it would on my first attempt. There are several things that I plan on doing different the next time. One is to use taller risers to give them more definition. Two is to do the final drying wrap with a finer material than 550 cord (which I what I happened to have). Three is that when I do this for sure, I will strip and reshape the core - not because I think it will be a problem, but just to do it the proper way. |
That's a nice piece of work, a lot nicer than my first attempt at a wrap like that.
When it comes to the risers etc I can't say much about your technique, but if you want better definition on your next attempt I'd look to better materials rather than different technique.
Near as I can tell from your photos you've used chrome-tanned leather. It'd difficult to tell on the thin stuff, but the thick stuff is grey in the middle of the cut edges, which is a dead giveaway and unless the calfskin was specifically sold as vegetable tanned it was probably chrome tanned.
The thing with chrome tanned leather is it doesn't wet-form much at all. If you use vegetable tanned leather you'll get far better definition out of both your risers and your cord wrap than from chrome tan. I'd try that before using taller risers, but it might pay to try it out on a section of broom handle or somesuch test core because it does handle quite differently to chrome tanned. Mainly it stretches a lot when wet and stays stretched when it dries. That's what gives it good definition when you cord wrap it but it can mean it can be hard to get the seam sitting the way you want.
Having stared with a leatherworker's eye at the grip on my knight, the other thing that really raises the tone of the whole piece of work is how the edges are finished. The ends have been skived and folded under so there's no raw edge showing and the long edges of the grip leather have been skived down to nothing so there's no lump at the overlap and those little details take it from just being another leather grip wrap to being a really nice piece of work.
It's late here so I won't get into a description of skiving leather, but it does take a sarp, [i]sharp[\i], knife. If you don't already know how it's done and you want some idea let me know and I'll write something up when it's not late at night.
I look forward to seeing what your next attempts look like.
Thanks for the complements and advice on my initial try here.
One thing I definately am going to invest it is some medical scapels. I changed my exacto knife blade before starting, but on slightly damp leather, it's very difficult to cut and glue residue gums up the blade quickly. I have a slight skive and overlap in there, that was probably the most time-consuming part other than doing the initial cord wrap. I will try to post some more pictures once I pull off the cord I let it dry in overnight.
For finishing, I'll use leather gloss like I put onto belts/bracers that I make.
Originally, I did have an overlap onto the pommel and cross. Asthectically, I just did not like it, so I trimmed it down.
Thanks again for the good advice. Now its onto the scabbard core waiting in my dad's shop. I am going to try to match the general look of my grip with it, but we will see how it turns out...
EDIT: Well, I pulled off the waxed cord I left on the grip over night. I am really pretty happy right now with the results. Here are the pictures after I took the cord off this morning.
Here is with no flash...
Last edited by JE Sarge on Sun 07 Dec, 2008 7:24 am; edited 1 time in total
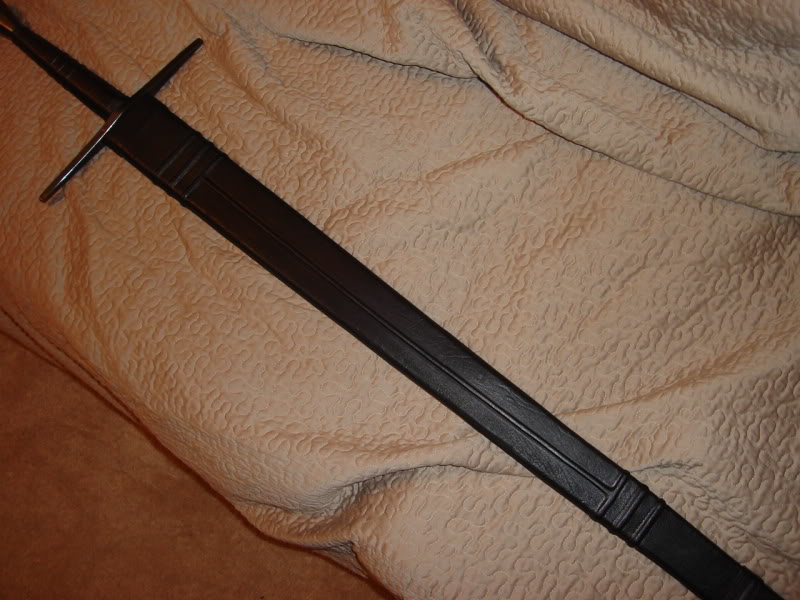
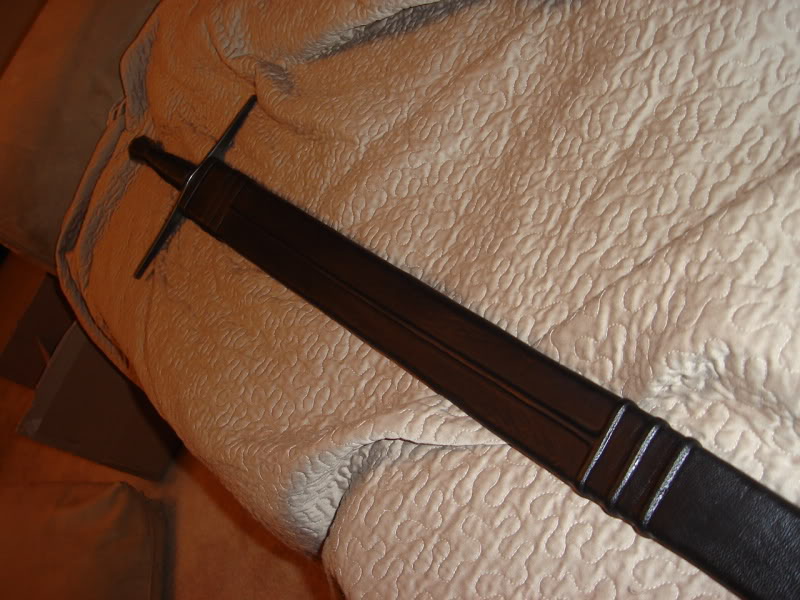
Well, I just finished the scabbard; I decided not to make another post for this same sword.
This is not the scabbard that will accompany this sword forever, it was only a test. I used the materials I had laying around, the scrap leather left over from the grip wrap, and some 1/4"poplar that I cut up/routed out last evening. I am not overly pleased with it, but it will work for the next few months as a good storage.
It's far too large for the type, but its a nice snug fit. I made the mistake of using 4" wide poplar instead of 6" so my edges don't taper nearly far enough to give it a better rounded shape. However, I was able to bring the detail out really well on the scabbard itself. I knew that I was limited on leather, so I was able to get about 90% of the length done, then had to make some little latigo wraps to conceal the cut where I joined two pieces together to join the leather chape I made with the rest of the scabbard..
I figure I'll order some leather, strip this 1st try off, and further thin and rewrap/re-emboss it later. I considered this practice on my detail work and getting these risers to pop on the wet leather.
No, you don't get the see the fugly end. As I said, another little bit, and I will work with it some more, but this gets me through Schola tomorrow! :D
Page 1 of 1
You cannot post new topics in this forumYou cannot reply to topics in this forum
You cannot edit your posts in this forum
You cannot delete your posts in this forum
You cannot vote in polls in this forum
You cannot attach files in this forum
You can download files in this forum
All contents © Copyright 2003-2006 myArmoury.com All rights reserved
Discussion forums powered by phpBB © The phpBB Group
Switch to the Full-featured Version of the forum
Discussion forums powered by phpBB © The phpBB Group
Switch to the Full-featured Version of the forum