Reconstructing 15. C heavy Ottoman Infantryman, I made this armour
[ Linked Image ][img]
almost two and a half years ago.
Being not very saticfied of it, last year I decided to make another suit ot Ottoman armour, main item in which is the combined plate-and-mail cuirass, called "yushman".
After the initial plannig, this
http://media.snimka.bg/5280/016816066-big.jpg
is what I intend to be my future armour.
This raw sketch
[ Linked Image ][img]
shows how the plates are combined in rows (the center-back row is in the middle of the sketch).
The cuirass itself is not a replica of any particular one, but rather it is combination of elements and ideas, taken from authentic 14. - 15. C Ottoman and Islamic armours
So, in the process of my work I will show you the progress of my work and the construction methods in "real time".
Enjoy!!!!!
[/img]
Interesting choice, one rarely sees heavy ottoman infantry kit. I like the breastplate.
Boris,
I found only a helmet Ottoman - XV century - Historical Museum Athens.
Not sure about the shoes and the sword. Perhaps only the Byzantines wore a shoulder belt for the scabbard.
Please correct if I'm wrong.
I can not wait to see something more. :)
Ciao
Maurizio
 Attachment: 89.02 KB
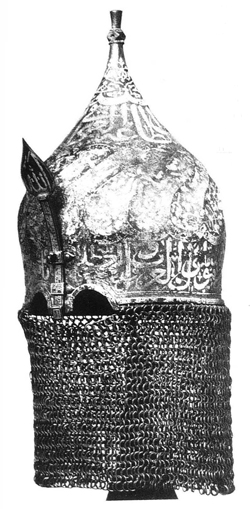
I found only a helmet Ottoman - XV century - Historical Museum Athens.
Not sure about the shoes and the sword. Perhaps only the Byzantines wore a shoulder belt for the scabbard.
Please correct if I'm wrong.
I can not wait to see something more. :)
Ciao
Maurizio

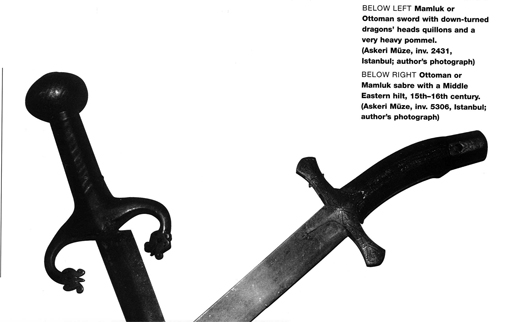
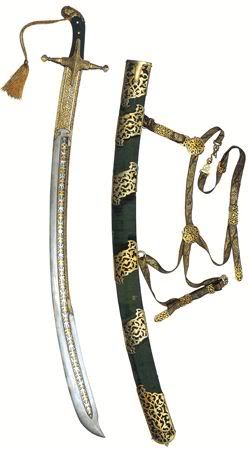
here some sword of the fifteenth and sixteenth century
 Attachment: 56.05 KB
 Attachment: 16.18 KB


Last edited by Maurizio D'Angelo on Fri 08 Jan, 2010 12:49 pm; edited 1 time in total
I will watch this topic very closely since I am making something similar. A Kolontar type armor :) . It's an earlyer version of a maille and plates armor from XIV-XV century.
 Attachment: 217.55 KB
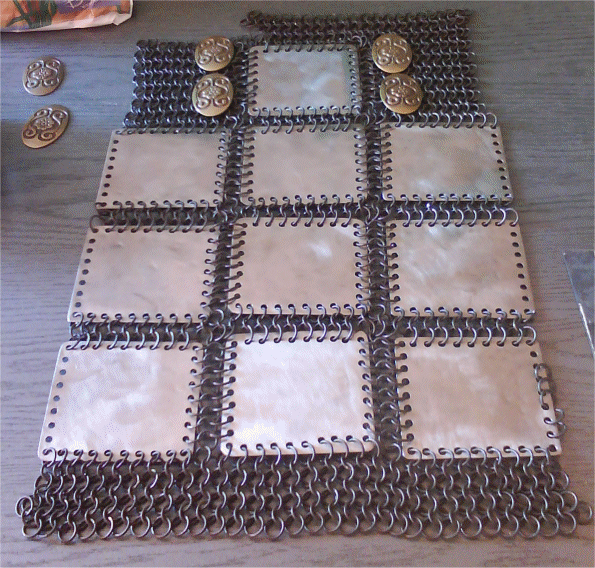

Good choice and work so far!
I like the kolontar too, but it was used mainly by the Russians and such armour is not appropriate for Ottoman Infantryman.
Is your mail butted or riveted?
Because I will use riveted on.
I like the kolontar too, but it was used mainly by the Russians and such armour is not appropriate for Ottoman Infantryman.
Is your mail butted or riveted?
Because I will use riveted on.
For this project the maille is butted. I intend to make a bechter armor (polish/hungarian form of yushman) later and I will use riveted maille then. The kolontar is intended for an irregular Transylvanian infantry kit.
I am happy to see mail-and-plate armours, Boris! Yours is good. I also want to improve mine, like your sketch. Here is it:
http://nomadok.gportal.hu/gindex.php?pg=27550495
I made it with riveted links between the plates.
http://nomadok.gportal.hu/gindex.php?pg=27550495
I made it with riveted links between the plates.
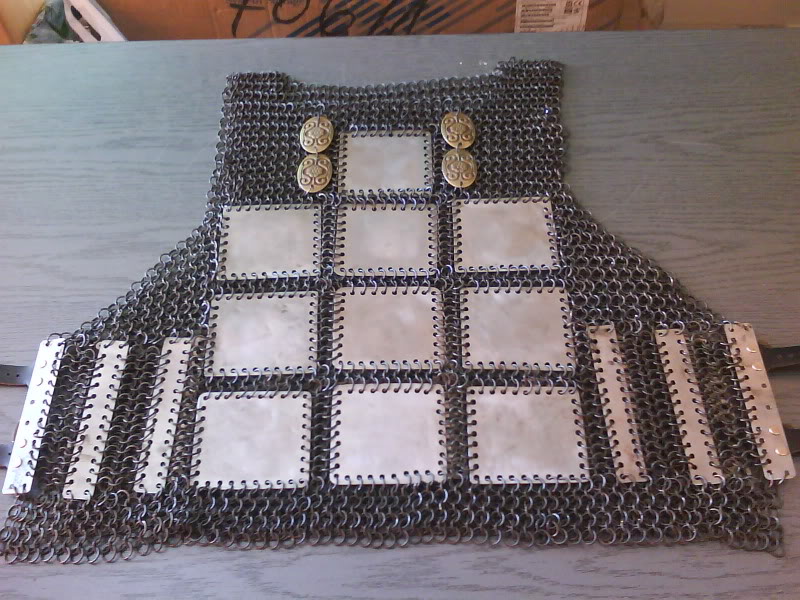
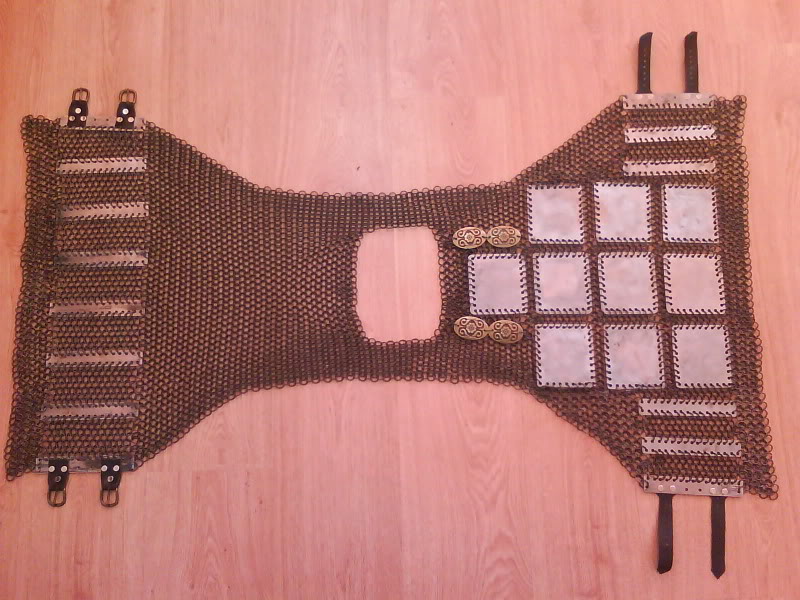
Here is an update to my project, a kolontar type vest:
Kolontar face:
The full kolontar layout:
Kolontar face:

The full kolontar layout:

Dear friends!
Around the end of January I moved to a new flat and last months I worked quite hard in order to equip my new workshop. That's I was severely restrained to do any significant progress on the project.
Now, my new workshop is ready, so I'm able to continue with my work
Around the end of January I moved to a new flat and last months I worked quite hard in order to equip my new workshop. That's I was severely restrained to do any significant progress on the project.
Now, my new workshop is ready, so I'm able to continue with my work
As a new begging, these
[ Linked Image ]
are the paper patterns for the Yushman.
As you see, there is a little difference between them and the sketch in post#1. This is because I'm still not very sure, if the two small sections just under the armpits would be necessary
[ Linked Image ]
are the paper patterns for the Yushman.
As you see, there is a little difference between them and the sketch in post#1. This is because I'm still not very sure, if the two small sections just under the armpits would be necessary
Meanwhile, I purchased this riveted mail
[ Linked Image ]
which I will use as a supply depot for straps of riveted rings.
Here is a closer view to a section of the mail
[ Linked Image ]
The coin (which is Bulgarian national curency) is almost equal in size to 1 EURO coin.
[ Linked Image ]
which I will use as a supply depot for straps of riveted rings.
Here is a closer view to a section of the mail
[ Linked Image ]
The coin (which is Bulgarian national curency) is almost equal in size to 1 EURO coin.
Somewhere at this point, I started with the real work.
The first step is to prepare the plates, and these are the phases:
[ Linked Image ]
From bottom up: firstly they were drawn and marked; secondly - all holes were drilled; the plates were cut, the corners - rounded and the edges - finished; then the plates were bent and the surface - finished to a smooth satin appearance; and lastly - the plates were oxidized against rust.
In this closer look:
[ Linked Image ]
the order (clockwise starting from the top left corner) is the same.
These
[ Linked Image ]
are the almost countless little plates for the skirt - a work done during the "dead" period in which I equipped my new workshop.
And a simplified pattern of their arrangement
[ Linked Image ]
[ Linked Image ]
are the almost countless little plates for the skirt - a work done during the "dead" period in which I equipped my new workshop.
And a simplified pattern of their arrangement
[ Linked Image ]
Now, with almost all plates (except these from the breastplate) done through the previously showed phases
[ Linked Image ]
and the mail, destroyed :lol: into straps
[ Linked Image ]
I can start to connect the plates into desired rows.
[ Linked Image ]
and the mail, destroyed :lol: into straps
[ Linked Image ]
I can start to connect the plates into desired rows.
Very nice work! What are the inside diameter of the rings of mail and the thickness of the wire? Also what are the dimensions of the plates (the height of the rows of plates)?
Romulus!
The wire is 1,4 mm thick and the inner diameter of the rings is 8 mm.
Obviously, the plates are different in size and shape - the height is constant for all of them (50 mm), but the wight varies from 46 to 146 mm. The plates for the skirt are 98 x 34 mm (big ones) and 50 x 34 mm (small ones). The plates for the breastplate (not shown yet) are bigger than everything else.
The height of the central back row, which I managed to assemble today, is 508 mm when fully streched.
The central back row is ready:
[ Linked Image ]
Although I have some experience with combined mail-and-plate armours, I was well surprised by the flexibility of the row
[ Linked Image ]
and in the opposite direction:
[ Linked Image ]
Actually, I think that this flexibility will be restrained when the full cuirass is ready, but the result is good so far
[ Linked Image ]
Although I have some experience with combined mail-and-plate armours, I was well surprised by the flexibility of the row
[ Linked Image ]
and in the opposite direction:
[ Linked Image ]
Actually, I think that this flexibility will be restrained when the full cuirass is ready, but the result is good so far
The breastplate right into the middle of the working process
[ Linked Image ]
As you see, there is a great difference between the initial idea and the result.
In order to use these traditional Ottoman locks (the hooks aren't still attached)
[ Linked Image ]
I was forced to re-work the whole breastplate, but although (with bigger plates) it is still quite close to the autentic ones.
[ Linked Image ]
As you see, there is a great difference between the initial idea and the result.
In order to use these traditional Ottoman locks (the hooks aren't still attached)
[ Linked Image ]
I was forced to re-work the whole breastplate, but although (with bigger plates) it is still quite close to the autentic ones.
Page 1 of 26
You cannot post new topics in this forumYou cannot reply to topics in this forum
You cannot edit your posts in this forum
You cannot delete your posts in this forum
You cannot vote in polls in this forum
You cannot attach files in this forum
You can download files in this forum
All contents © Copyright 2003-2006 myArmoury.com — All rights reserved
Discussion forums powered by phpBB © The phpBB Group
Switch to the Full-featured Version of the forum
Discussion forums powered by phpBB © The phpBB Group
Switch to the Full-featured Version of the forum