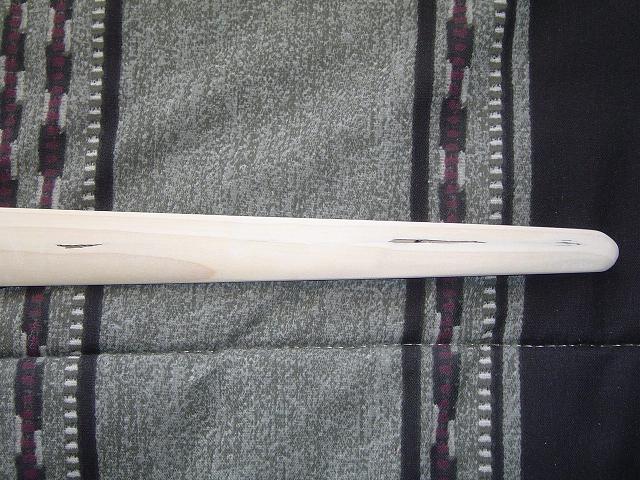
Poitiers scabbard core completed
I have been working on a scabbard core for my Albion Next Generation Poitiers, and I got it glued to together and shaped this weekend. I had done all of the interior carving with four chisels, but I made a visit to the on-post wood shop in order to do the shaping on the exterior. I would love to tell you that I didn't have any help, but apparently one has to have a safety class/card in order to use the wood shop, and while they were nice enough to let me use the belt sander, I had to stand there and watch someone "qualified" cut it to shape on the band saw. (I do understand the reasoning for such requirements, but that doesn't keep them from being a nuisance).

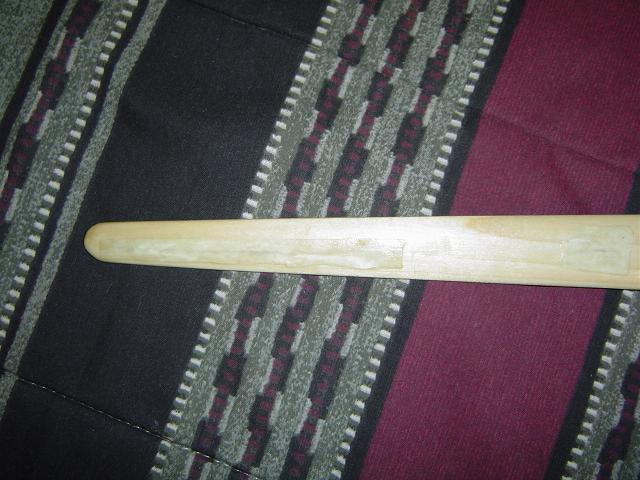
I am pretty happy with the way things turned out, but I did have a little trouble as a result of having cut a bit deep with the chisel. When I sanded down the outside, I accidently sanded through a few spots toward the tip of the scabbard. That was a little embarrasing (thankfully, no one was watching). I refuse to believe that I am the first scabbard maker to do this, so my mind quickly went to work on possible solutions. I could probably have just left it be as the leather would cover it, but I wanted to make sure that no varnish or glue got into the scabbard. My next thought, and the one I went with, was to glue strips of parchment over the holes. I let the glue dry, and then carefully hand sanded the parchment just a bit. It worked to keep the varnish out of the scabbard, and, with the varish applied, is actually suprisingly solid.

Because I did not have the sword present for this project, I erred on the side of making things just a bit big on the inside of the scabbard. That means I will not have the tightest fitting scabbard (though, I am hoping to be able to glue some felt or leather into the throat latter on to make the fit a little more snug), and that the over all bulk of the scabbard is perhaps a bit greater than it needs to be. Still, I think I got it down thin enough that it will look alright.

The interior of the scabbard does not match the blade profile nearly as closely as I would like. This was one of my first projects where I used chisels extensively, and I had to do some learning. The next scabbard, which I have already started (for my Albion NextGen Agincourt), will look a lot nicer internally.

BTW, I cheated a bit. I used some 1/4x4 boards that I found at Home Depot, so there was less work needed to get the scabbard thin. It took me an hour to shape this scabbard from the time it was cut to shape on the band saw, until I walked out the door to go buy parchment.

-Grey

 Attachment: 60.77 KB
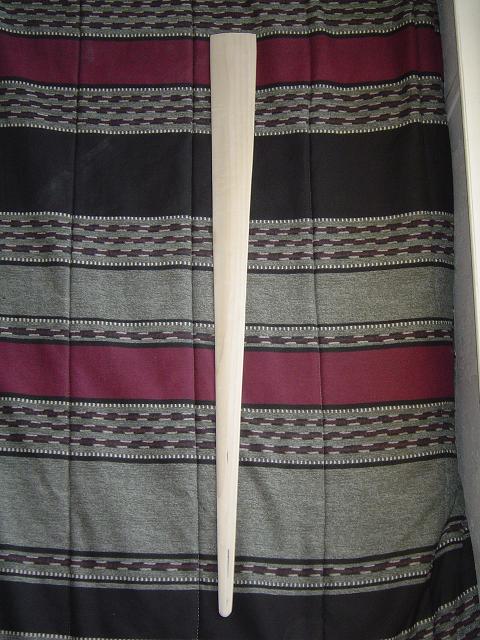
Scabbard_OV.JPG
Overview.

 Attachment: 76.73 KB
Scabbard_CU.JPG
Close up showing the holes that I accidently sanded into the scabbard core.
 Attachment: 39.28 KB
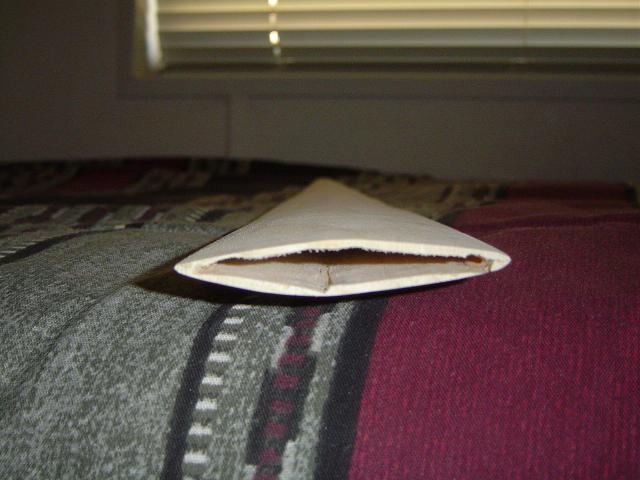
Scabbard_Throat.JPG
The throat of the scabbard. sorry for the poor picture quality.
 Attachment: 51.45 KB
Scabbard_Repair.JPG
Close up showing the parchment strips I glued over the holes. The core has also been varnished in this picture.
Lookin' good Grey! Can't wait to see the finished piece. You are bringing what you have done to Wichita aren't you? After all, it will be show-n-tell time. :lol:
Later,

-Greg
Very nice and streamlined. With all of this scabbard business I'm begining to think I need to try it myself!
When things get this thin, it makes me wonder if it wouldn't be better to steam form thick veneer or similar to form the two halves. A lot less wood chips and dust to create. As long as the two halves when joined were stiff enough to stop the leather from flopping about when the sword wasn't in place (which seems to me to be the main role of the wood core). Just a thought.
Accidentally sanded into the scabbard core. Yeah but it's these little hands on mistakes at doing something that are all part of the learning process in becoming proficient!

Nice Job!

Bob
Greg Griggs wrote:
Lookin' good Grey! Can't wait to see the finished piece. You are bringing what you have done to Wichita aren't you? After all, it will be show-n-tell time. :lol:
Later,

-Greg


I will definately have it at Wichita. Depending on how fast the deliver truck gets here from Kansas City, I may even have leather on it. Speaking of which, did you use any glue to hold your leather on?

Patrick Kelly wrote:
Very nice and streamlined. With all of this scabbard business I'm begining to think I need to try it myself!

I think you should give it a go. If you have the patience to modify a rivetted mail hauberk (incorrectly, and then redo it correctly :p ), you have the patience for scabbard making. And if you don't have the tools, I think I know of a guy that lives in your area that might loan some to you. :lol:

Geoff Wood wrote:
When things get this thin, it makes me wonder if it wouldn't be better to steam form thick veneer or similar to form the two halves. A lot less wood chips and dust to create. As long as the two halves when joined were stiff enough to stop the leather from flopping about when the sword wasn't in place (which seems to me to be the main role of the wood core). Just a thought.

That might not be a bad idea, but I would have needed the sword present (can't have it because I live in Army barracks), or a mandril. That would have added up to more work, and work for which I don't really have the tools at the moment.

Bob Burns wrote:
Accidentally sanded into the scabbard core. Yeah but it's these little hands on mistakes at doing something that are all part of the learning process in becoming proficient!

Nice Job!

Bob

That's true. I have probably learned more in life from the things I have screwed up, than the things I have done right.

Thanks for the support!

-Grey
Greyson Brown wrote:

I will definately have it at Wichita. Depending on how fast the deliver truck gets here from Kansas City, I may even have leather on it. Speaking of which, did you use any glue to hold your leather on?


Grey,
Didn't use glue on mine although I've been told you can. Personally I liked being able to adjust the leather as I sewed it on. Hope to see yours mostly done in two weeks!!!

-Greg
I stand corrected; the scabbard will definitely have leather on it. In fact, it has leather on it right now. My stuff came yesterday, so I set to work on it last night. I made my pattern just a touch wide, so I ended up trimming the leather at the seam as I went. Unfortunately, I trimmed too much, so I have one six inch section where the leather does not meet. That was kind of disappointing, but the rest worked out well.

I had picked up some Tightbond Liquid Hide Wood Glue, so I went ahead and put a bead of that down the center of the leather. I don't know if it was really needed, but it didn't cause any problems, either. It was rather nice to have on the triangular flap at the mouth.

I only have four complaints with the scabbard as a whole. 1, the core does not match the sword's cross section as closely as I would like. As mentioned before, this was an unfortunately necessity in some ways. 2, the gap where I trimmed off too much leather irritates me, especially since I had more than enough to start with. 3, I did not think about compressing the leather like I should have, and I didn't really have any tools for that on hand. I managed to do well enough with a metal paint can opener. The front looks fine, but the back could have used a little more attention. Even then, it is not really visible, it's just something I know about. And 4, while stitching the triangular flap at the throat of the scabbard, I pricked my finger, and got a small line of blood on the front of the scabbard. I'm sure the leather dye will hide that well enough, but I still would have prefered it not happen.

I need to find some brown leather dye today (I think the local shoe repair place is my best bet), and I will take pictures once that is done. The locket and chape will probably have to wait a bit; I think it may soon be time to start in ernest on that Agincourt scabbard.

Thanks for all of the help and support I recieved.

-Grey
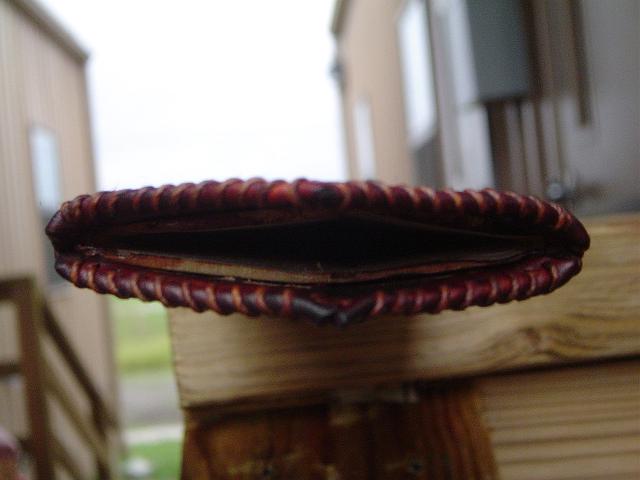
Pictures, as promised.

The dye covered up the spot of blood quite well, but I can still see it because I know what I am looking for. I think I am going to do something pretty simple for the locket and chape, but I am not decided. I need to do some drawings, and make a couple of patterns first.

-Grey


 Attachment: 26.26 KB
Scab_covered_throat.JPG


 Attachment: 22.16 KB
[ Download ]

 Attachment: 23.48 KB
[ Download ]
Looks pretty darn good to me, Greyson. What color of dye did you use? Considering you didn't have the sword with you to make the cross-section I'd say you did super. Once you get the locket and chape on it makes a world of difference on the finished piece, I found out. Anxious to meet you and see your handiwork next weekend. Hope the weather holds. (How did you like that mess yesterday? Blech!)

-Greg
Very nice! I like the overall shape as well as your color choice.
Greyson;

Good work, but the gap at the back would bug me also: Could the leather for an integral belt or baldric overlap that area and hide it ? Not sure if that would work as I'm just throwing the idea out there without checking on any pictures of scabbards.
( Too lazy, to go check before I write nonsense maybe. :p :eek: :lol: )

Nice rich colour for the leather and I guess the blood won't matter unless CSI ( The T.V. program ) gets involved. ;)


Last edited by Jean Thibodeau on Sat 23 Sep, 2006 6:30 pm; edited 1 time in total
Great work there!

I've been thinking about making a scabbard for myself as well. What kind of wood did you use for the core and what kind of chisels?
The dye is just "Dark Brown" leather dye from the local shoe repair store. I honestly haven't even looked close enough to tell you the brand, but the box is black and yellow. I don't think they will match perfectly, but I wanted to go with a dark brown, since that is the color of the grip on my Poitiers.

I thought about trying to hide the gap on the back with a second locket or something along those lines, but it would take a hideously wide locket. Besides, I have only found one example of a fourteenth century scabbard with two lockets. I think I am going to have to either accept the results, and call it a learning experience, or take the leather completely off, and start over. My goal was to make a functional, historically based scabbard, and I succeded at that, so that gap will just have to be there.

As for the wood and chisels. I used 1/4x4x4 poplar from Home Depot. The chisels were a set of four straight wood chisels in 1 inch, 3/4 inch, 1/2 inch, and 1/4 inch sizes. A shallow curved chisel would probably be nice for something with a lenticular cross section, but this scabbard is for a type XV sword, so straight worked just fine.

-Grey

Page 1 of 1

Jump to:  
You cannot post new topics in this forum
You cannot reply to topics in this forum
You cannot edit your posts in this forum
You cannot delete your posts in this forum
You cannot vote in polls in this forum
You cannot attach files in this forum
You can download files in this forum


All contents © Copyright 2003-2006 myArmoury.com — All rights reserved
Discussion forums powered by phpBB © The phpBB Group
Switch to the Full-featured Version of the forum