Tod ,
that is bloody amazing .
good job
Well I had a go turning a kitchen spatula into a katzbalger and this is what I came up with. I will show the scabbard progress in the next day or two
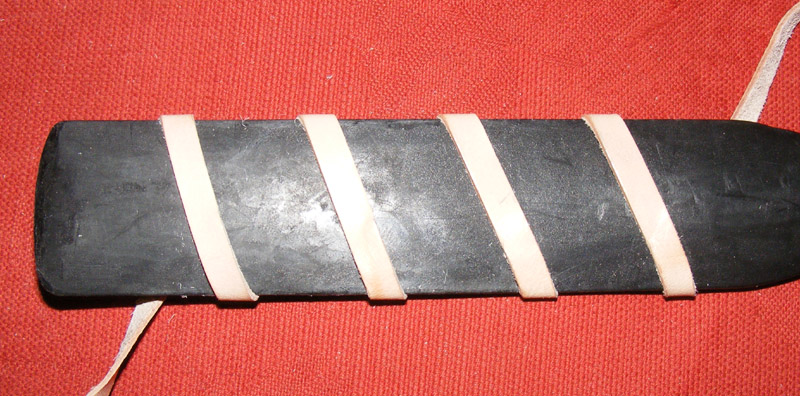
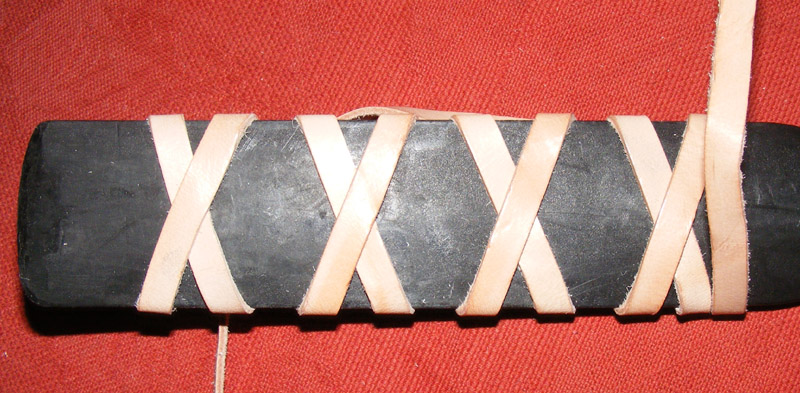
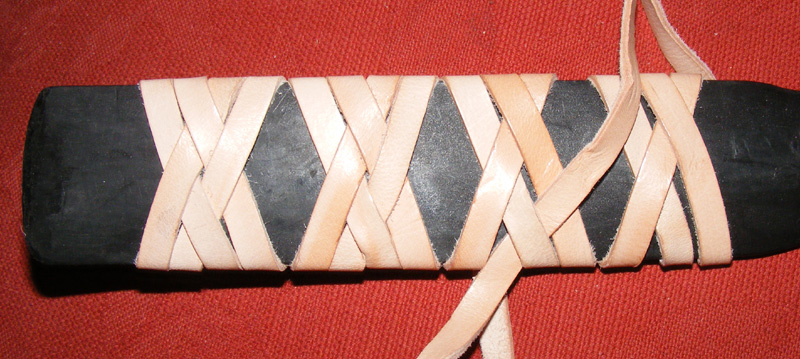
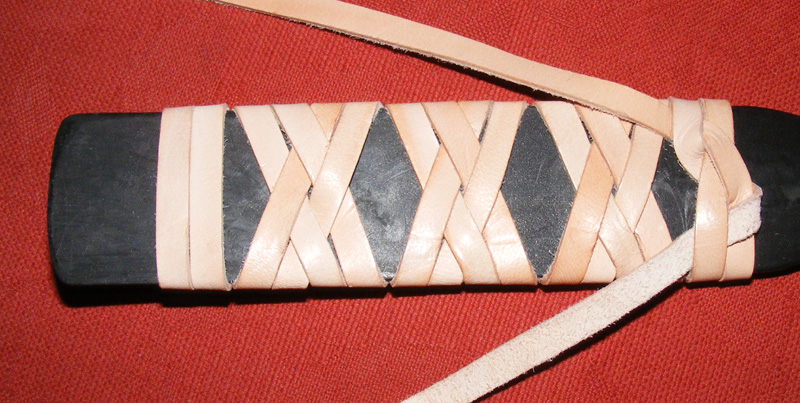
I think the pictures say as much as any words I can write, except for the nice part being it is only the last layer of 4 that needs to be interlaced to get the effect and that the distance between the initial turns needs to be 3 x the strap width. I think I also missed out a picture for the 3rd layer, but any of you interested enough to have a go will soon work out this missing step. - sorry.
Regards
Tod
 Attachment: 153.47 KB
 Attachment: 145.71 KB
 Attachment: 164.54 KB
 Attachment: 187.29 KB
 Attachment: 164.27 KB
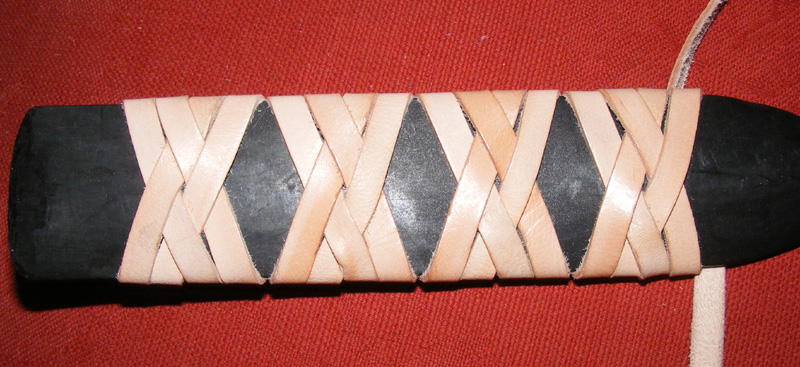
I think the pictures say as much as any words I can write, except for the nice part being it is only the last layer of 4 that needs to be interlaced to get the effect and that the distance between the initial turns needs to be 3 x the strap width. I think I also missed out a picture for the 3rd layer, but any of you interested enough to have a go will soon work out this missing step. - sorry.
Regards
Tod


Most helpful, Tod! Many thanks!
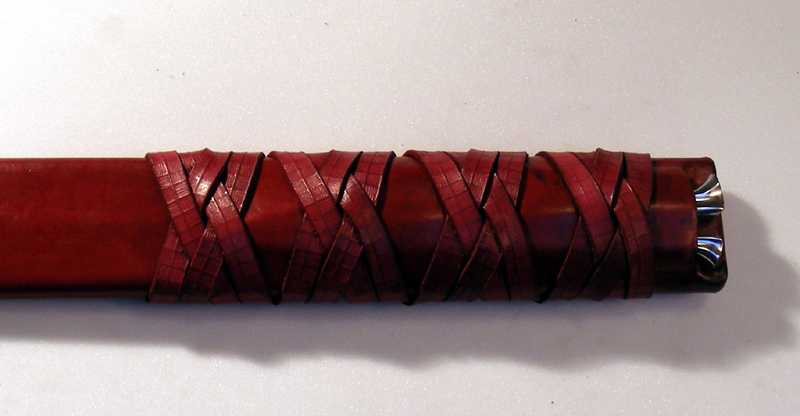
And here is the scabbard so far. The chape will be at least 2 weeks away I am told and the guard and pommel similar I think.
For the record it was 8'/2.4m of strap for this piece
Regards
Tod
 Attachment: 178.18 KB
 Attachment: 175.13 KB
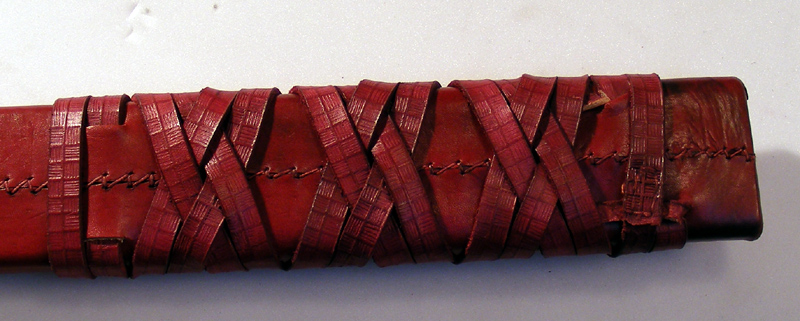
For the record it was 8'/2.4m of strap for this piece
Regards
Tod


loving it!!!
can't wait to see it finished
can't wait to see it finished
Tod, does that stitch that you use for the back of your scabbards have a name, or is it something you cam up with on your own? I've been staring at it for the past ten minutes trying to figure out how it's done. :confused:
Well this has been a while coming.
Thank you Anders for your patience.
The chape came back to me a little late after 3 or 4 weeks and can be seen in the following pictures. The pommel and guard were delivered in January to the casters and I was promised 3 weeks. After more mails and calls than I care to remember they came back in late May. This ridiculous level of lateness is to be fair unusual for them, but nonetheless it strained our relationship somewhat.
I was originally going to use a casting of the guard, but in the few months that passed I decided to use the master for this sword and so set about cleaning up the pommel casting and forming the guard.
I have not shown any pictures of the pommel pre-clean up, but it is basically a case of filing and sanding to shape.
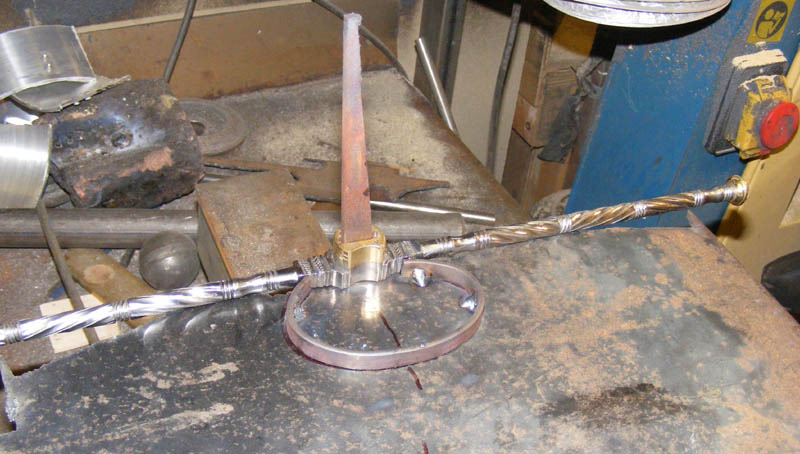
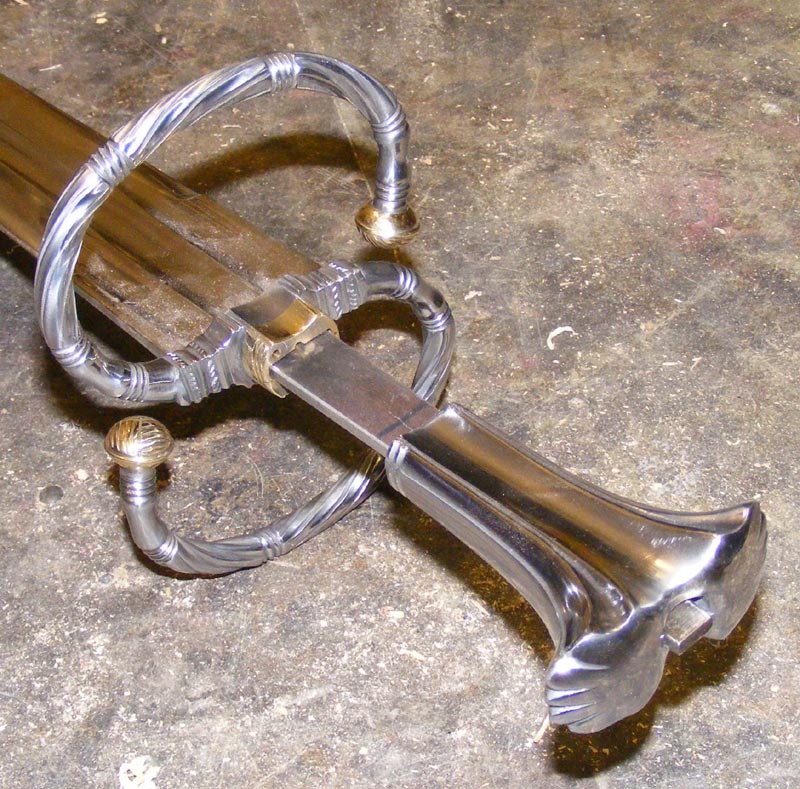
For the guard I took a flat plate and welded on a 'tang' on which to seat the guard. I then took some flat strip[ and bent it into the form the inside of the guard would take and welded this down to the plate, so that I had a bending jig for the guard. First 1 side and then the other of the guard were hot bent around the jig. The guard was now covered in scale so it was all cleaned down and polished up.
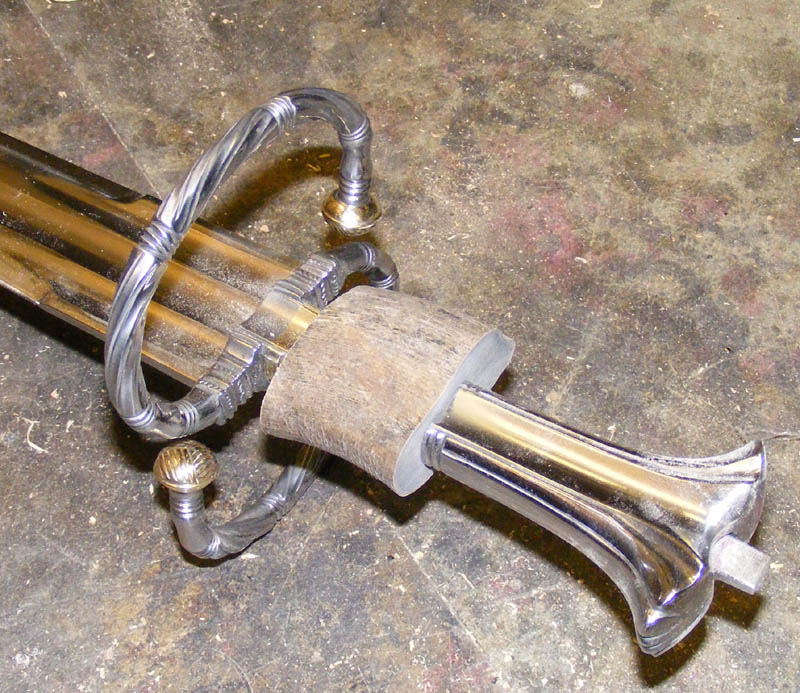
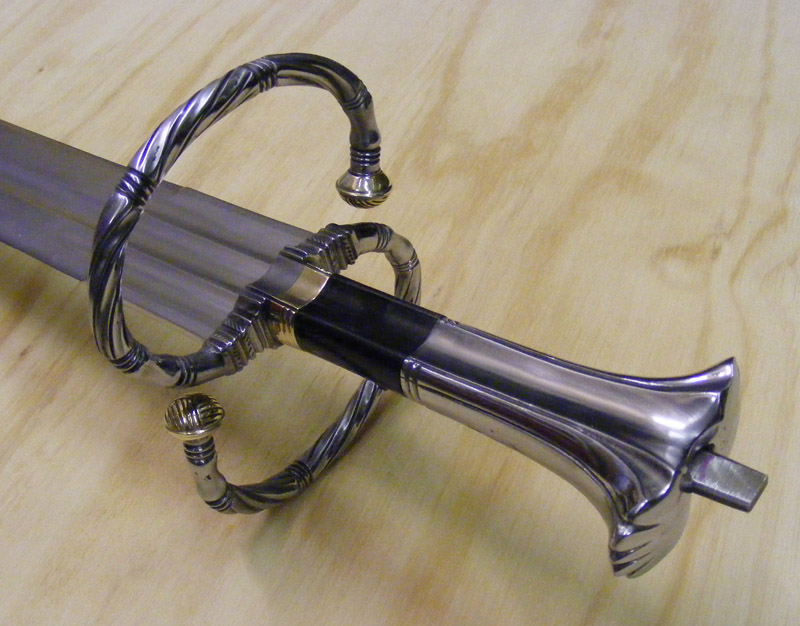
The guard was fitted to the blade and the pommel/tang was sized to slide down and stop at the right point. A horn block was fitted and shaped to size and all the components polished.
The sword has not been peened together yet, so the tang is showing.
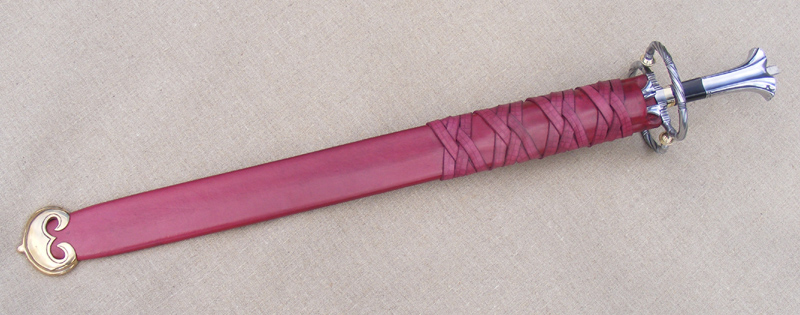
The chape has been fitted to the scabbard and so the sword is nearly complete.
When I have fully fitted the sword I will put some full stats up.
Regards
Tod
 Attachment: 147.84 KB
 Attachment: 188.84 KB
 Attachment: 163.27 KB
 Attachment: 142.14 KB
 Attachment: 164.88 KB
 Attachment: 166.24 KB
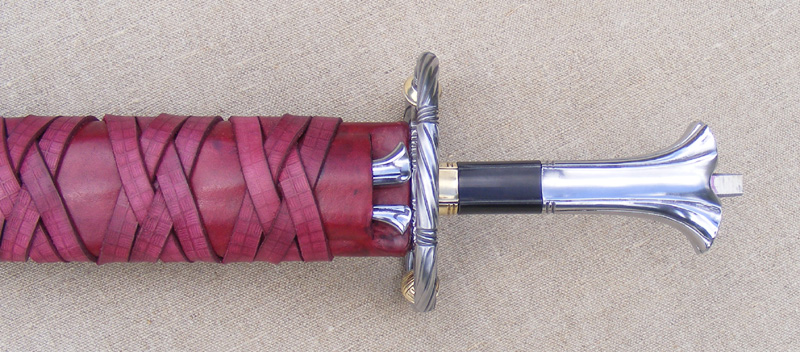
 Attachment: 175.98 KB
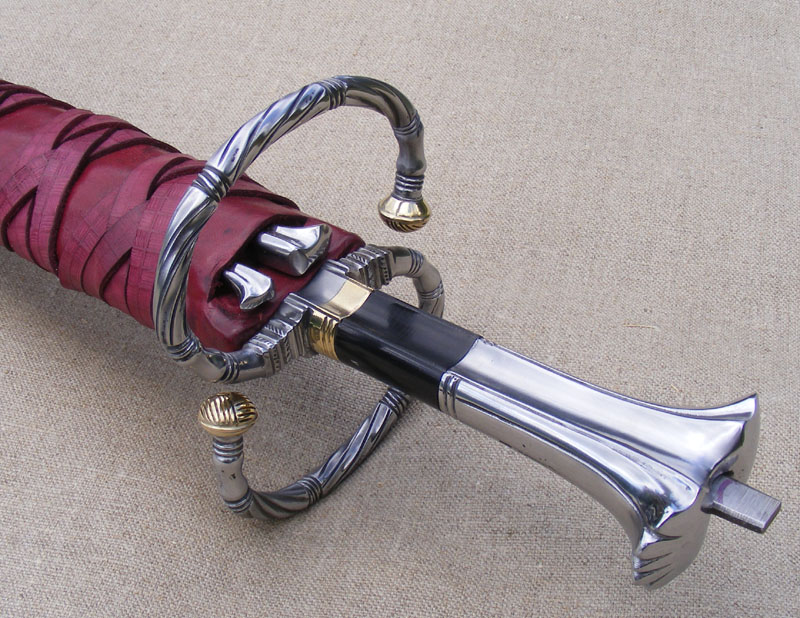
 Attachment: 191.73 KB
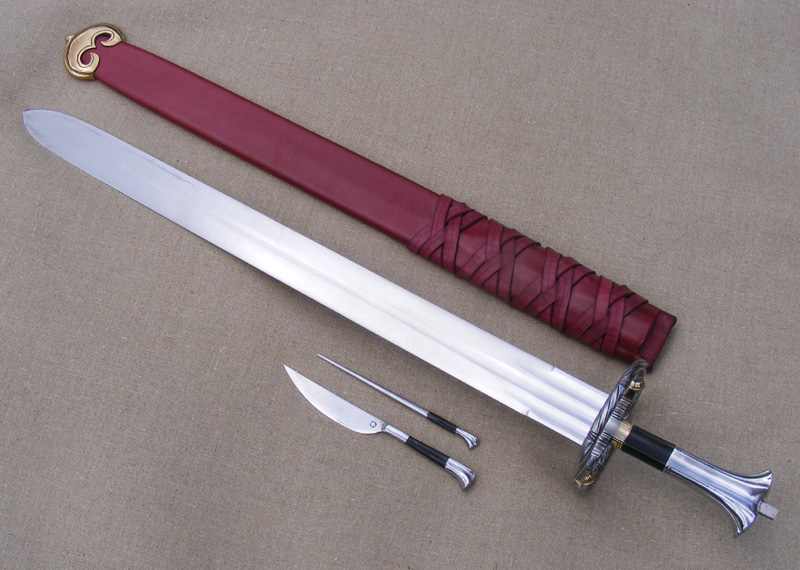
Thank you Anders for your patience.
The chape came back to me a little late after 3 or 4 weeks and can be seen in the following pictures. The pommel and guard were delivered in January to the casters and I was promised 3 weeks. After more mails and calls than I care to remember they came back in late May. This ridiculous level of lateness is to be fair unusual for them, but nonetheless it strained our relationship somewhat.
I was originally going to use a casting of the guard, but in the few months that passed I decided to use the master for this sword and so set about cleaning up the pommel casting and forming the guard.
I have not shown any pictures of the pommel pre-clean up, but it is basically a case of filing and sanding to shape.
For the guard I took a flat plate and welded on a 'tang' on which to seat the guard. I then took some flat strip[ and bent it into the form the inside of the guard would take and welded this down to the plate, so that I had a bending jig for the guard. First 1 side and then the other of the guard were hot bent around the jig. The guard was now covered in scale so it was all cleaned down and polished up.
The guard was fitted to the blade and the pommel/tang was sized to slide down and stop at the right point. A horn block was fitted and shaped to size and all the components polished.
The sword has not been peened together yet, so the tang is showing.
The chape has been fitted to the scabbard and so the sword is nearly complete.
When I have fully fitted the sword I will put some full stats up.
Regards
Tod


I'm incredibly envious. That is stunning. I have been on a landsknecht kick for the last two years and this fits that bill perfectly. Very nicely done, Tod.
Fantastic artwork, it leaves me quite speechless. Not my time period, but extraordinarily beautiful nonetheless.
Kind regards,
Mark
Kind regards,
Mark
I think I may have just soiled myself! :D Utterly stunning.
But what you really need in your portfolio, Tod, is a nice mid-16th Century basket-hilt! ;)
But what you really need in your portfolio, Tod, is a nice mid-16th Century basket-hilt! ;)
| Glennan Carnie wrote: |
| I think I may have just soiled myself! :D Utterly stunning.
But what you really need in your portfolio, Tod, is a nice mid-16th Century basket-hilt! ;) |
Hmmmmmm ..... hope that is metaphorically soiled yourself but I have to agree and rush some place made out of white porcelain urgently..... also metaphorically ! ( Meant in a good way as one wouldn't normally use this as a compliment. ;) :p :lol: ).
But back to a more conventional way of giving praise: I'm really impressed by the whole sword but the hilt geometry and sculptural qualities are so rich that they couldn't be improved by using gold or diamonds ! It is just so much visual eye candy that one needs insulin shots just looking at it " SWEET ". :D :cool:
I was eager to see how you'd bend those quillons without wrecking that beautiful filework. The jig is an impressive solution and quite beyond my current skill set. Can you tell us why you cast straight and then bent rather than just bending the master and casting it that way? Gorgeous work!
Once again, you've managed to make me enthusiastic about a style I previously had little interest in. Jaw-droppingly beautiful work.
I truly enjoy the opportunity to see so much of your work. It seems to me that with each successive piece you out do yourself. I've never been the biggest fan of the sword type before, but I am quite the fan of this one. I love it! Well done, Sir.
WOW! I havn't much more to add. You know I'm a fan of your work. I not only want this set: i want to be a landsknecht now !
Congratulations !
David
Congratulations !
David
Hot darn Tod,
That's just. . . wow, and I don't even have a real collection interest in katzbalgers! That's beautiful indeed!
That's just. . . wow, and I don't even have a real collection interest in katzbalgers! That's beautiful indeed!
Thank you for the positive comments.
Sean Flynt wrote
I decided to do this (wrongly as it turned out) because a casting with this level of detail will always need cleaning up and I thought this would be easier done straight. I have now changed my opinion.
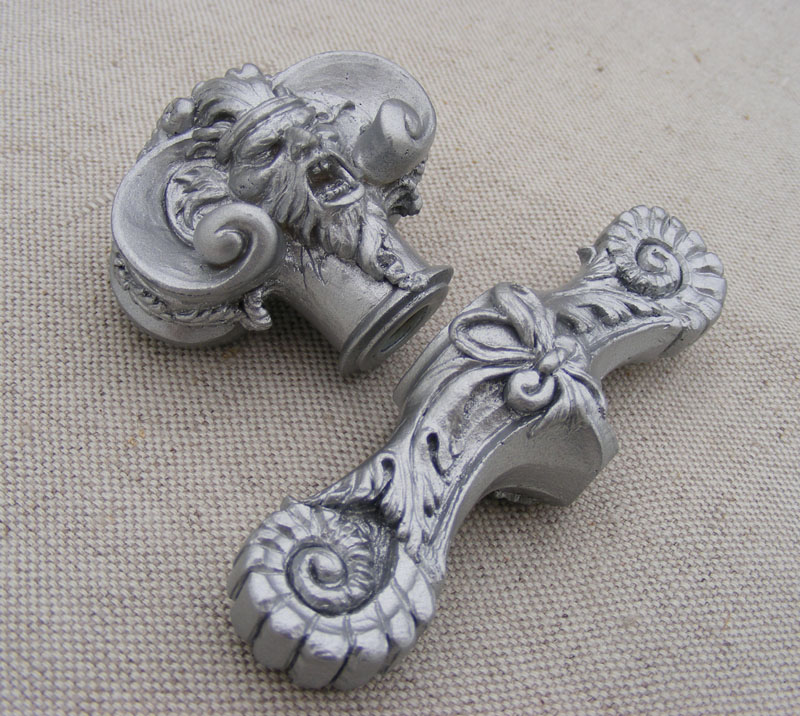
I also have some new pictures of the dagger components. I originally started this sculpt myself but after a few hours it was quite clear I didn't have the skill so I turned it over to my friend Matt who has done an amazing job.
The original pictures came from a catalogue picture by Albert Durer I believe and the form is often seen in period depictions of Landsknecht and I also recently saw a picture of Henry VIII wearing a very similar one.
This piece will go off to the casters next week to be made in bronze and I can't wait.
Tod
 Attachment: 200.8 KB
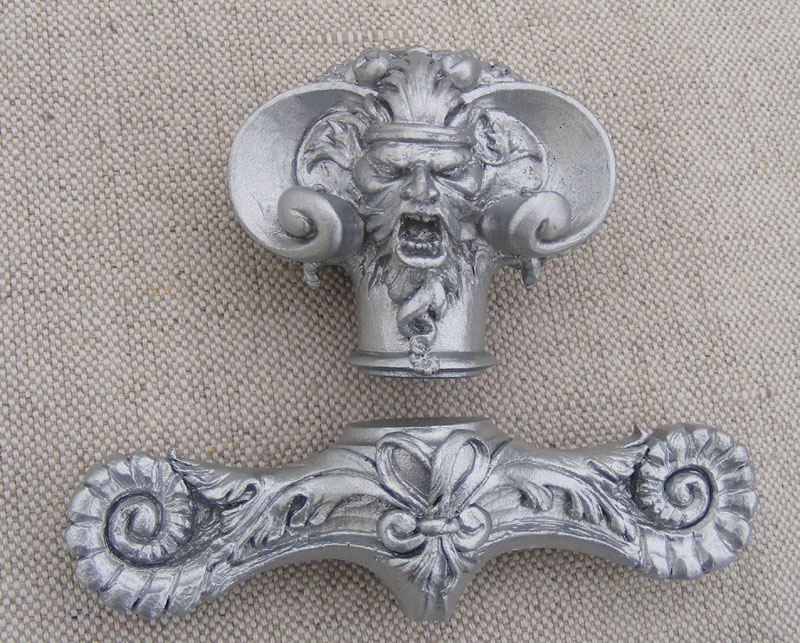
 Attachment: 188.86 KB
Sean Flynt wrote
| Quote: |
| Can you tell us why you cast straight and then bent rather than just bending the master and casting it that way? Gorgeous work!
|
I decided to do this (wrongly as it turned out) because a casting with this level of detail will always need cleaning up and I thought this would be easier done straight. I have now changed my opinion.
I also have some new pictures of the dagger components. I originally started this sculpt myself but after a few hours it was quite clear I didn't have the skill so I turned it over to my friend Matt who has done an amazing job.
The original pictures came from a catalogue picture by Albert Durer I believe and the form is often seen in period depictions of Landsknecht and I also recently saw a picture of Henry VIII wearing a very similar one.
This piece will go off to the casters next week to be made in bronze and I can't wait.
Tod


| Leo Todeschini wrote: | ||
|
Sean Flynt wrote
I decided to do this (wrongly as it turned out) because a casting with this level of detail will always need cleaning up and I thought this would be easier done straight. I have now changed my opinion. Tod |
Maybe you could expand on this as to why you now think that casting in the final shape is a better idea ?
Here are a few guesses:
A) The file work when bent into shape will close up on the insides of the curves and stretch/expand on the outside of the curves and this may distort the file work ?
B) The file work may cause uneven bending or difficulties in controlling the curving process ?
C) I could be completely wrong in my guessing. ;) :lol: :cool:
Although some of the complex spiral file work, while complicated enough when done on a strait piece, I can hardly imagine how those spirals could be done with a file on a curved rod ? Some of the other file work like the closely spaced " separators " between the spirals should be easier to do on an already curved quillon ?
| Leo Todeschini wrote: |
|
This piece will go off to the casters next week to be made in bronze and I can't wait. Tod |
I bet. This looks great! What's the medium used? Super sculpey, painted?
Another one of your stuff I'm definitely looking forward to see.
J
Absolutely wonderful work displayed on your latest creation.
The attention to detail, and the resultant product simply stuns me.
The attention to detail, and the resultant product simply stuns me.
Page 2 of 3
You cannot post new topics in this forumYou cannot reply to topics in this forum
You cannot edit your posts in this forum
You cannot delete your posts in this forum
You cannot vote in polls in this forum
You cannot attach files in this forum
You can download files in this forum
All contents © Copyright 2003-2006 myArmoury.com — All rights reserved
Discussion forums powered by phpBB © The phpBB Group
Switch to the Full-featured Version of the forum
Discussion forums powered by phpBB © The phpBB Group
Switch to the Full-featured Version of the forum