All of this started when my Schola group leader gave me a old Churburg-type breast plate, maille skirt, greaves, and spaulders. He had worked up the pieces years ago, but soon found himself buying higher-line armor. These ended up unintentionally rusting in a trunk in his basement for a period of years. He gave them to me to see what I could do with them. So, I get home and end up with a partial, unstrapped, rusty harness in a box. I was grateful at the chance to have this stuff to experiment with.
This gave me the chance to begin creating an inexpensive 14th C. transitional harness - meaning that will not be 100% on par for the period. My goal is to create a historically-inspired suit of armor for very little investment; just as a sell-sword or lower man-at-arms may have crafted or salvaged from various components that came from slightly different time frames/regions. The harness will be used for light contact en arma fighting, so it will be engineered to be extremely light weight and comfortable to move in.
I began with these:
First came the initial clean up and strapping. I began work with a sandblaster first, but did not like how the finish was turning out, so I went back with varying grits of sandpaper to restore a bit of shine. There were a few places with pitting, so I had to take a wire brush to tem to get them clean. A few dark places remain, but for now, all the orange rust is off and it has a semi-finished look.
Straps were added easily enough to the spaulders and greaves. I decided to use a 1pc greave instead of a complete one for comfort and safety purposes.
Next came a GDFB linen/wool gambeson that I converted into an arming jacket. I took the stock gambeson and riveted thick arming points onto it using thick leather. Each point is was cut, dyed, and hardened. Each has a back plate riveted onto it for added strength. Out of period, yet very, very durable - each will take a tremendous amount of stress without harming the jacket as a whole. I added points for the spaulders, upper cannons, elbows, and legs.
I tried on the arming jacket, cuirass, and spaulders to check for fit. Very flexible and unencumbering as of right now. I could easily touch my toes. Forgive the Larry The Cable Guy Goes to Camelot look, I forgot I had on a real tree hat when taking the photos.
Gauntlets came in today. I ordered some simple GDFB mittens from my wholesaler. They were only $64.00, but they will work out nicely for this experimental kit once I have them gloved and strapped properly:
Great bascinet, arms, legs, maille skirt/apron are incoming. I will update as I continue progress.
Last edited by JE Sarge on Sun 05 Apr, 2009 5:23 pm; edited 2 times in total
Sarge,
Man that's looing great. What a great gift! I like what you've done for an arming jacket, great Idea. I'm putting together a late 14th century rig myself, I've had Nute Scott of Armour Gnomes build my Churburg breast plate, vambraces, full legs with greaves. my spaulders and sabatons are still in the works, and I've recently went with the GDFB hourglass gauntlets which I sewed my old army work gloves into, and they turned out great. I'll probably use their houndskull as well. What site did you order your arming jacket from? Well your progress is looking great, I hope you will continue to post your progress here.
Thanks for the compliments, Dustin. The gambeson is actually offered by GDFB. It's a wool outer with a linen inner. In the photos, it looks like a brown tunic, but its construction is a little more substansial and capable of holding a fair amount of weight.
Updates will be forthcoming for those interested! :D
I just got the arming jacket finished. I added re-enforcing grommets to all of the stitched eyelets for more strength, then added eyelet lace points around the mid-section to attach my riveted aluminum skirt I ordered from Ice Falcon. This will keep it from sagging below to breastplate. Right now, I have the cotton brass-tipped cords set to secure the armor, and on the remaining points, I am using some paracord I had in a duffle bag. I'll make some nice brass tips and laces later, but this will serve to mock it up for now.
This jacket was a bear. I can see why vendors charge $300+ for these, I probably put about 6 hours of work into it total.
The klappvisor and aventail should arrive late this week or early next week. The helmet will prove to be a bit of a project unto itself. Still waiting on the arms and legs to arrive.
More updates forthcoming for those interested.
Progress continues steadily on the project. I was busy this week, so I did not really get much done until today when my helmet and mail skirt arrived.
I had to change my helmet order at the last minute for a few reasons. One is that the great bascinet I ordered was out of stock at one vendor and I additionally found out it was not the gauge steel I needed. Rather than order it, I went ahead and order the GDFB Klappvisor from my distributor.
The mail skirt came in from Ice Falcon and I am pleased with the quality. It arrived a few days before the aventail is due to show because I actually placed two seperate orders for stuff from him. He is a super-nice guy, gave me a call and everything. I will return to Ice Falcon with business in the future. I spent about 10 minutes lacing the top of the skirt with 1/4" latigo so that it can be secured to my arming jacket. This was probably the easiest part of the project.
I have slightly mixed feelings about the GDFB Klappvisor. Right out of the box, I had to do some minor modifications. The retaining thumb screw that holds on the visor was really loose and needed to be repeened from behind so that the visor would not wobble left and right. Additionally, the visor still wobbles side to side a bit because the hinge is slightly loose in its mount. I will work on this later. Overall, the helmet is as thick as stated (14ga), solid, and the visor offers great visibility. It's lined with felt, which will be coming out when I get ready to do the liner. I am a little worried about my big nose impacting the visor, but we will wait and see how it fits once lined where I can get my head a little further back from the faceplate.
On to the aventail: Taking some newspaper, I cut a template for the aventail mount, traced the drawing onto leather, then cut it out, punched it, and mounted it. It's still damp, so I laced it on and am allowing it to dry under a fan to shrink, conform it to its final shape. This might result in a little rust on the helmet edge, but since its only going to be a couple hours drying, it shouldn't be an issue. I'll reoil the whole helmet when I am finished.
I am waiting on my arms/legs and aventail to show. When it gets here, I will stitch it onto the above mount then have the helmet complete sans liner.
I'll repost as I progress.
Ok, this is not a process I wish to repeat again...it was the most difficult challenge with this harness yet. The aventail arrives from Ice Falcon today. Mounting the aventail to the helmet was an absolute bear.
I removed the leather strap after it dried and punched it for attaching the aventail. I then dyed it, finished it with sheen, and put it onto the helmet, and laced a leather thong through the vervilles.
Initially, I had planned to stitch the aventail on with saddle sinew. I tried this, and for some reason, I just could not get the spacing correct. It made for a really non-linear look. So, I then used butted maille rings to attach it, which made it even, but it gives it a funky little flair on the edge of the helmet. I am beat for now, so I will leave it and come back to it later to see if the leather relaxes a little bit. It does not really look bad as is, but its not quite the way I wanted it to look. Also, the opening on the GDFB Klappvisor is more squared than rounded, so it looks a bit different that the effigy pictures in the face. Not exactly perfect, yet it will pass.
Someone should have told me how hard mounting an aventail was. I have blisters on both hands from working with a pair of pliers for nearly three hours. ;D
Here is the completed (for now) helmet. The black string around my neck is what I used to keep the visor closed for the picture. It will eventually be replaced when I can think of something better.
Hi Sarge,
Mounting a aventail is a real bear, thought somebody should warn you before you start... woops, too late ;)
I used heavy waxed linen thread on mine.
Nice work so far.
After looking at all of your swag that you've been tweeking,. I think you should rename your thread to "Making a late 14th century transitional harness" as you've got almost all 14th century armour there. That's they type of harness I put together a few years ago myself.
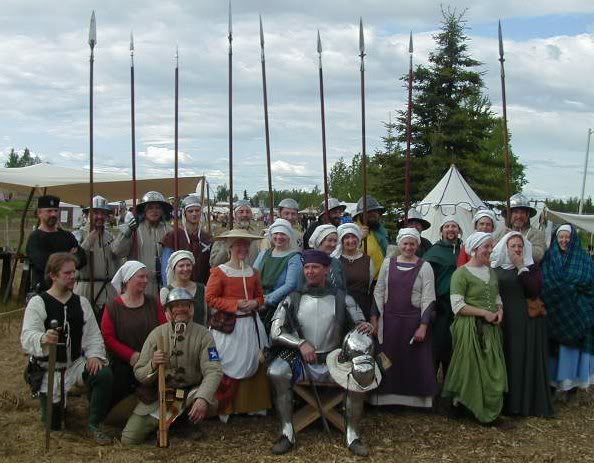
Here is a photo from 3 years ago (Me on the right) sans my maille aventail and surcoat.
Cheers,
David
David,
Thanks for the info and complements. I've admired your kit from the posted pictures and almost did a padded aventail as you did with your harness. This is all new to me, so its a different experience which is challenging at points, though an enjoyable one. I am learning alot though the process - much of which is still trial and error.
I finished the helmet today and made a securing strap for the visor (to keep it shut) and installed the chin strap. I also put a few more holes under and to the side of each occulus to add to my field of vision. Right now, I am using the pre-installed wool liner and a removable padded arming cap - though I have a thicker helmet padding on order from Steel Mastery, I'll make up my mind when it arrives given how much room my big melon has in the helm. Here is a little better photo of the completed helmet.
Jonathan
Looking good. Although I would say if your study group leader was any kind of guy he would have knocked the rust off of the steel for you :)
Really though great work. I'm really looking forward to seeing it all together. Shaping up to look very nice.
Bryan
Looking good. Although I would say if your study group leader was any kind of guy he would have knocked the rust off of the steel for you :)
Really though great work. I'm really looking forward to seeing it all together. Shaping up to look very nice.
Bryan
Bryan...nothing some 400g and elbow grease wont handle!
Of course, you have my thanks for giving me this stuff to get started on my first kit and much apperciation for your guidance as our Study Group Leader...and my gratefulness for being the the very guy who should have knocked the rust off to begin with! :lol:
The arms and legs came in from Schmitthenner Armory today. I dry fit it before wet forming the leather. I can tell that I am going to have to remove a few rows from the aventail because it hangs too far down.
This is everything thus far sans helm, gauntlets, and gorget. Once I get everything formed up and strapped to fit properly, I'll post again.
Jonathan
Lookin good. Still want to see the whole kit mit helm and gauntlets
BTW the two straps just below the skirt just have to be trimmed :p
Bryan
Lookin good. Still want to see the whole kit mit helm and gauntlets
BTW the two straps just below the skirt just have to be trimmed :p
Bryan
When I wet form the leather, I'll trim everything up properly. Also going to be taking about 6" off each shoulder strap and about 4" off the aventail. I don't want too much flapping around! :lol:
Page 1 of 1
You cannot post new topics in this forumYou cannot reply to topics in this forum
You cannot edit your posts in this forum
You cannot delete your posts in this forum
You cannot vote in polls in this forum
You cannot attach files in this forum
You can download files in this forum
All contents © Copyright 2003-2006 myArmoury.com All rights reserved
Discussion forums powered by phpBB © The phpBB Group
Switch to the Full-featured Version of the forum
Discussion forums powered by phpBB © The phpBB Group
Switch to the Full-featured Version of the forum