Very very nice work and if you had told us that a maker with many years of experience had made it I would have believed it. ;) :lol: :cool:
Yeah, sharpening can be worrying using a belt grinder: Much too easy to take a big bite out of a blade or overheat the edge if one uses too much pressure or stays on the same spot for too long.
Low pressure on a slack belt sort of works best: I have sharpened a Del Tin this way or at least ground away the majority of the material but left the final sharpening to doing it by hand i.e. just used the belt grinder to save some time although hand sharpening can be done if one is patient and it's a lot easier to avoid an uneven sharpening job as one is going slow and only taking very little material off at each pass with the sharpening implement ( I usually use diamond hones ).
A sword is much more difficult to sharpen on a belt than a knife because each pass should be done smoothly and over a long blade while keeping the angle and width of the bevel consistent over the whole length of the blade.
I only have limited experience doing this myself but enough to know how easy it is to mess it up. ;)
( Edited: Fixed a couple of typos ......" Low " instead of " long pressure " and an " or " to replace and erroneous " of ".
Always notice these typos the next day and they are the kind that a spellchecker won't help you with. ;) :eek: :lol: )
Last edited by Jean Thibodeau on Mon 23 Aug, 2010 9:39 am; edited 2 times in total
Hey David,
Cheers mate, and yes, cross and pommel have just been passed through the tang in order to shape the wood grip and tweak some minor details. It will take a few blow of a hammer to set everything in place.
Thanks for your comments Jean. This is all very encouraging. Regarding the sharpening with he belt grinder, I was not so worried about overheating the edge, as I dipped the sword in a water bucket as I went along. As you said, I was worried about consistency along the edge (remove too much here and not enough there). Knowing when to stop is an issue..("do I see a burr along the edge?" (after 5minutes) "what is a damn burr anyway?" "this thing isn't sharp at all"( probing with your finger) "Wrong, it is!" (cutting your finger)... :) Anyway I spend a lot more time blending that edge afterwards so I'm not sure this is the best way to go for me...I'll give a go at stones soon.
Cheers,
J
The sword is now fully assembled.
Generous amount of epoxy have been applied in the guard socket, grip and pommel, then it was cold cold peened.
Mushrooming the peen was much easier than anticipated, however flushing it invisible was a bit harder. In fact, I asked Owen for a bit a welding once the peen was fully flatten and sanded because too much of it was still showing, and then sanded the top again, which reduced the visible part even more (but still left a tiny bit visible..might correct that when I can weld stuff myself!)
I was almost ready to move on to the grip work, but the handling of the sword was not as good as it should have given the overall weight and balance...the grip was not comfortable for I had sanded too much material (profile was correct on one dimension only, but it was flat on both sides (that's what happen when you find out what a belt grinder can do...after shaping scabbards core and grip with a wood rasp...you might get over enthusiastic...). Anyway the thin guard made things tricky as the wood grip had to be slightly thinner to accommodate a layer of leather (not to mention cord underneath in some cases). So I sandwiched the existing grip with two thin panels of hardwood, glued with epoxy, and filled the gaps with wood paste. After that, I had to reshape the all thing again...but it was well worth it because now that the grip has some thickness at the centre, the sword handles beautifully. I did of course scratched pommel and guard while filling the new grip , so I have to polish it again...the leather will come right after...then onto the scabbard.
Pictures below...comments most welcome!
Cheers,
J
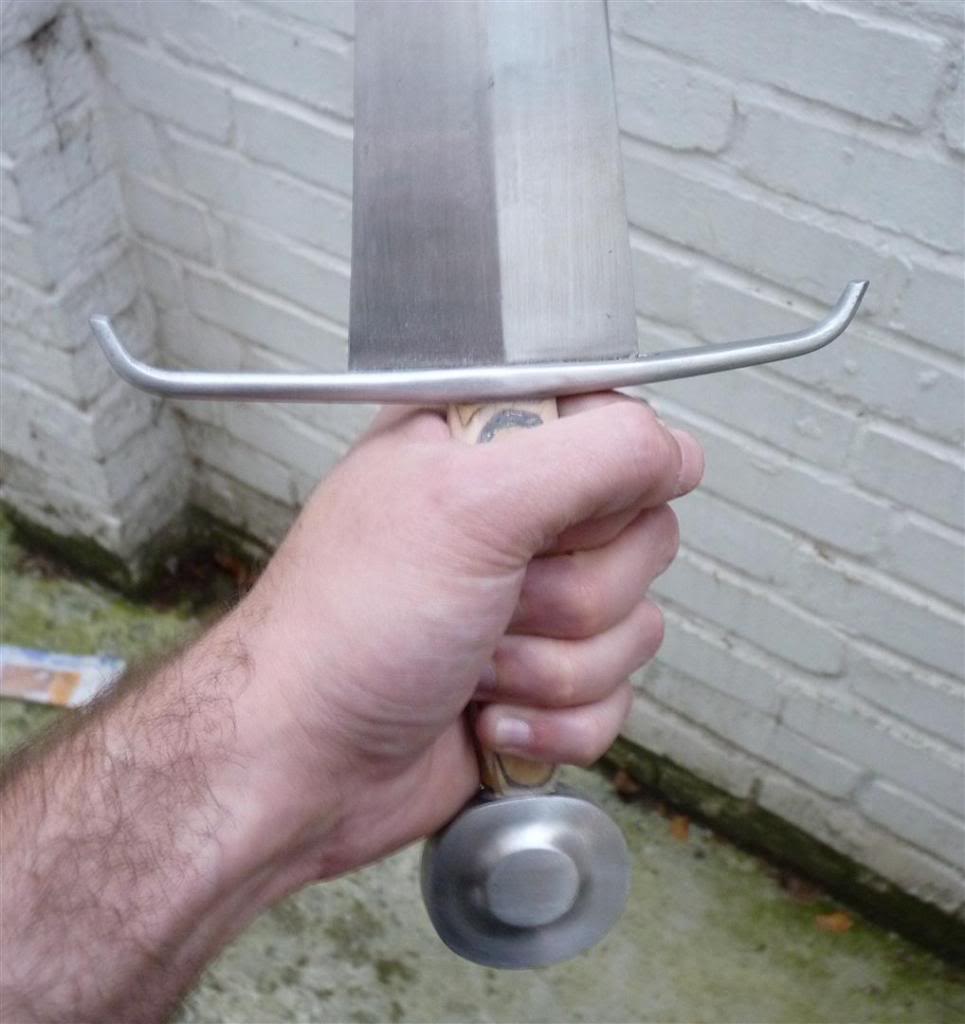
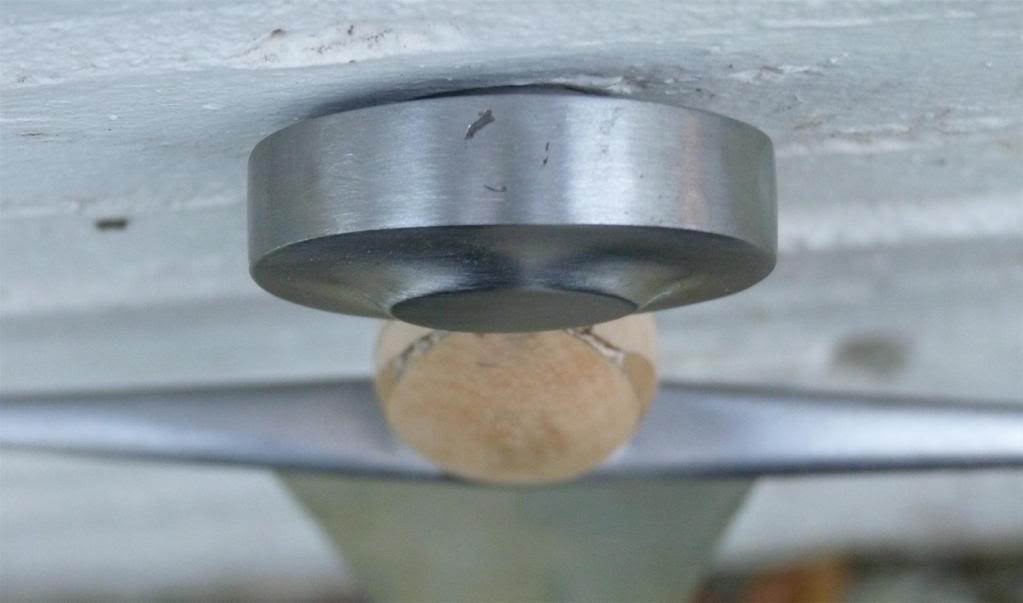
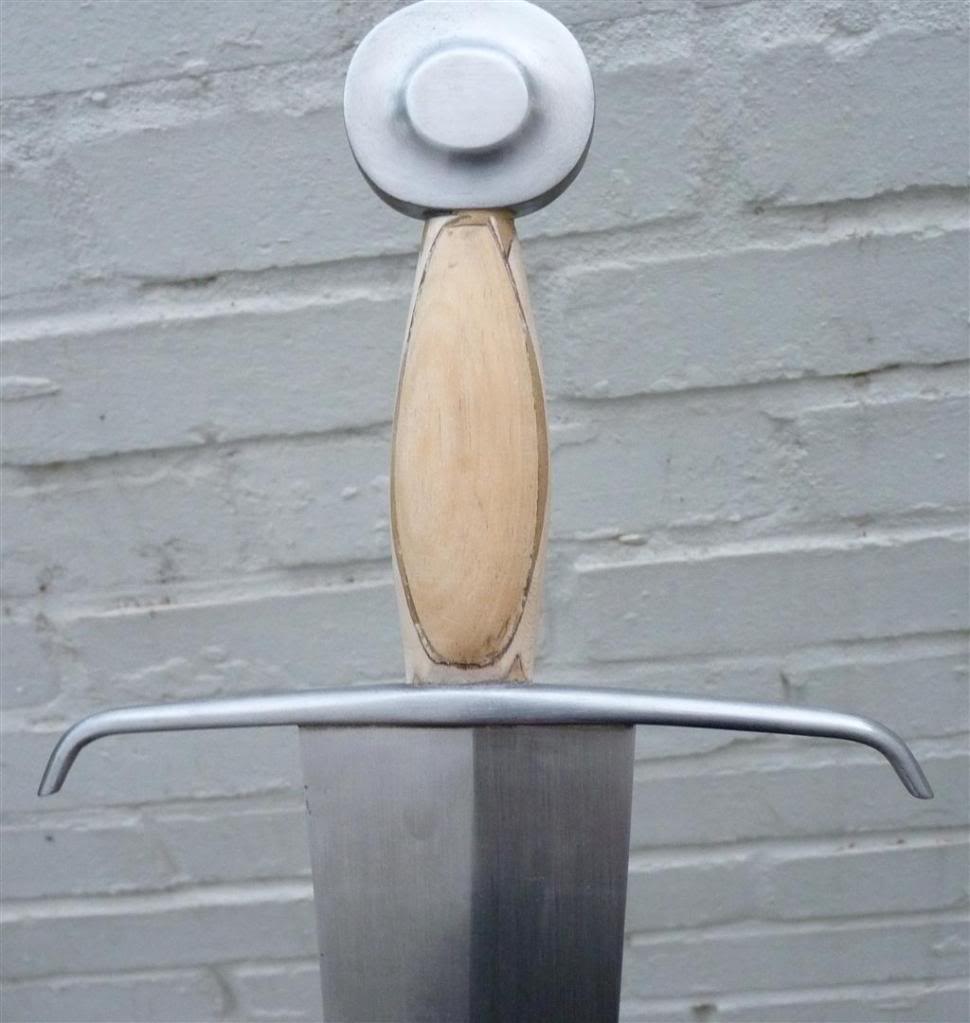
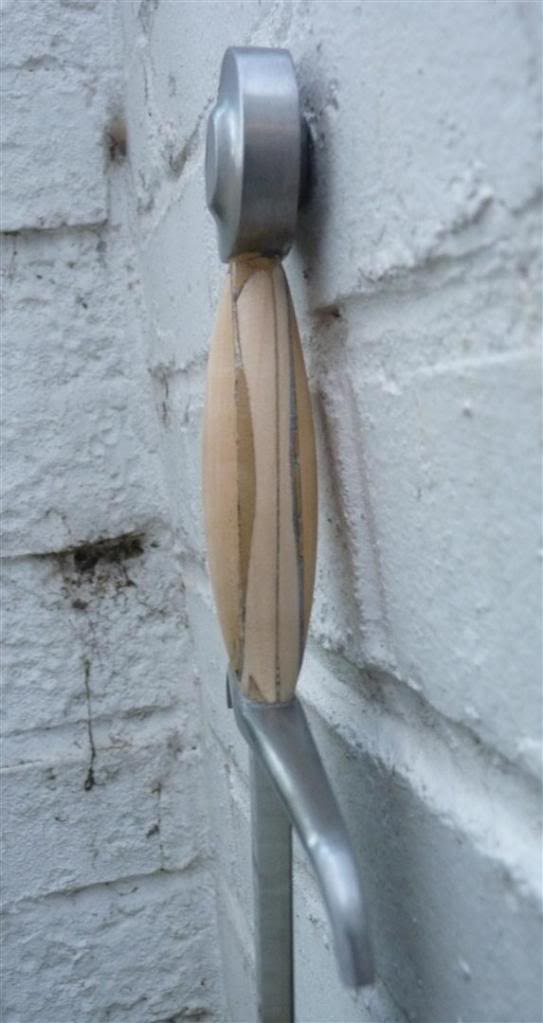


That looks really good. :D :cool:
How wide is the blade at the guard ? It looks to me a bit over 2 1/2" wide at least.
For the peen I think that making it invisible is an option but another might have been to leave the tang a bit longer and peen over a peen block or leave the peen proud but facetted by hammer strikes.
In other words hide it perfectly by blending it in with the pommel or make it obvious.
In any case in period I don't think they would have consistently worried about the peen except that it be a good peen. ;)
I like the volume and shape of the handle, Do you plan on having risers on the handle ? Probably not one in the middle because it would look odd with the shape/bulge of the handle, but a narrow riser at the top near the pommel and near the guard might be an option.
Oh, a wire wrap could be an alternate way to finish the handle.
Just thinking out loud: I'm sure that whatever you do will end up good looking and functional.
Hi Jean,
Thanks again for your feedback :)
I don't know know exactly how wide the blade is at the guard but it is a few millimetres larger than the 2.75 inches wide poplar boards I purchased for the scabbard (bravo...well planned). I like that feature on the original, it gives a very aggressive profile to the sharply tapering blade.
My first idea for the peen was in fact to make a peen block, simply because the original sword features one. But I was running out of time at the workshop because I was messy with he epoxy and some got on the blade and I was too slow to wipe it away...as a result I spent an hour removing it with elbow grease and solvent. On the top of that, I shaped the very end of the tang in a circular shape, so that it fits the pommel hole precisely....so my rectangular peen block would have been hard to secure in place (it would move around the tang axis, unless I reshaped the very end of the tang squarish, and file the inside of the peen block the same way...). Too much hassle really, not too mention that (like many here) I am probably too influenced by the Albion neat finish, and a flushed pommel such as the one featured on my Crecy was too tempting, but you are definitely right: medieval craftsmen would not have mind a visible peen, and museum swords definitely attests of that.
Regarding grip design, I am always tempted to go "albion next gen style"...but at the same time I have done most of my grips this way and may want to try something else (stitched, tooled...not sure yet). In any case I will try to balance aesthetics and function, so I might shave a bit more here and there. A good way to test, once the risers are placed, is to clamp the sword flat on the side of a table, leaving the hilt on the side, wet your leather and press it down the grip. I will show a preview of the finish grip, as far as raisers and overall volumes are concerned.
More to come in a couple of days.
cheers,
Julien
Julien;
For messy epoxy try this: If you just smeared some epoxy on the blade or where you don't want it just use rubbing alcohol before it has had time to set and I find that I can remove it very quickly.
Also good to clean one's fingers when they get messy and sticky with epoxy resin and before touching anything else that will also become sticky.
Anyway, seems to work for me but just try it out on a piece of scrap steel and let me know if you find it to work as well as I do.
Oh, you don't want the rubbing alcohol to get at the epoxy that you do want to hold and this seems to work best if done without any delay: Mess up / Clean up within seconds.
Often I will put too much epoxy on something or in a hole and when I join whatever I want to join surplus epoxy oozes out I then use an alcohol soaked wet wipe ( better than paper tissue that will leave paper fibers stuck on everything ) and wipe off the run off. ( Note a wet wipe that has dried is better than one fresh and still full of whatever they put on wet wipes. ;) :lol: )
| Julien M wrote: |
| Hi all,
I signed up a while ago for the 7 days sword course lead by Owen Bush. |
Julien,
That is just awesome. I love the photos, especially the one of burning the tang through the handle. I need to find a class like this in the U.S. I have a tendency to struggle along on my own, but I know the value of one class. A good teacher opens doors like nothing else can do.
Thanks so much for posting all this info.
this is coming along very nicely. I personally thin there is something appealing about the peen not looking 'perfect', it makes it look somewhat more real.
Keep up the good work.
Dan.
Keep up the good work.
Dan.
This really is very nice work. I taught myself how to stock remove blades and I wish I would have had a teacher like you do, would have saved quite a bit of trouble. To make a sword as good as your seems to be took me about one year and you guys did this one WEEK. Congrats, really. No teacher can make you do that if there's no skill or talent he can form. Can't wait to see the finished sword and maybe a cutting vid?
Btw, how exactly did you make the slot in the guard for the blade's shoulders? Dremel? :cool:
Btw, how exactly did you make the slot in the guard for the blade's shoulders? Dremel? :cool:
Forgot to ask: do you know how the blade was tempered (degrees and time) and how hard it is now?
Thanks Lukas!
The slot guard was indeed made using a Dremel. Concerning the heat treatment, that's the one part I still don't feel confident about after this week of intensive training. Owen supervised it all and commented the steps as we went along, and if I was close by and did actually quenched the blade in oil, I cannot say I did the heat treatment myself. I'll probably ask Owen for more explanations as soon as I have another blade to heat treat.
Cheers,
J
Thanks, Julien. I normally make the slots with the angle grinder but it's very easy to mess up because only one single stroke not perfectly on line and there it goes, your beautifully crafted guard. A dremmel probably isn't as risky since it doesn't remove metal that fast.
Concerning heat treat, you're right, this is the most complex part of sword making and takes the longest to master. I heat treat only the shorter blades myself and have a swordsmith close to my house heat treat everything over 15". It is pretty expensive, he charges 60 Euros per blade but I've never seen such a good heat treat on a sword, including Albions and ATrims so it's well worth it.
Have you checked the harmonical balance (do you feel any vibration when the sword is struck in a cutting movement onto a wooden block)? I feel this takes the most experience and luck, to get the harmonival balance just right. Often I have to experience a lot with heavier and lighter pommels to get the sword vibration free. It really sucks to have to throw away a pommel crafted in hours simply because it's too light :mad:
Since you copied a historical sword it should be fine but I do wonder whether the other guys with "fantasy" swords have had problems with that.
Hi all,
Finally found some time this morning (6 ish!) to wrap leather around that grip. After trying various raiser settings, I decided that I had enough with the plain cord over leather thing, having done nearly 15 of those there was not much of a challenge...so I chose a variation instead, a spiralling cord under the leather. The challenge with that grip was that it strongly tappers near the pommel and guard, and even if I shaved a little more wood at the middle compared to the previous pictures, it still required a lot of moulding and re-cuts here and there. I like the end result a lot...it's a nice change of style compared to my other grips. Furthermore, the cord spiral provides a very safe and comfortable grip when holding the weapon. Also, I think aesthetically it suits the sword really well and I don't regret the extra amount of effort it took at all.
The sword is now officially complete (scabbard to come soon though and I have to re polish all scratches made during the final stages of the assembly...but I see little point in doing it before the scabbard core is done).
Hope you'll like it!
Cheers,
Julien
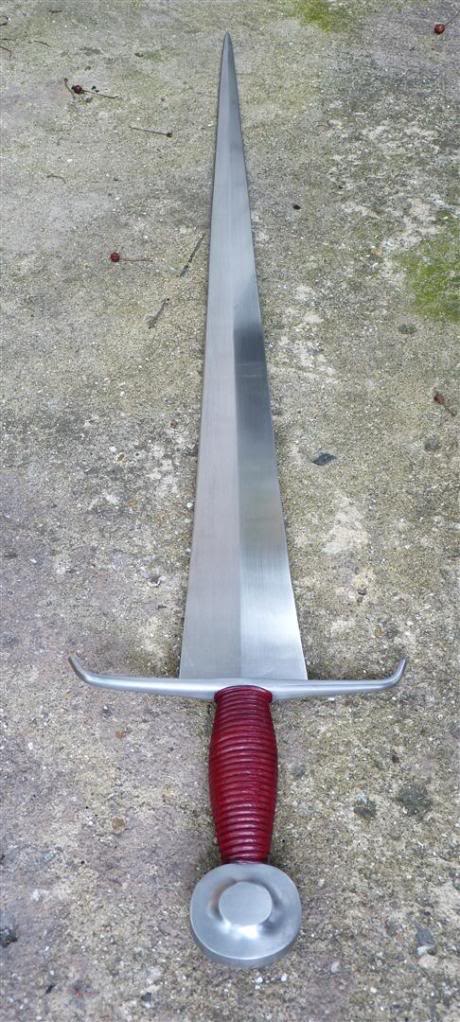
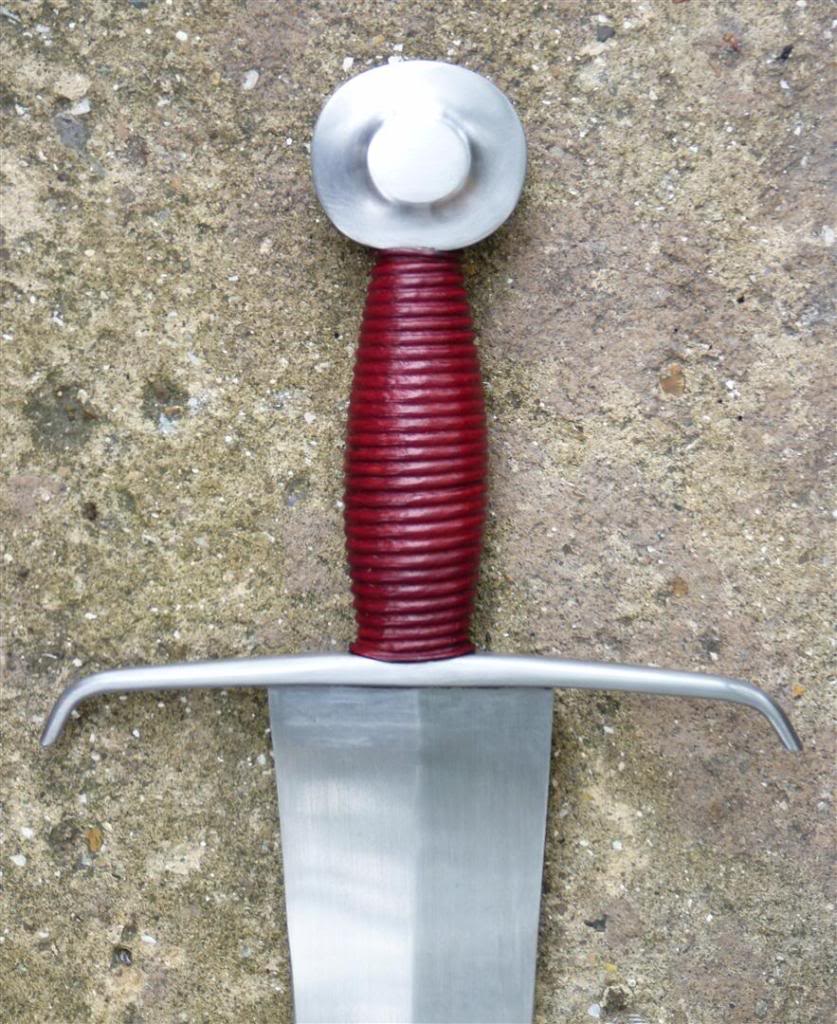
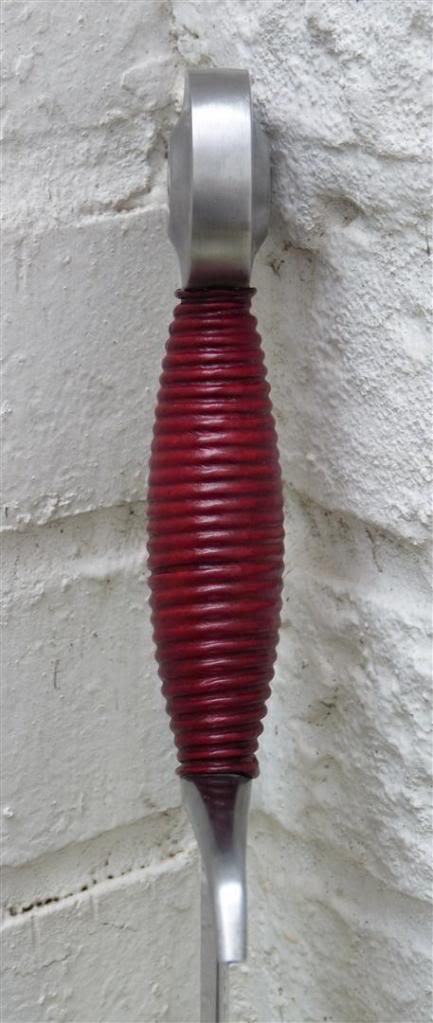
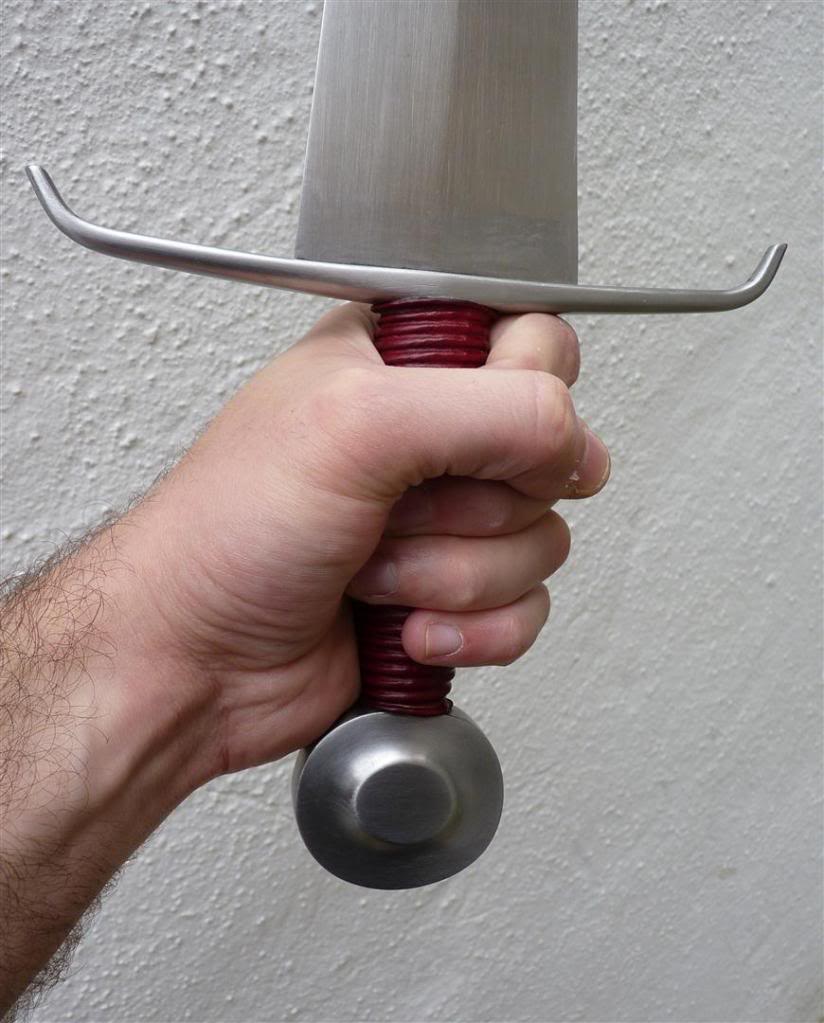
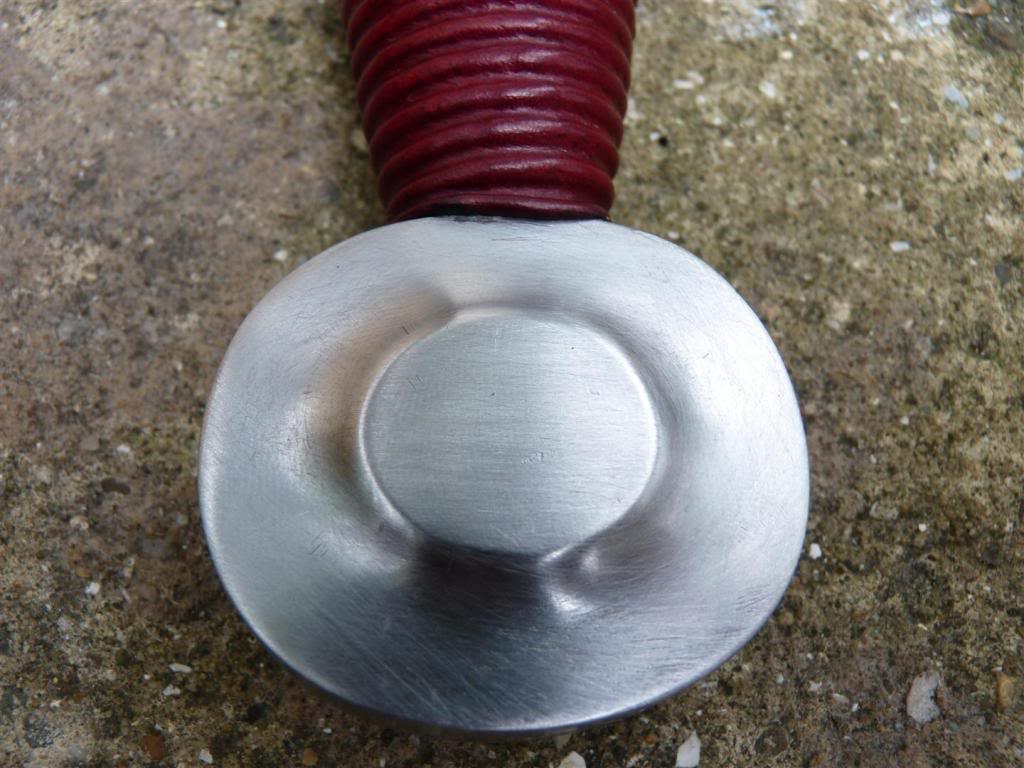
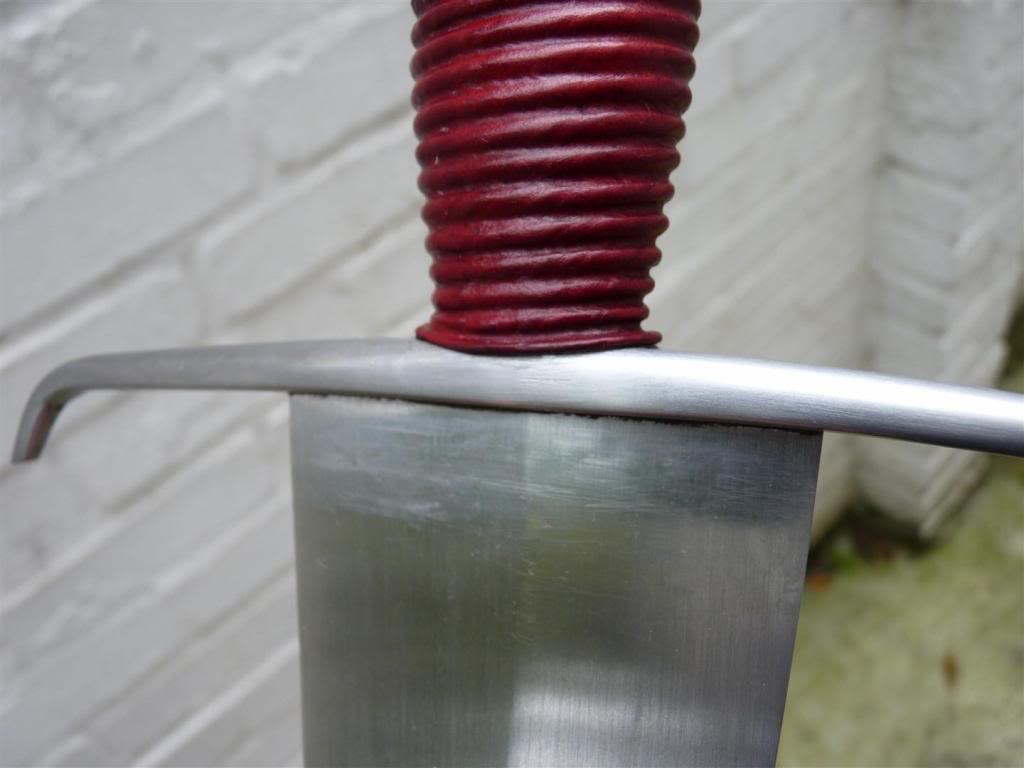


Very, very nice!!! Congrats for an amazing piece of steel you can be very proud of. I hope the XVIII I'm currently working on turns out as nice.
Would you mind measuring the pommel and guard (length and width)?
Would you mind measuring the pommel and guard (length and width)?
Hey Julien,
Glad you finished your sword it's looking really nice :D. Did you enjoy the week?
I'm hoping to put some leather around the grip myself so when I'm done I'll put a pic up for you to see. Also I was inspired by you and your skills with making scabbards so I want to make one for the single sword I made. What are your thoughts on engraving a motto or hallmark onto your blade as I've been designing one and fancy doing it.
Also here is the website for the sword fighting classes in hither green www.londonlongsword.com
Speak to you soon,
Cheers
Toby
Hey Toby,
Good to hear from you and thanks for the link to the longsword course...I will surely go at some point but for now whatever free time I have will be spent on making the sword rather than handling the sword :) I'm really looking forward to join though...so hopefully soon.
Regarding engraving, I don't recall any flat diamond sword of that time period bearing inscriptions on the blade (they usually decorate the fueller), so I'll pass on that one. I will try salt water engraving someday though, as the technique intrigues me, but not on this sword.
Cheers and talk to you soon,
J
A question that might have been asked before but does anyone know a way to mate finish leather?
I have tried various ways of finishing my grips over the years (anything from lexol to shoe cream, but settled on paste wax). My problem with paste wax is that I really like the effect when it is just applied, but once buffed it makes the all thing way too shiny for my taste.
I've heard of that tandy eco flo...does that give a mate finish?
Peter Johnsson says he used "leather fat" to finish his grips...does anyone have any idea what that may be? (lanoline based product?)
Oh and last but not least...can you remove a layer of paste wax without ruining the leather underneath? (solvent?)
Cheers,
J
| Julien M wrote: |
| A question that might have been asked before but does anyone know a way to mate finish leather?
I have tried various ways of finishing my grips over the years (anything from lexol to shoe cream, but settled on paste wax). My problem with paste wax is that I really like the effect when it is just applied, but once buffed it makes the all thing way too shiny for my taste. I've heard of that tandy eco flo...does that give a mate finish? Peter Johnsson says he used "leather fat" to finish his grips...does anyone have any idea what that may be? (lanoline based product?) Oh and last but not least...can you remove a layer of paste wax without ruining the leather underneath? (solvent?) Cheers, J |
Try chamois :lol: Actually, I think your grip looks wonderful exactly as it is. In so many ways we're stuck in Albion mode, aesthetically. That's not necessarily a bad thing because Albion make gorgeous swords. But historical artwork shows us much greater variety in leather decoration and grip construction (chappes being the most obvious and universal modern omission from production swords). Historically, I see risers in various patterns, tooling, applique, tacks, mixed colors, etc. So, I think your work here, start-to-finish is outstanding and a welcome relief from the black, fine-cord grip that dominates the upper-end of the market. Frankly, I'm astonished at how far you've come so fast. Jealous, too. :)
Hi Sean,
Thanks a lot for your kind words. I don't believe you need to be jealous at all, given what you produced and displayed here in the past, and when you'll have access to the kind of equipment I had the opportunity to play with during that course, I'm sure you'll do just as well, if not much better :)
Cheers,
J
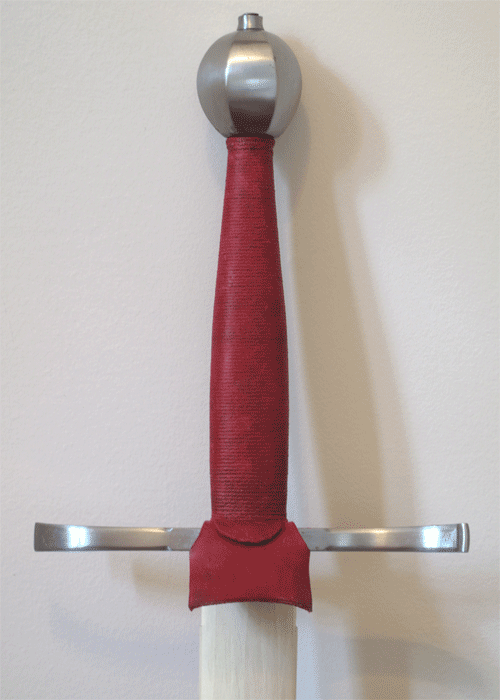
You got such nice, rich color. My only experience with a red Feibings (still incomplete below) didn't work out so well, mainly because of the scabbard cover but also because of some problem with the grip (esp. matching the chamois grip cover with the tooling leather chappe). I don't remember now exactly else what went wrong there, but I do recall the joy of having to scrape off the scabbard and grip covers. Maybe the glue seeped through and created splotchy color. I could fix that with greater care but I was in no mood at the time! You've inspired me to try again this fall. :D
 Attachment: 149.31 KB

Page 2 of 3
You cannot post new topics in this forumYou cannot reply to topics in this forum
You cannot edit your posts in this forum
You cannot delete your posts in this forum
You cannot vote in polls in this forum
You cannot attach files in this forum
You can download files in this forum
All contents © Copyright 2003-2006 myArmoury.com — All rights reserved
Discussion forums powered by phpBB © The phpBB Group
Switch to the Full-featured Version of the forum
Discussion forums powered by phpBB © The phpBB Group
Switch to the Full-featured Version of the forum