| Author |
Message |
Julien M

|
 Posted: Mon 27 Oct, 2008 5:49 am Post subject: Scabbard project for an Albion Crecy Posted: Mon 27 Oct, 2008 5:49 am Post subject: Scabbard project for an Albion Crecy |
 |
|
Just wanted to share my work in progress with you as the step by step and pictures I was able to gather here on this forum were a tremendous help to get this project started.
Workplace: not ideal...my computer desk, and alternatively the balcony when I got tired of eating wood dust.
Tools: the bare minimum (one hammer, one large chisel, various grade sand paper sheets, a wood rasp, a set of clamp...and a very noisy £10 jigsaw)
As usual, I had a hard time finding the appropriate materials in central London. In large DIY shops such as B&Q, no one seemed to have ever heard of "poplar wood" (as the largest DIY stores in the UK you would expect otherwise, but they were not helpful nor knowledgeable at all) In the end I settled for the best I could find in there: two boards of pine wood (Knowing very well that this choice wasn't the most suitable for a scabbard, but the dimension of those were spot on for this project). I just won't leave the sword to rest in it (it shouldn’t be kept in the scabbard for long period anyway) since I have read here that pine might eventually cause blade corrosion. Since I have also used regular PVA glue which can also cause corrosion, I will surely do what Justin King suggested in this tread http://www.myArmoury.com/talk/viewtopic.php?p=145264#145264 and use Tung oil to treat the inside of the scabbard.
Any advice on this issue is most welcome.
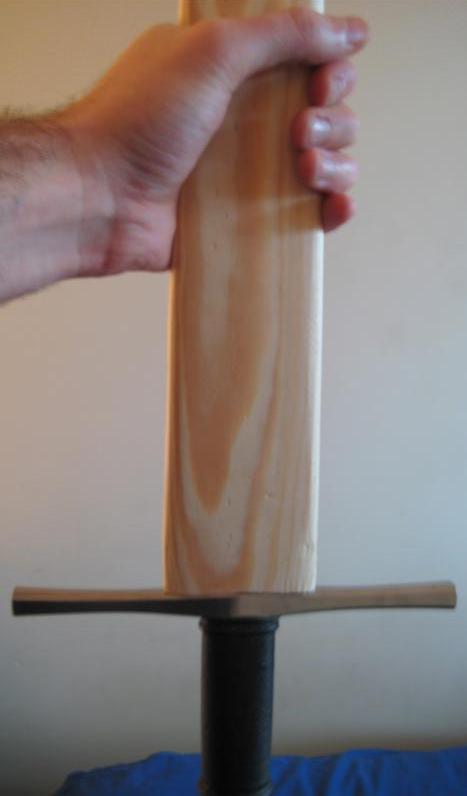
The rest was fairly straight forward. I traced the shape of the blade on both sides of the two halves of the wood “sandwich”, making sure I placed the blade the same way on all faces. I then traced a second line for each to mark the contours of the outer core using two pens instead of one while moving along the blade. Once this was done, I started hollowing the inside of the wood core. No doubt that this is the most painstaking part of the all thing. It is slow and noisy if (like me) you work in a flat. I had never used a chisel before and made my share of mistakes with it. I first tried to match closely the blade cross-section but gave this up quiet quickly since my much too large and flat chisel was quickly turning this into a nightmare…I finally aimed for an approximate match for the Crecy’s cross section (basically I did this scabbard as if the all blade was entirely of diamond cross section).
In the end, I hollowed the first half much too deeply. When closing both parts of the scabbard together to test the fit, it became obvious that great care will be needed when sanding down the outer core or I would surely pierce it (as Grey experienced here: http://www.myArmoury.com/talk/viewtopic.php?t...t=scabbard ). One the other hand, I would have to narrow the other half much more.
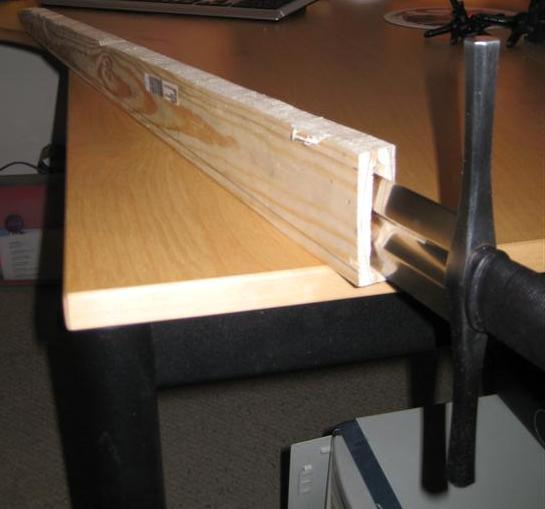
Once this was done, I tested the fit of the blade using clamps and to my great surprise; it was spot on right away. I could draw the sword very easily but yet hold it cross down and it would stay in the shealt (blind luck I’m sure!). I then glued the two halves together and cut out the scabbard using a jigsaw. Now the air in the room was so full of wood particles I had to retreat to the balcony with a wood rasp, sand paper and a bottle of wine and spent the next two or 3 hours flattening and shaping the outer core. As I told you I had to remove much more wood on one half than on the other…and having no power tools at hand this took a fair amount of time and efforts.
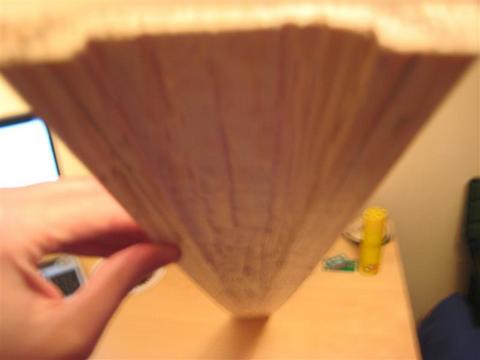
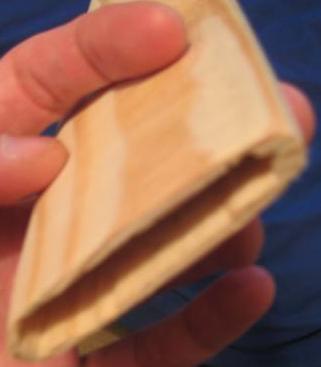
Below is how the scabbard currently looks like. Using clamps to compress a piece of leather around the wood core, I get a pretty good idea of how the scabbard will look once leather is applied. My main concern is to end up with a bulky looking scabbard. I may be able to narrow the all thing even further, but as you may have noticed on the picture of the scabbard mouth, one corner of the core is already getting very thin. Again, I am hoping for your advice on this point.
I have questions for the next steps too.
I’ve read here and there that the wood should be oiled (outer core and inside). What’s the purpose and what should I use to do that?
More importantly, I need advice about the leather: I have redone grips in the past, with 1 mm thick lamb skin. Now this will be too thin for that purpose. Looking at Brian BDK custom site in progress section, it is my impression that 2 mm leather would be more appropriate (cow, goat, sheep?). I will probably get the leather from Tod stuff other website here so feel free to advise on what you would pick (http://www.traditionalmaterials.co.uk/html/leathers.php) .
Finaly what kind of thread should I use for the sewing at the back?
I will post more as I go along.
Thanks in advance for your answers/comments and hope this post will help some to get started too 
J
edit: what about glue btw? Should i use hide glue when applying the leather on the wood core?
 Attachment: 38.26 KB Attachment: 38.26 KB

 Attachment: 12.95 KB Attachment: 12.95 KB

 Attachment: 24.53 KB Attachment: 24.53 KB
 Attachment: 31.87 KB Attachment: 31.87 KB
 Attachment: 17.78 KB Attachment: 17.78 KB
Last edited by Julien M on Mon 27 Oct, 2008 11:50 am; edited 2 times in total
|
|
  |
 |
Stephanie Maks

|
 Posted: Mon 27 Oct, 2008 6:06 am Post subject: Posted: Mon 27 Oct, 2008 6:06 am Post subject: |
 |
|
That looks like great work Julien. I'll be starting my first sword-sized scabbard projects next month so I'm very interested in seeing how other people have made out.
For knife/dagger scabards, I have been using veg-tanned tooling leather of about 3-4 oz which works out to approx. 2mm thick. From what I've seen in other scabard photos and project photos, this does seem to be around the right weight. Based on the stitching I've seen, I plan to prepunch all the holes with an awl or a tool made for punching the stitching holes, then use waxed thread and use the two-needle 'hand stitching' method.
Edited to add: re. oiling the wood core, I have read a few scabard-making instructions which say to varnish or seal the outside of the wood core, but haven't read about doing it to the inside. I have tried using tung-oil in the past to treat the inside of scabard cores and in my experience that just makes them slippery - i.e. the knife is more prone to sliding out unexpectedly, whereas the un-oiled wood gripped the blade very nicely. Consequently, with my knife scabards, I only treat the outside of the core, to protect against moisture etc.
Cheers!
|
|
   |
 |
Leo Todeschini
Industry Professional

|
 Posted: Mon 27 Oct, 2008 12:37 pm Post subject: Posted: Mon 27 Oct, 2008 12:37 pm Post subject: |
 |
|
Hi Julien,
Looking very good and well.
Not a great surprise your guys didn't know what poplar is, I suspect they wood be hard pressed to know what wood is.
I have now sold Traditional Materials, but it is still operating and the site should take you there.
Buy 1.5mm vegtan for the scabbard covering and if you make a belt harness use 3.5mm vegtan. You can buy bleached linen thread from there or just pop down to John Lewis and buy their little cards of carpet thread. Use a blunt ended harness needle and an awl to make the holes, using a section of pine as the back stop when you punch through with the awl. run the thread over a chunk of beeswax before you use it and this makes threading the needle easier and helps stop the thread running out if it ever breaks. You will be able to get all this stuff from Trad mats for not very much.
Dampen the leather slightly (1 second immersion in a sink of water) before you use it and it will stretch and pull round making the sewing easier.
Good luck
Tod
www.todsworkshop.com
www.todcutler.com
www.instagram.com/todsworkshop
https://www.facebook.com/TodsWorkshop
www.youtube.com/user/todsstuff1
|
|
   |
 |
Leo Todeschini
Industry Professional

|
|
   |
 |
D. Austin
Industry Professional

Location: Melbourne, Australia Joined: 20 Sep 2007
Posts: 208
|
 Posted: Mon 27 Oct, 2008 5:29 pm Post subject: Posted: Mon 27 Oct, 2008 5:29 pm Post subject: |
 |
|
Nice work Julien.
I think most of your questions have been answered but I have a little to add. Regarding the bulky look, you've probably already seen it but there are some good photos posted by Chad Arnow in this thread:
http://www.myArmoury.com/talk/viewtopic.php?t=6316
In my opinion, even a scabbard with some very thin parts should stand up to reasonable use. I don't see it as the type of item that gets a lot of abuse. I'd prefer a light, sexy scabbard to a tough, chunky one.
On the topic of oil, I use linseed oil for treating wood but haven't done so on a scabbard or sheath, basically because I don't see the need. I think the leather is enough to protect it from a light shower.
Hide glue would obviously stop the wood from slipping out of the leather but I don't think it's an issue. I wouldn't use it between the leather and wood as sewing the back seam is quite time consuming and I'm just not interested in dealing with messy glue during that process. Perhaps a few dabs here and there would be ok. I wouldn't want it to dry before the leather is in place.
Regarding the thread, I replied to your question in this topic:
http://www.myArmoury.com/talk/viewtopic.php?t=14484
Looking forward to seeing the finished piece.
Darren.
|
|
  |
 |
Julien M

|
 Posted: Wed 29 Oct, 2008 3:50 am Post subject: Posted: Wed 29 Oct, 2008 3:50 am Post subject: |
 |
|
Hi Fellows,
Many thanks for your comprehensive answers.
Not only do I have now a much better idea of what to do next but I also know where to get what I need (which is half of the time spend on such a project)
Tod, I really appreciate the fact that an experienced craftsman such as yourself would share his knowledge with a rank amateur like me  (I guess it's as good an occasion as any to tell you that I greatly admire your work). (I guess it's as good an occasion as any to tell you that I greatly admire your work).
I just wished I asked first for a good place to find appropriate timber, it would have saved me a disappointing trip to B&Q  (oh yes, I forgot to mentioned that even though I purposely chose a shop that offered a timber cutting service, they wouldn’t cut my board (that was in one piece measuring more that 2 meters) because it didn’t qualified for reasons I still wonder about… I eventually had to saw it myself on the parking so you can be damn sure they won’t see much of me in the future!) (oh yes, I forgot to mentioned that even though I purposely chose a shop that offered a timber cutting service, they wouldn’t cut my board (that was in one piece measuring more that 2 meters) because it didn’t qualified for reasons I still wonder about… I eventually had to saw it myself on the parking so you can be damn sure they won’t see much of me in the future!)
Stephanie, I take your point and will rule out Tung oil, since the fit of the sword in the wood core is actually the only thing I am 100% satisfied with so far.
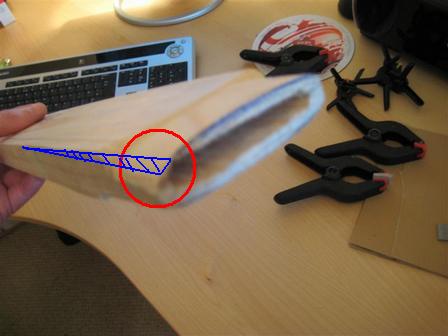
Darren, regarding the bulky look, I am aware of the thread you mentioned. Those two shots of scabbard mouths where in my mind during the carving process. I have applied some leather on the core using clamps to have some idea of the result, and even though the scabbard looked quiet good, I couldn’t be fully content with it. So since I’d rather risk ruining the all thing than ending up with something I am not fully happy with, I gave it a go yesterday. I mentioned earlier that my main concern is that one corner of the scabbard is already very thin (see picture below). Removing more wood is taking the risk of opening gaps (in the blue zone). Yesterday I have done a third of the all length, and at places the wood is so now so thin that I could pierce it with a pen. A few very thin gaps appeared here and there, but despite this I am surprised because the scabbard altogether remains quiet tough and hold itself together well. With 1.5mm leather glued on it, i'm pretty sure this won't make any difference in the end (hopefully!)
Well...To sum thing up I am still not sure at this point whether I have ruined it all or if this will succeed.
I'll keep you posted!
J
 Attachment: 24.32 KB Attachment: 24.32 KB
|
|
  |
 |
Greyson Brown

|
 Posted: Wed 29 Oct, 2008 11:53 am Post subject: Posted: Wed 29 Oct, 2008 11:53 am Post subject: |
 |
|
Julien,
I would definitely say that you have not ruined it. You could actually end up with some rather large holes and still have a functional scabbard. It may not turn out exactly as you had envisioned, but there is no law that says you can't try again with the information you learn from this project. Aaron Schnatterly once told me (I think it was advice that he got from Peter Johnsson) to be content to not be content. There is always some little flaw that you know about and are bugged by. In most cases other people can't see it, or aren't bothered by it.
I don't buy all of the arguments that a scabbard core has to be super thin. My first one was, but it doesn't make it that much lighter and the functionality is the same. As long as the core is not thicker than the cross, I'm usually pretty happy. If the core is too thin, the triangular flap of leather that comes up over the guard sticks out more than up.
I have done scabbards where I glued the leather to the core, I have done them without glue at all, and I have used glue to tack the leather in place. I think I like using a bead of glue on the front to hold things in place. Hide glue is a bit too runny for that, I think, and will probably use wood glue in the future (hide glue is the stuff for grips, but I prefer wood glue almost universally when it comes to scabbards). If you do use glue to help hold the leather on, make sure you think about what type of suspension you will use. If it is one that laces through the leather, you want to avoid glue in those areas.
On the oil issue, I have some scabbards where I did nothing to treat the wood, I have some where I treated the outside with varnish, and I have some where I use varnish on the outside and teak oil or boiled linseed oil on the inside. In the end, I don't know that it matters. In my experience, the wood is exposed to more moisture from the damp leather while you are sewing that on than it will be at other times. Some varnish on the outside might help protect it then, but it shouldn't be a problem either way as long as you don't soak the leather.
I hope some of that is helpful. Keep up the good work.
-Grey
"So long as I can keep the path of honor I am well content."
-Sir Arthur Conan Doyle, The White Company
|
|
  |
 |
Julien M

|
 Posted: Fri 31 Oct, 2008 6:02 am Post subject: Examples of XIV century longsword scabbards Posted: Fri 31 Oct, 2008 6:02 am Post subject: Examples of XIV century longsword scabbards |
 |
|
Hi There,
I have now finished the wood core. Grey you were right! The scabbard is fine and has has survived an intensive cession of thinning, which was a perillous endeavor since my chisel work while hollowing the inside had been more than uneven. I’m now satisfied with the look of the core. I am aware that I have weaken the structure though, but it is still solid and I'm sure gluing 1.5mm leather on the all thing will bring it together. I plan to fill the few gaps I made on the core with milliput before wrapping the leather on. As for "being content to not be content" I realize that this is a wise piece of advice, but I'm afraid I am too stubborn to take advantage of it 
Now time to move forward on this project and while I wait to receive the leather I ordered I wonder about the design of the piece. I have a pretty good idea of the overall look I'd like to achieve: a mix of some of fletcher's past work and peter johnson's scabbard for his swante sword (pic below). I had a very close look at it during a forge gathering near London that Peter attended. Now the Crecy is a typical XIV century sword...do you think that choice would be appropriate for it? I'm aware that the svante is a late 15 century sword but reproductions of XIV century long sword scabbards I've looked at seemed fairly similar in shape and design. For instance, the Brescia Spadona's scabbard, shown on the Albion website (the Brescia is after all another type XVIa) also exhibits a central ridge, no leather flap above the guard, and a similar suspension system.
Also It is my understanding that high medieval scabbards were quiet bare, with little ornaments compared to the previous era or the renaissance era that followed. But I wouldn't be against trying my hands at leather carving. So If you have pics showing decorated leather scabbard (or shown in artwork) from that period I'd be happy to have a look 
J
edit: I stress the fact that the pic below is peter johnson's savante scabbard . Reading the thread I realised that it may be confusing...this is not my work, just what I am aiming for 
 Attachment: 45.61 KB Attachment: 45.61 KB

Last edited by Julien M on Fri 31 Oct, 2008 10:02 am; edited 3 times in total
|
|
  |
 |
Chad Arnow
myArmoury Team


|
 Posted: Fri 31 Oct, 2008 7:52 am Post subject: Posted: Fri 31 Oct, 2008 7:52 am Post subject: |
 |
|
My Sovereign scabbard's core has been mentioned a couple times in this thread, and I believe it to be on the thin side of normal. As long as it isn't too bulky and inelegant I think you're fine.
Check out the pic of the scabbard of the supposed sword of Charlemagne, posted by Manouchehr:
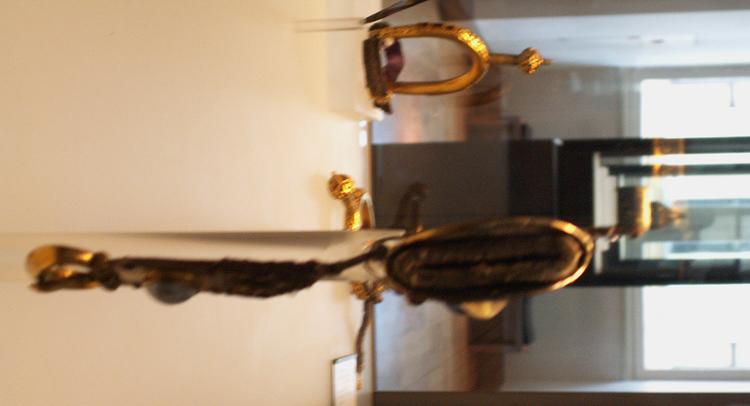
That scabbard is probably 13th century, embellished later. You can see it isn't too thin, though this is a ceremonial sword.
It doesn't have to be super-thick, though, like we see on many poor scabbards. The sword itself is much tougher than the scabbard, so it's not like some thin slats of wood have to protect heat-treated steel. 

ChadA
http://chadarnow.com/
|
|
    |
 |
Jared Smith

|
 Posted: Fri 31 Oct, 2008 9:49 am Post subject: Re: Examples of XIV century longsword scabbards Posted: Fri 31 Oct, 2008 9:49 am Post subject: Re: Examples of XIV century longsword scabbards |
 |
|
| Julien M wrote: | | ....it is still solid and I'm sure gluing 1.5mm leather on the all thing will bring it together. |
I am curious... Did you glue the front side down with hide glue, and leave the back stitch partly unglued for the sewing?
Please post a picture of the back stitch and how it turned out! Everything I saw looked great..
Just as a matter of speculation, I theorize that cloth or leather may have been glued over the core historically. Hide and fish based glues were available, and we know that some Eastern styles laminated manta ray skins with fish based glue (water resistant.) This type of construction does not survive well, so lack of Western scabbard artifacts does not really convince me one way or another. I usually laminate fiberglass cloth (light weight model airplane material from hobby shops with slow cure epoxy) over the core. After a couple of layers of the stuff, you can support the ends of the core on some logs and jump up and down on it like a spring board. My covered sempach core weighs something like 1 lb and a just a few ounces, but is surprisingly strong. It also adds a springy resilience to the sword fit.. i.e., the wood will not spread and take a loose set if the sword is left inside the core for several months.
Absence of evidence is not necessarily evidence of absence!
|
|
  |
 |
Julien M

|
 Posted: Sat 01 Nov, 2008 4:48 am Post subject: Finished woodcore! Posted: Sat 01 Nov, 2008 4:48 am Post subject: Finished woodcore! |
 |
|
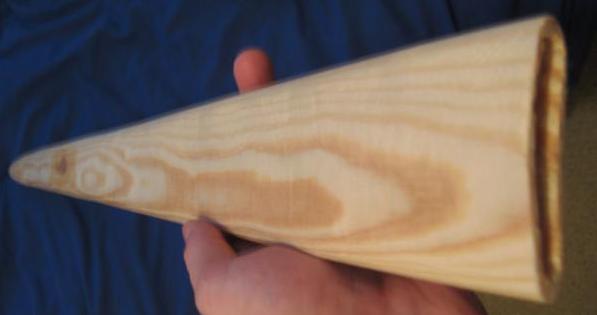
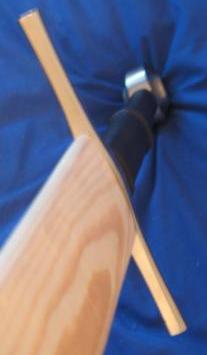
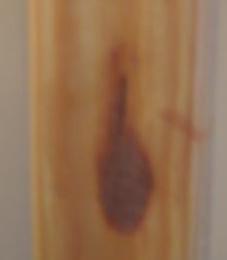
I finished the woodcore this morning. As planned I used milliput to fill the narrow gaps created by the thinning of the core. It worked great, since the areas I have treated with milliput seems to be now even more solid than the rest of the core. I had forgotten how tough that stuff was once dry, even a thin layer is rock hard. If I ever have to repair cracks in a grip or scabbard I will look no further and use milliput again. (see pic below to have an idea of how milliput looks like once applied and sanded).
Anyway the woodcore is now as thin as it can be, but yet strong and It fits the sword like a glove. I spared no efforts on this and I am relieved its over. I'll just work on the final bevel of the edges and sanding the milliput so that it's completely integrated to the core....while I 'm waiting for the leather and tolls I ordered to be delivered.
As said in my post above don't hesitate to give me your thoughts regarding the design of a XIV century longsword scabbard.
Godspeed
J
ps: "Did you glue the front side down with hide glue, and leave the back stitch partly unglued for the sewing?" that's exactly what I plan to do. Regarding the use of fiberglass: it is an interesting idea, but I'd rather keep as close as possible to traditionnal materials (this would technicly rule out epoxy putty such as milliput I know  but I'm sure medieval artisans had ways to repair repair/strenghten their scabbards using materials such as the ones you mentionned (cloth/glue mix etc...). If I was to use fiberglass I would do it all the way, with no wood core at all (I've seen such a thing on the web I'm sure). but I'm sure medieval artisans had ways to repair repair/strenghten their scabbards using materials such as the ones you mentionned (cloth/glue mix etc...). If I was to use fiberglass I would do it all the way, with no wood core at all (I've seen such a thing on the web I'm sure).
 Attachment: 18.52 KB Attachment: 18.52 KB
 Attachment: 15.5 KB Attachment: 15.5 KB
 Attachment: 13.52 KB Attachment: 13.52 KB
 Attachment: 6.69 KB Attachment: 6.69 KB
|
|
  |
 |
Chad Arnow
myArmoury Team


|
|
    |
 |
Ed T.

|
 Posted: Sat 01 Nov, 2008 7:21 am Post subject: Posted: Sat 01 Nov, 2008 7:21 am Post subject: |
 |
|
Julien,
You might want to study monumental effigies and brasses for 14th century scabbard design. http://www.themcs.org/armour/14th%20century%20armour.htm As you said, by the second half of the 1300s scabbards were typically not decorated on the body. There are exceptions however, see Robert de Freville above. Decoration which may represent leather tooling is more common during the first half of the century, see William Fitzralph for example. Also notice how integrated sword belts almost disappear after 1350 in favor of direct attachment to the military girdle (plaque belt). At the end of the century you start to see swords hung on seperate belts slung diagonally from waist to hip. Of course these monumental examples are mostly from the wealthy nobility. Since yours is a longsword I'm assuming you are interested in the knightly class. There is far less evidence as to how belts and scabbards for single handed swords may have appeared.
Ed Thyberg
Cockeysville, Maryland, USA
|
|
  |
 |
Matt Easton

Location: Surrey, UK. Joined: 30 Jun 2004
Posts: 241
|
|
    |
 |
Julien M

|
 Posted: Sun 23 Nov, 2008 1:24 am Post subject: Posted: Sun 23 Nov, 2008 1:24 am Post subject: |
 |
|
I have been moving forward on my scabbard project lately, completing raisers and starting to mold the wet leather on the shealt core yesterday.
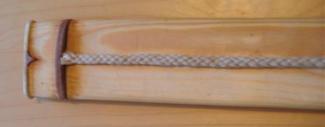
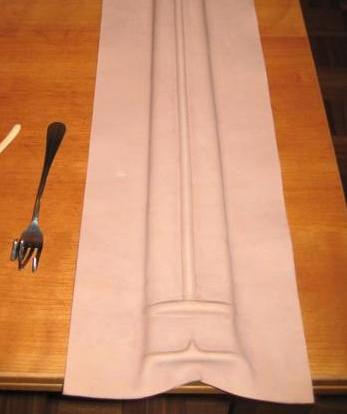
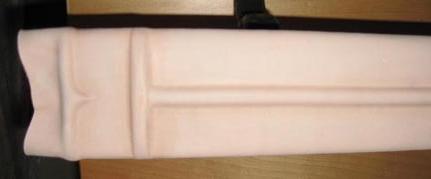
I have used thick cotton cord for the prominent central ridge, nylon cord for the one at the scabbard mouth, and milliput for the details and perpendicular ridge. On the back side of it, I have glued a long strap of leather in the middle.
Regarding the molding of the leather, I have made several passes on it while the leather was drying, using my fingers, a wood spatula (clay sculpting tool) as well as a custom tool (a modified fork as you can see on the picture  ) to press down the central ridge. Veg tan leather is an interesting material to work with, as I didn't know it would retain shapes so easily. ) to press down the central ridge. Veg tan leather is an interesting material to work with, as I didn't know it would retain shapes so easily.
I have applied glue but I'm not convinced that it will make a difference in the end, as the wetting of the leather, though superficial, tends to dilute it. It is not an issue since the leather keeps the all thing together very well.
Next step is cutting the leather to it's final shape and punching holes to sew the back, then tracing lines and details on the surface.
I'm pretty happy with the way it is turning out so far, but the next steps might be tricky (mistakes in cutting the leather to exact size can happen I'm sure, especially were the two sides meet at the back and also great care will be needed to trace those line with a swivel knife, as this is not a flat surface). By the way, what would you use to trace those lines before actually cutting the leather, as a pen will surely leave marks on the surface?
I might do that later on this week.
Cheers,
J
 Attachment: 10.13 KB Attachment: 10.13 KB
 Attachment: 18.4 KB Attachment: 18.4 KB
 Attachment: 10.88 KB Attachment: 10.88 KB
 Attachment: 14.79 KB Attachment: 14.79 KB

|
|
  |
 |
Brian K.
Industry Professional

Location: Salt Lake City, Utah Joined: 01 Jan 2008
Posts: 727
|
 Posted: Sun 23 Nov, 2008 8:18 am Post subject: Posted: Sun 23 Nov, 2008 8:18 am Post subject: |
 |
|
Looking good. As far as marking the leather to indicate where to cut, you really have no choice. Just mark on the side that gets cut off 
It's also better to be a little too big than too small, as you can always remove but you can never add. When sewing leather up the spine if you have areas that didn't meet well enough you can do some stretching but if the gap is too large you will tear the leather as you pull it together. Also, make your stitching holes approximately .25" from the edge. Any less and you invite more tearing as you sew, especially if you need to pull it together.
Brian Kunz
www.dbkcustomswords.com
|
|
   |
 |
Julien M

|
 Posted: Mon 24 Nov, 2008 3:38 am Post subject: Posted: Mon 24 Nov, 2008 3:38 am Post subject: |
 |
|
Hi Brian,
Thanks a lot for your imput.
I have cut the leather to size yesterday without any trouble. I did the first side using a ruler and a cutter, aiming for the middle of the back of the scabbard. then I wet the leather on the other side (the side to be stimmed down precisely matching the other), pushed it down to overlap the other side, and pressed my finger along the edge. Since veg tan marks so easy, I ended up with a line on the inside of the leather, clearly indicating were I should cut.
I'll move on to stitching in a few days (" Also, make your stitching holes approximately .25" from the edge" : as a matter of fact I was starting to wonder about that, so thanks again for your advice!).
J
|
|
  |
 |
Julien M

|
 Posted: Mon 24 Nov, 2008 4:16 pm Post subject: Posted: Mon 24 Nov, 2008 4:16 pm Post subject: |
 |
|
A couple of pics of the WIP:
Leather has been cut to size, molded around the core, currently tracing lines on the front. I now have a pretty good idea of what the finished scabbard will look like.
 Attachment: 13.47 KB Attachment: 13.47 KB
 Attachment: 20.83 KB Attachment: 20.83 KB

|
|
  |
 |
Julien M

|
 Posted: Sun 30 Nov, 2008 10:58 am Post subject: Finished Crecy Scabbard!! Posted: Sun 30 Nov, 2008 10:58 am Post subject: Finished Crecy Scabbard!! |
 |
|
Hi fellows,
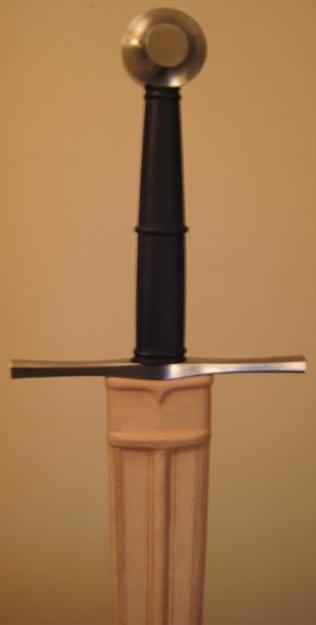
I finally completed the scabbard for my Albion Crecy (I still have to clean it and dye it, but all the tooling is done).
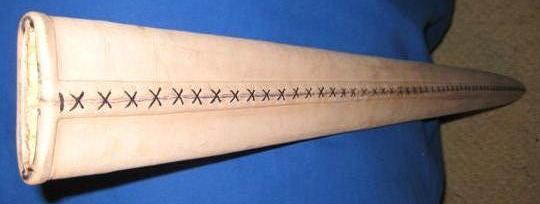
Stitching the back was no pleasure cruise, and I didn't expect this to take so long (I did an average job on cutting evenly where both edges meet at the back, so I had to correct some parts as I went along...same for the pre punched holes, which I was too casual with and had to redo them while stitching, one after the other).
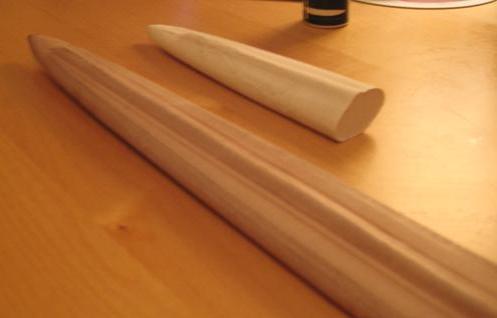
I also made a copy of the lower part of the scabbard, using resin plaster (took five minutes at best: I wrapped the tip of the scabbard tightly with tin foil, pressed it down, took the core out and put it vertically in a vase, then poured the liquid plaster in). I needed to replicate it so that Lazlo (fellow forumite and Londoner) could take it home during Christmas and work on a metal shape for me, without having to bother with carrying the all thing around.
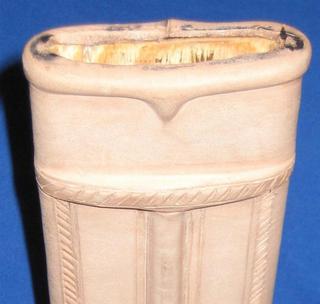
All in all, I am very pleased with the result, and I can't wait to see it dyed and fitted with the proper suspensions. The only thing that could bother me is that I did deviate slightly here and there when cutting all those lines, and once you have to make another pass over, you cut again and the result is not as clean as it could have been...but doing it when the leather is already applied on the core is not easy, as it is not flat. Next time if there should be one  , I'll take the leather off and will do it flat on the table. Also, I agree that using glue is not essential, as the leather; if thick enough, will hold itself on its own. , I'll take the leather off and will do it flat on the table. Also, I agree that using glue is not essential, as the leather; if thick enough, will hold itself on its own.
Pics are below and comments are most welcome!
Cheers,
Julien
 Attachment: 17.88 KB Attachment: 17.88 KB
 Attachment: 18.01 KB Attachment: 18.01 KB
 Attachment: 20.47 KB Attachment: 20.47 KB

 Attachment: 16.57 KB Attachment: 16.57 KB
 Attachment: 35.82 KB Attachment: 35.82 KB
[ Download ]
 Attachment: 127.65 KB Attachment: 127.65 KB
[ Download ]
|
|
  |
 |
Julien M

|
 Posted: Wed 03 Dec, 2008 6:56 am Post subject: Posted: Wed 03 Dec, 2008 6:56 am Post subject: |
 |
|
Hi guys,
Where would you buy affordable buckles and fittings for belts and suspensions? Also any thoughts on what to use to finish the scabbard after dye has been applied? I hear Lexol cleaner/conditionner is the best choice (and of course it is not easily available in the uk..same old story  ). ).
ps: A lot a viewing but no feedback at all since I posted these last pictures! Any comments/advice would be greatly appreciated (especially since I can still modify/correct a few stuff before dying the all thing).
Cheers,
J
|
|
  |
 |
|
|
You cannot post new topics in this forum
You cannot reply to topics in this forum
You cannot edit your posts in this forum
You cannot delete your posts in this forum
You cannot vote in polls in this forum
You cannot attach files in this forum
You can download files in this forum
|
All contents © Copyright 2003-2025 myArmoury.com — All rights reserved
Discussion forums powered by phpBB © The phpBB Group
Switch to the Basic Low-bandwidth Version of the forum
|

