A Resource for Historic Arms and Armour Collectors
A Resource for Historic Arms and Armour Collectors |
|
The Workbench: A Confederate Foot Officer's Sword
An article by Sean A. Flynt
Transform an off-the-shelf sword replica into a better representation of a historical antique Essential tools and materials File(s), Sanding sponge, Hammer, Fine steel wool, Filter mask, Bucket, Ammonia, Saltwater Recommended tools and materials Bench vise, Rotary tool or drill, Wire brush bit, Ear and eye protection (if using power tools)
Staying a step ahead of Federal forces during the American Civil War, the Memphis, Tennessee, manufacturing firm of Leech & Rigdon (originally Memphis Novelty Works) fled to Mississippi, and then to Alabama and Georgia, leaving in its wake a variety of military arms and accoutrements made for the doomed Confederate States of America. Like all things Confederate, these rare items are highly prized by collectors. Confederate swords, in particular, are so breathtakingly valuable, and faithful reproductions so inexpensive and forgery so easy, that collectors of Confederate edged weapons must be especially wary. Modern reproductions of Leech and Rigdon swords abound, and a casual observer would be hard-pressed to notice the differences between an original and an artificially antiqued reproduction. Knowing from previous experiments how easy it is to fool the eye, if only momentarily, I bought a $99 US reproduction sword by Windlass Steelcrafts of a Leech & Rigdon foot officer's sword and took it straight to my workbench for antiquing. Inspiration and Goals I am fortunate to own an antique brass-hilted Civil War saber, so I have a convenient reference for simulating an "untouched" 150 year-old brass patina. But swords of this period can be found in almost every state of preservation, as I confirmed with a visit to the Alabama Department of Archives and History, home to a startling number of Confederate arms. Photographs I made there or found at online auction sites or in William Albaugh's Photographic Supplement of Confederate Swords gave me wonderful guidance on the details of antique swords of this type, especially patterns of wear and corrosion.
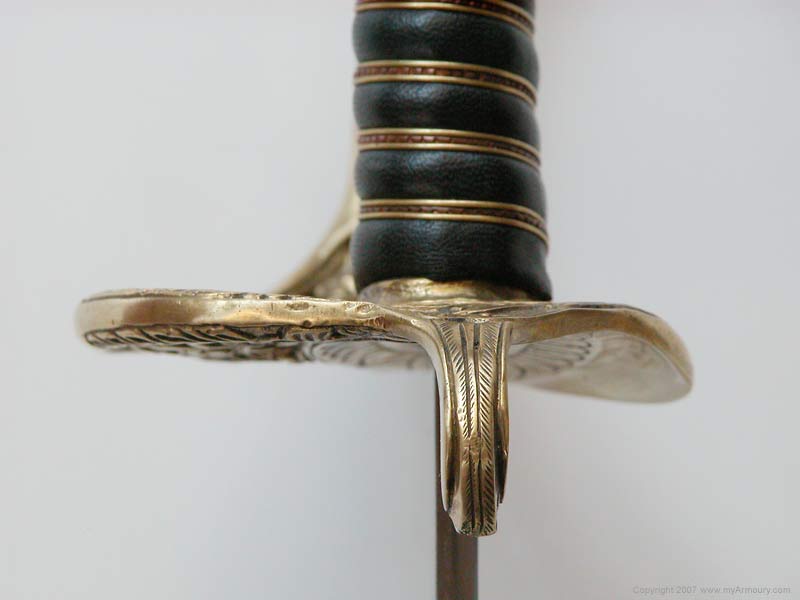
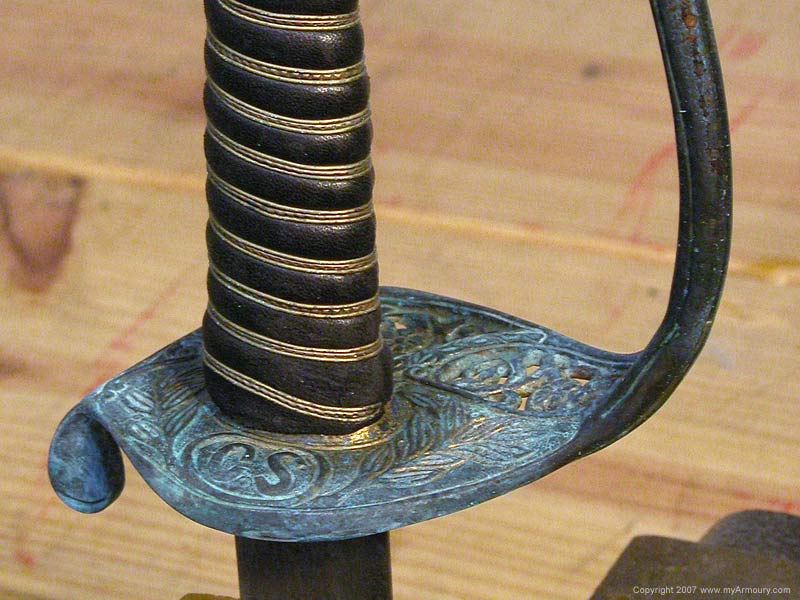
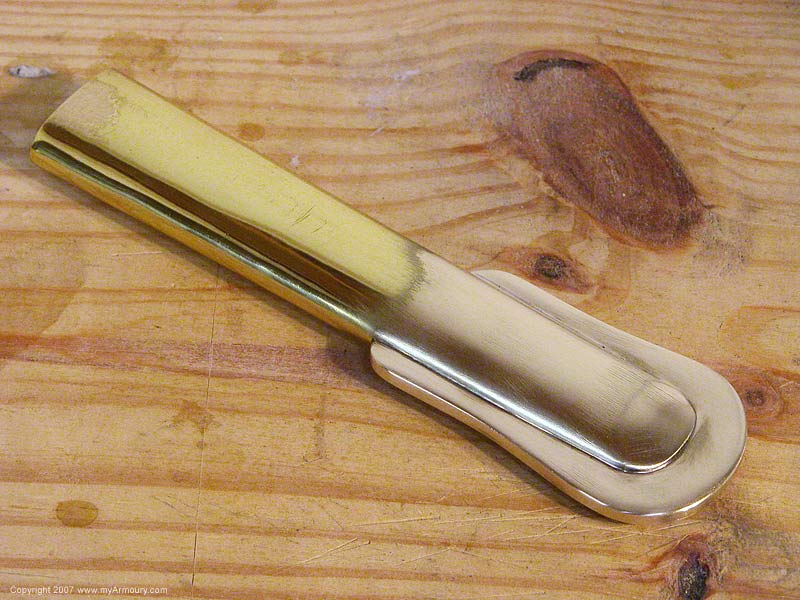
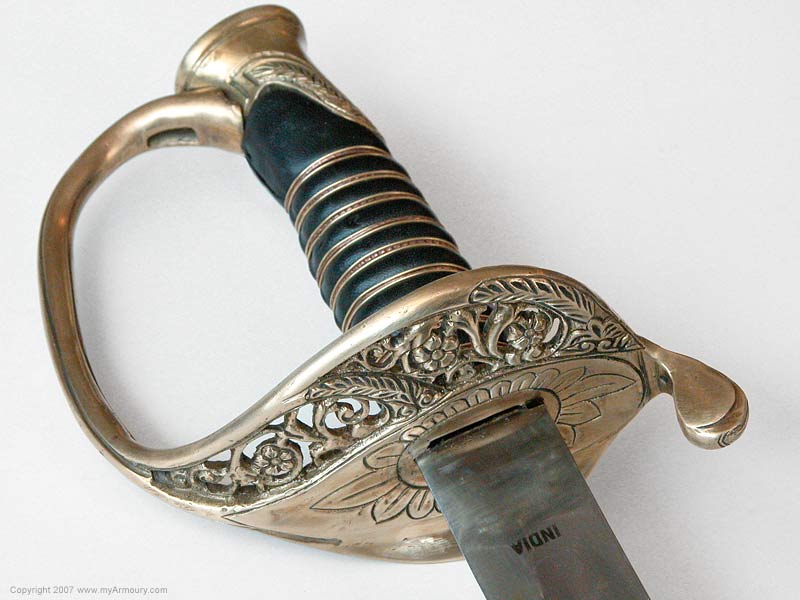
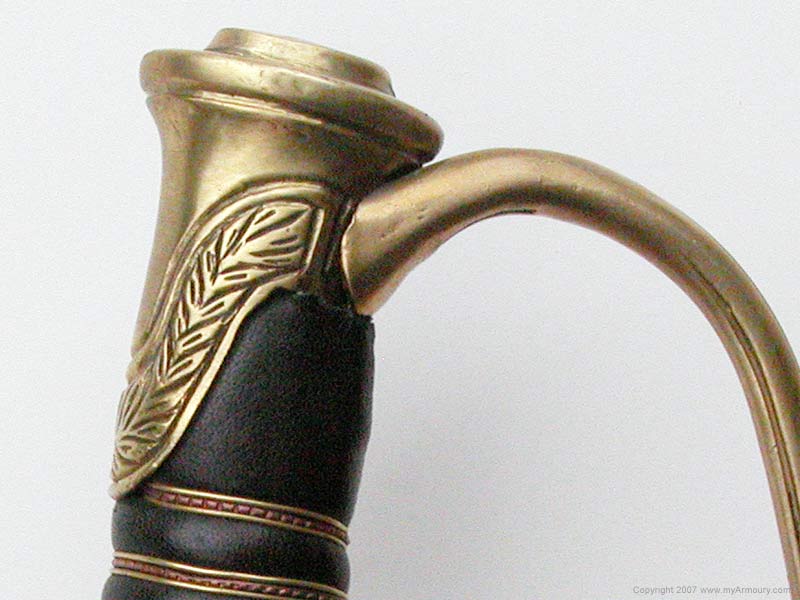
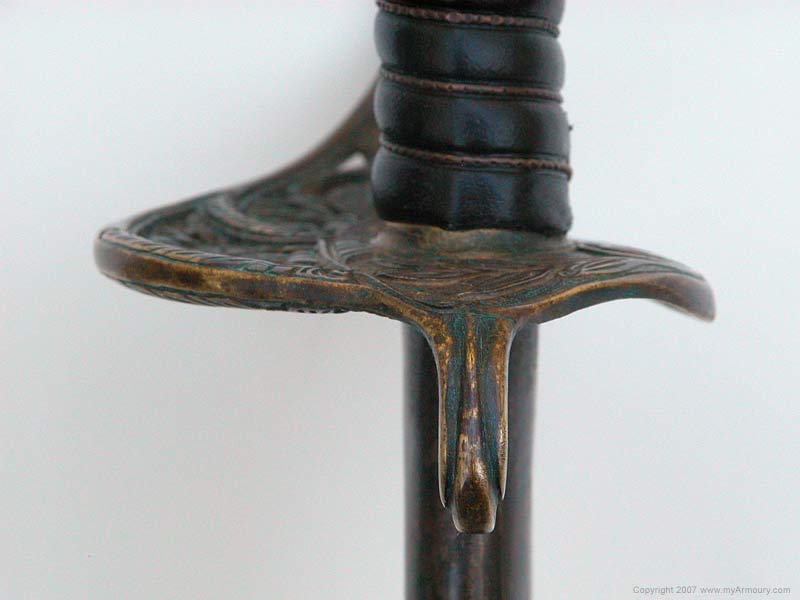
The Work Although this sword's cast brass hilt is generally very detailed and true to the original weapons on which the weapon is based, it was let down by some sloppy hand-chased decoration on the quillon and pommel cap. The quillons of original officers' swords of this type tend to bear some kind of decoration, either by casting or hand chasing. As the "before" photo shows, Windlass made only a halfhearted attempt to add such decoration. Rather than try to elaborate on that work, I chose to eliminate it and add visual appeal by creating a more pronounced median ridge on the edge of the quillon. With the weapon secured in my bench vise I easily removed the shallow chasing with files. That made a significant improvement, as did sculpting the ridge. The laurel leaf decoration of the pommel cap wasn't too far removed from some originals in terms of quality, but it was obviously modern—deeply and crisply, if sloppily, executed. Fortunately, one often sees great wear on this area of original pommels, with little more than a trace of the original casting or hand chasing remaining. Using files and my Dremel tool with sanding drum bit, I simulated such wear and removed the most unattractive details of the handwork, leaving only the deepest marks. Next, I flattened and bent a small piece of brass wire to fit in an odd gap atop the pommel cap. When I had the wire bent to match the gap, I gently tapped it into place with the flat surface of a ball peen hammer, then spread the wire with the peen end and filed the excess until the wire was flush with the surface of the cap. While I was at it, I hammered closed and filed a clumsily incised line around the edges of the cap.
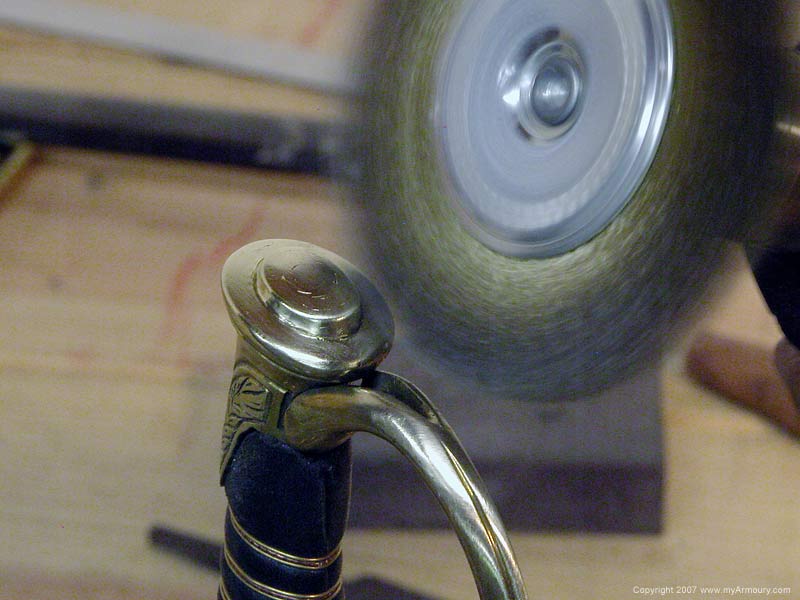
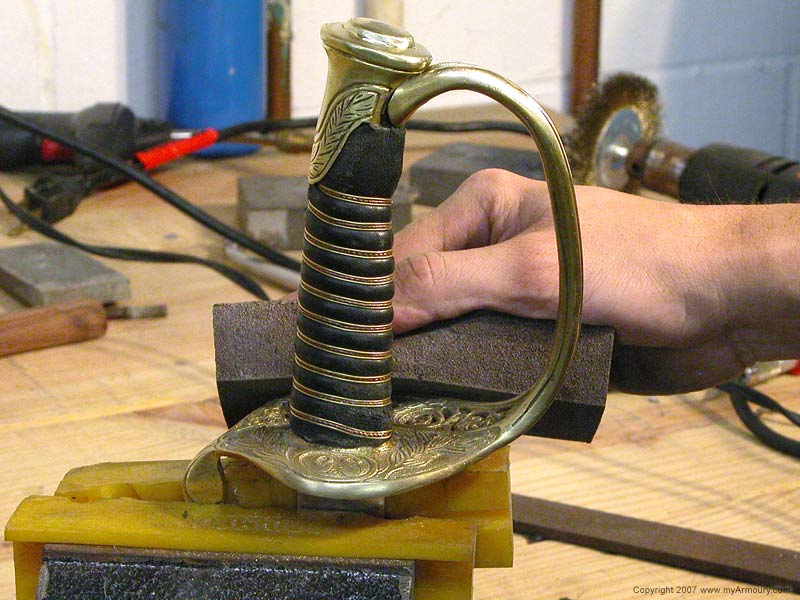
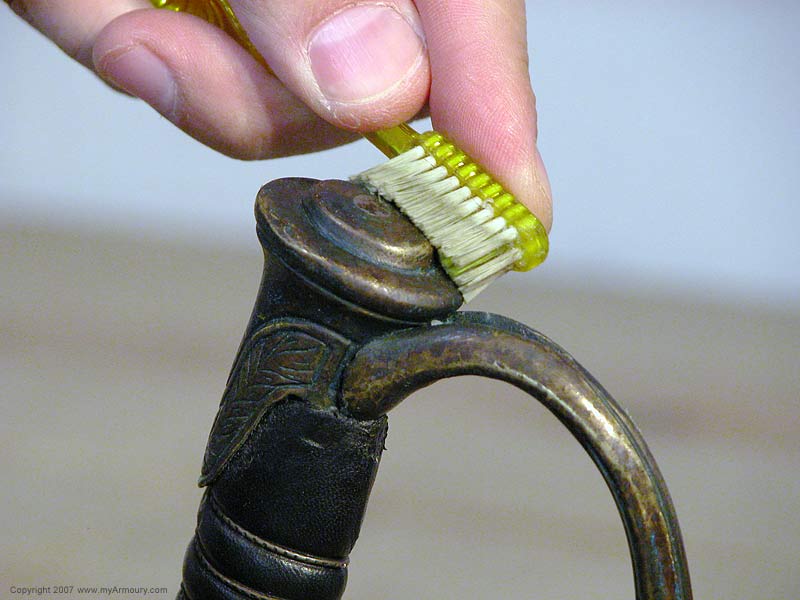
After completing all this hilt work I noticed a small bit of bent brass on the outside knuckle-bow terminus. Closer inspection revealed a thin, fragile rim of brass which gave the impression of the terminus being almost flush against the pommel cap. Once bent and broken, the rim had to be removed, but the resulting gap between terminus and cap was ugly and distracting. Using the ball peen hammer again, I braced the pommel on the workbench and hammered the terminus in order to spread the brass toward the pommel cap. It worked! When the terminus was reasonably close to the cap I simply filed and sanded away the hammer marks. The remaining gap is acceptable and similar to what is seen on some historic swords of this design. With the brass work completed I used a sanding sponge and a brass brush bit in my drill on all surfaces of the hilt in order to remove file marks and further soften the admirably crisp casting.
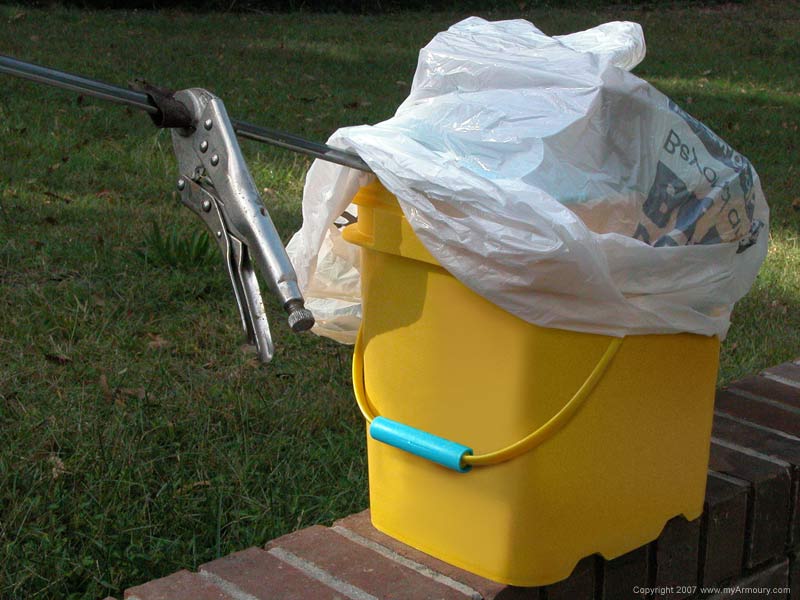
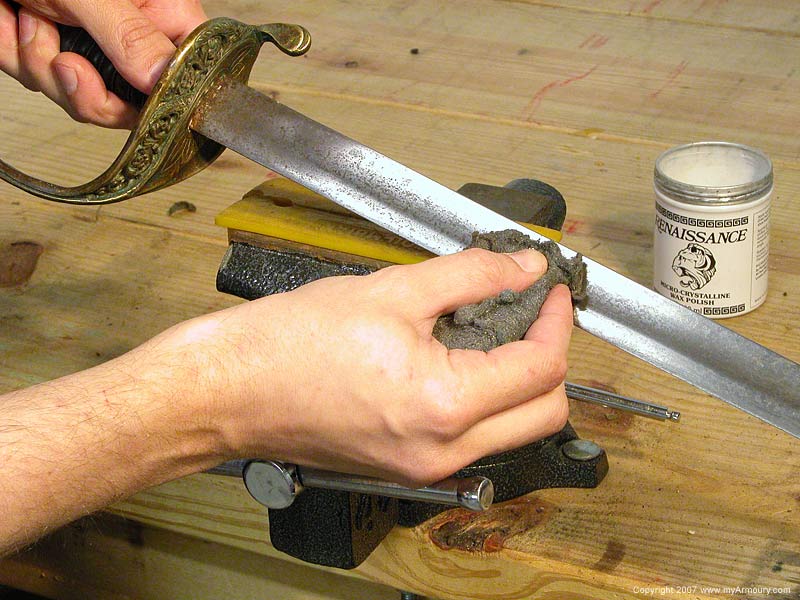
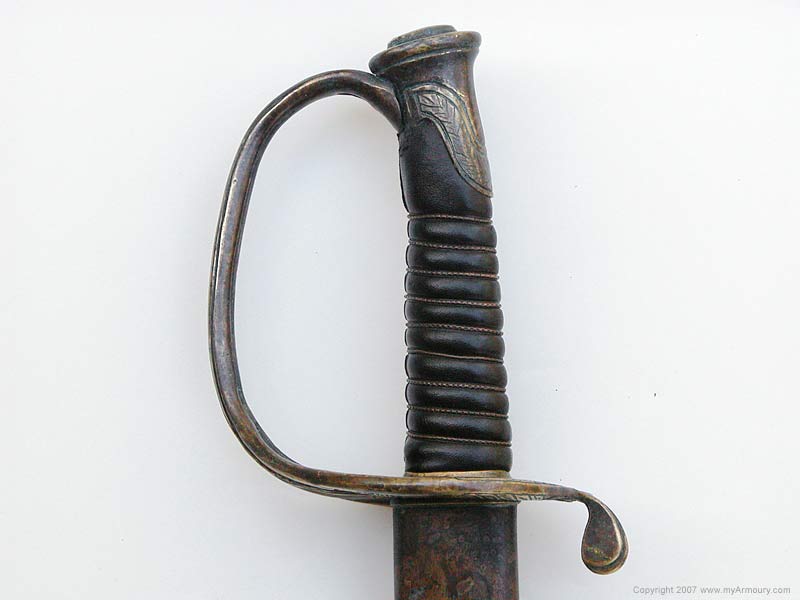
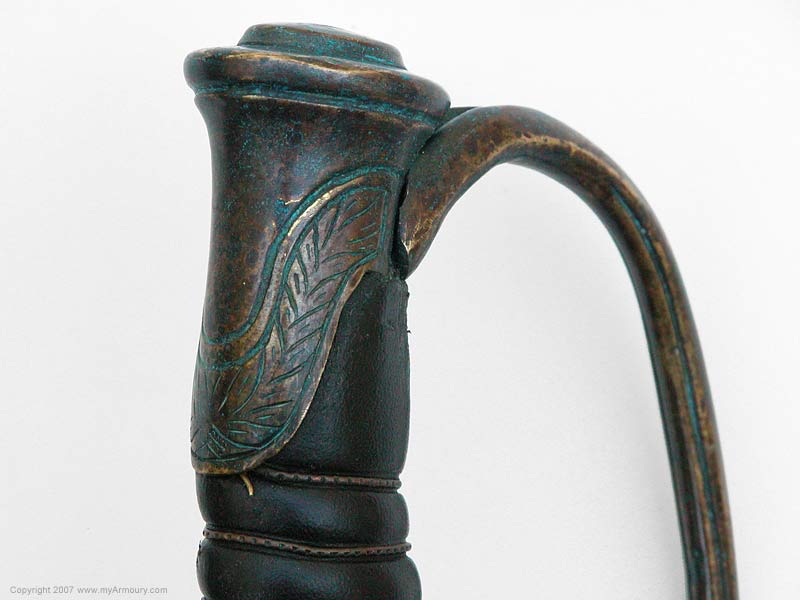
I removed as much of the haze as possible using an old toothbrush and 000 steel wool (using almost no pressure) and applied Renaissance Wax to the entire hilt. The resulting finish resembles that of the prized "untouched" brass hilts in my guide photographs. As often happens in such projects, an accident proved both instructive and aesthetically pleasing. After the first fuming, I noticed that the brass wire binding of the grip wasn't darkening. After the second fuming, I noticed that one of the wires had broken, apparently compromised by the process. I removed that wire and its twin, leaving broken bits where the wires emerge from the grip, as is often seen on such hilts. The thicker copper wire binding darkened slightly, and the grip now looks more authentic than it did with the full binding intact. Many swords of this period have intact, glossy leather wraps so I polished this grip to a high shine. The overall effect is even more convincing than I'd expected.
To begin the process of antiquing the scabbard, I removed the small screws securing its brass bands and coaxed those pieces off the steel body of the scabbard. The middle scabbard band was tightly held by some sort of adhesive, but a quick pass through a blow-torch flame loosened this enough to allow removal. Mounting my inexpensive electric drill in my bench vise, I used a brass wire brush bit to quickly remove the lacquer from the brass and give it a matte finish (the hilt was not lacquered, fortunately). After giving the brass bands a finer finish with a sanding sponge, I remounted them and abused the entire scabbard with various tools, the workshop floor, etc. to simulate typical wear. Again, I paid close attention to the damage seen on original scabbards. I also used the fine sanding sponge to wear away areas of the scabbard bluing that would be expected to suffer most from sweaty hands. When the scabbard was as damaged as desired, I again removed the brass furniture, strung it together on a length of twine, sprayed it with saltwater and suspended it inside the ammonia bucket along with the hilt. As with the hilt, two sprayings of saltwater and a few hours in the bucket produced a very dark, rich finish. After removing most of the blue-green haze from the furniture, I remounted it on the scabbard body and waxed the entire scabbard.
The photos below reveal the amazing transformation of a very inexpensive reproduction sword. Notice the quality and darkness of the patina and the way a very light polishing leaves the darkest patina in recessed areas, adding definition to the casting. Notice, too, how simple file-work removed the distracting hand-chasing on the quillon and pommel cap. The original grip wrap, minus its brass wire binding, looks great polished although it conceals a plastic grip core left as-is to help prevent accidental mischaracterization of the weapon as an antique if it ever leaves my collection.
Conclusion I tried some new techniques with this project and discovered a few tricks to make future projects much easier. Using brass wire and the ball peen hammer to plug up the gap in the pommel worked surprisingly well. The same hammer gave good service when I needed to alter the knuckle-bow terminus. This $99 sword now looks like the museum pieces that inspired the project, so I'm very happy, and my antique U.S. Model 1860 Light Cavalry Saber has a handsome companion. About the Author Sean Flynt is a public relations professional in Birmingham, Alabama. He is interested in the martial culture of all periods and people but focuses on 1450-1650, with special interest in German and Austrian arms and armour. Acknowledgements Photographer: Sean Flynt |
|